a guide to panettone

What is panettone?

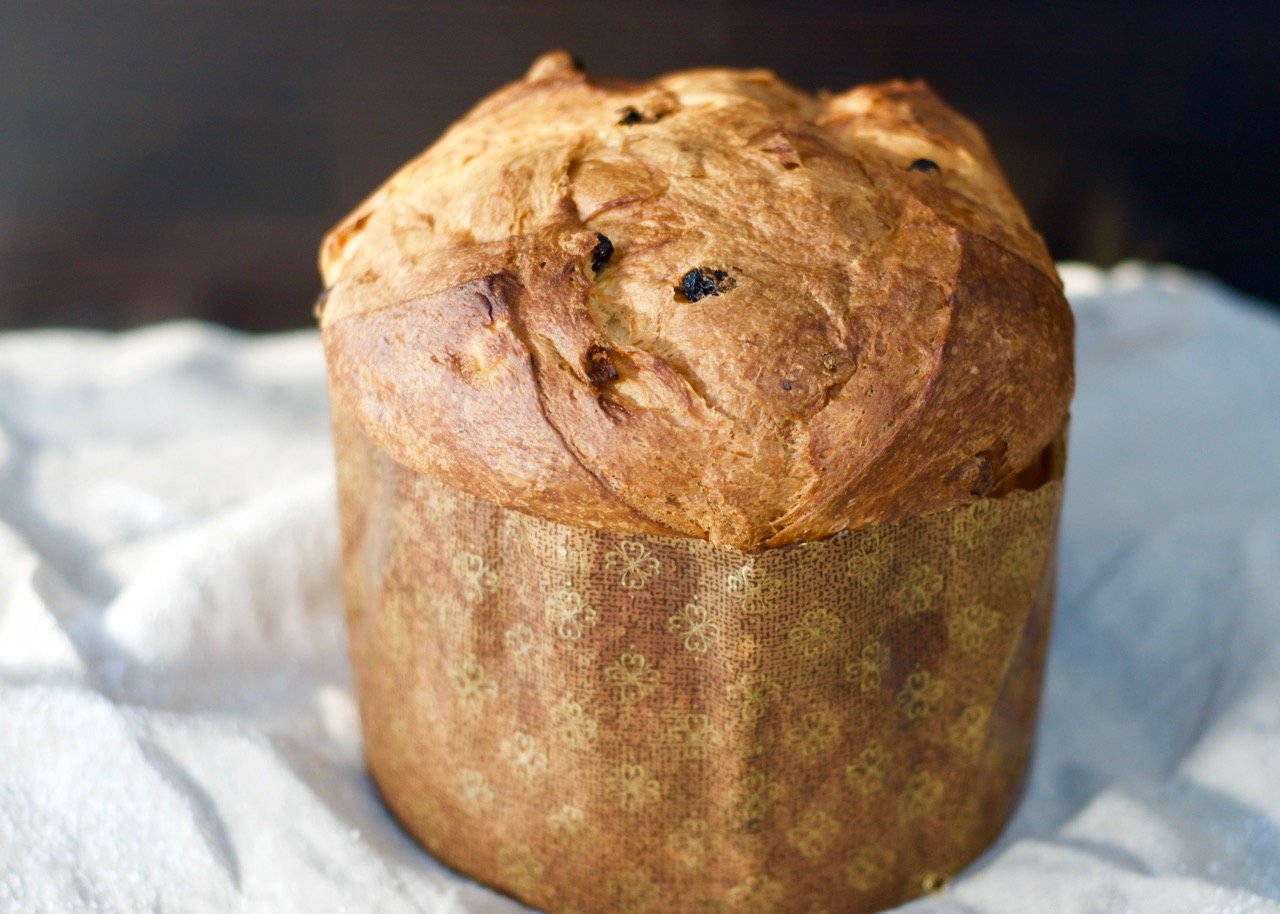
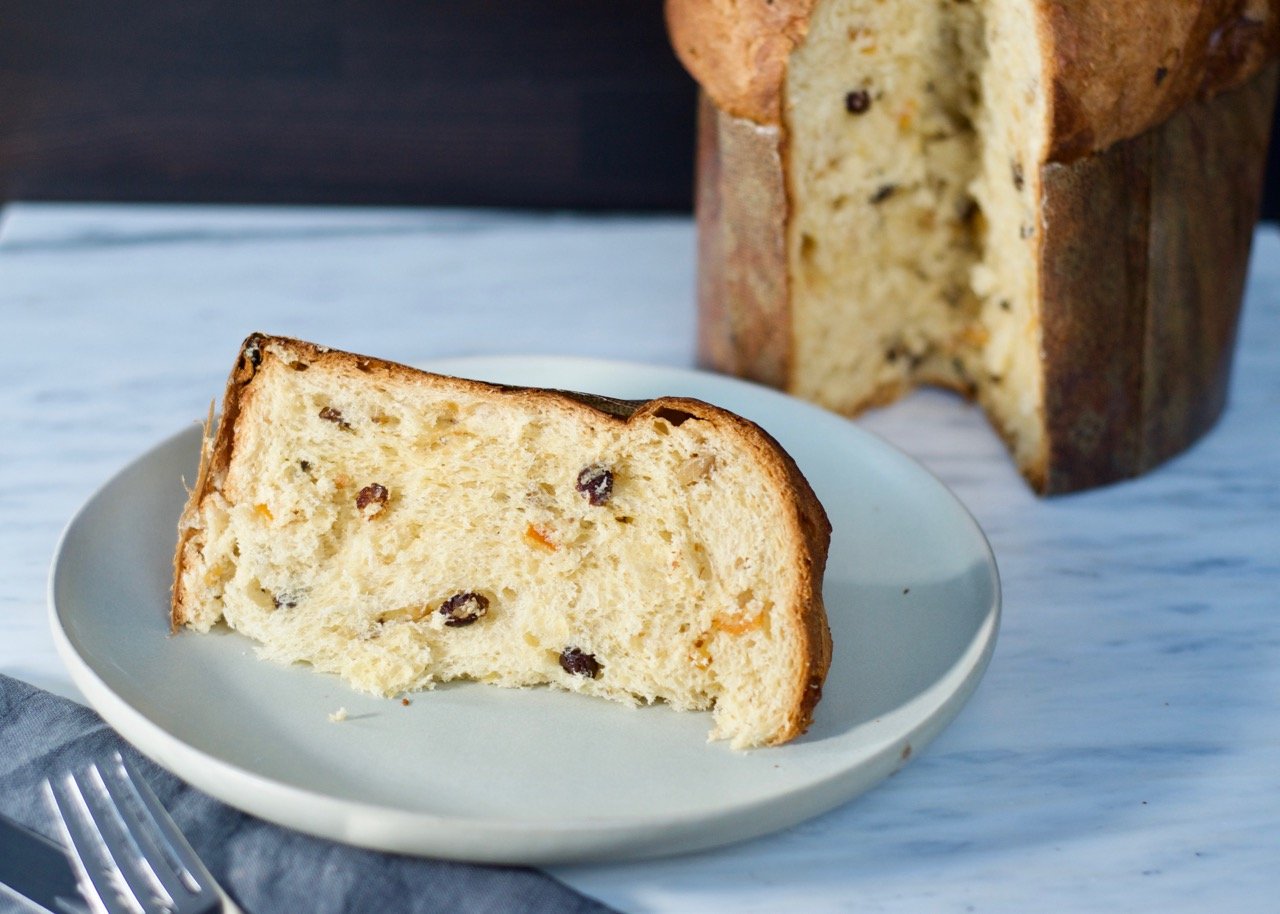
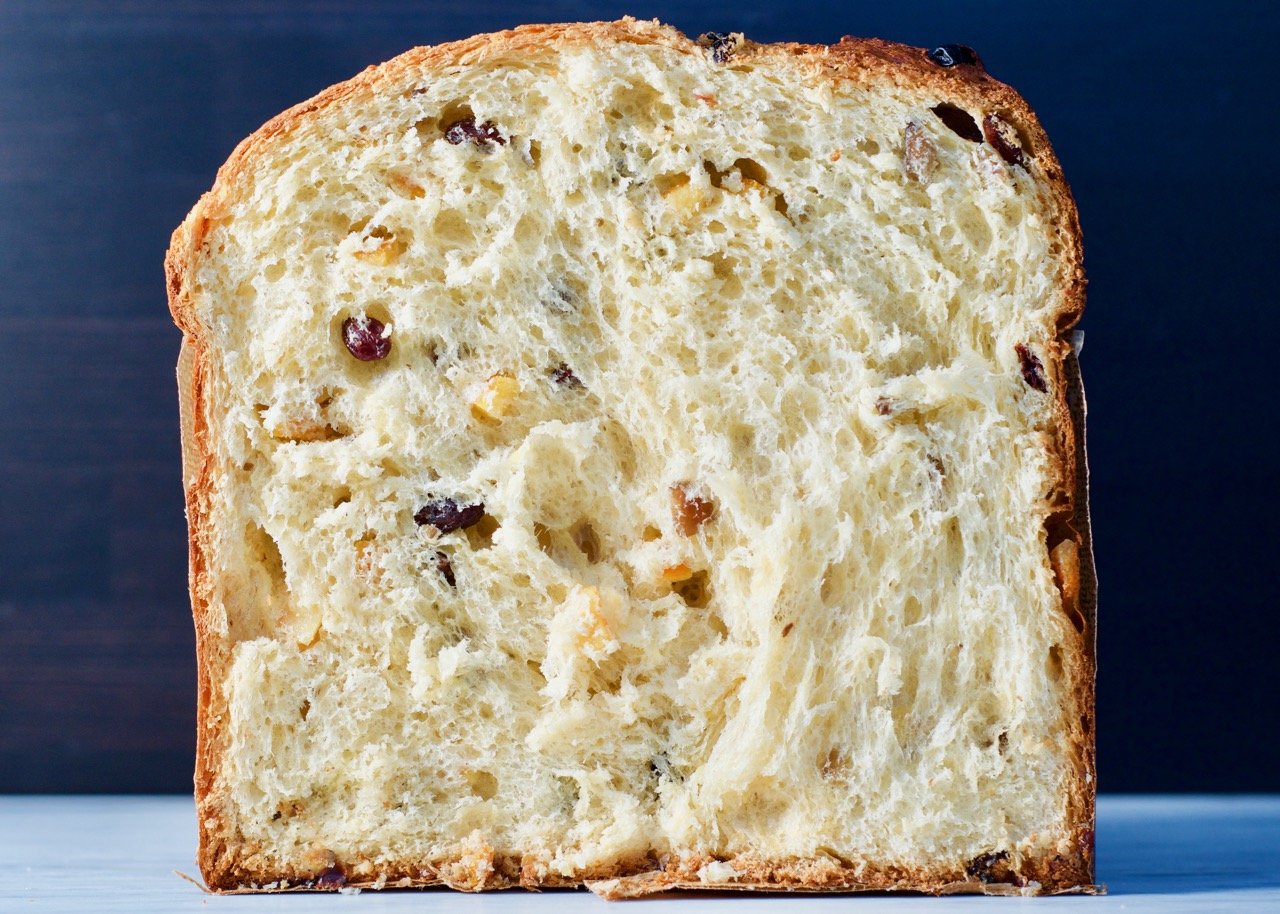
Panettone is a traditional Italian delicacy typically eaten during the holidays, somewhere between cake and bread. It’s frequently sold wrapped in colorful paper or in aluminum tin cans and stays fresh for a remarkably long time. The texture is impossibly soft and buttery and filled with everything from candied orange peels to chocolate, chestnuts or any variety of nuts. The process spans multiple days, but most of that just involves some advanced planning with plenty of rest time for the dough so don’t be intimidated by the prep time. This recipe is meant to provide a basic framework while you can customize the fillings as you prefer.

Making panettone is certainly a project and has been on my bucket list for ages. Store bought panettone is delicious and while it certainly keeps well, it’s a real treat to dig into a freshly baked loaf. Take a big whiff after you first slice into a freshly baked panettone - it smells like what the perfect holiday candle should smell like, with notes of vanilla, citrus, and butter.

Why use a sourdough starter?   

The traditional Italian approach uses a natural sourdough starter and this recipe assumes you have a starter ready to go. I won’t go through the steps for creating one here, but the following links are some great resources: (The Perfect Loaf and Full Proof Baking). I’d recommend anyone to already be familiar with the sourdough process before embarking on the panettone journey. The recipe uses a lot of high quality ingredients which aren’t cheap, so it’s not a great place to try out sourdough for the first time.

There are some recipes that use instant yeast which is quicker process, but the starter yields a far more flavorful end product which can actually help the panettone keep longer after the fact.  

Timeline & key elements of the process

The below timeline shows the overall framework for the panettone process and hopefully can allow you to better follow the recipe. Panettone calls for a stiff levain to give a well rounded flavor with minimal acidity. Some recipes require a very intensive levain feeding schedule of every 4 hours, but that isn’t a practical option for most people (and I’m certainly not inclined to wake up in the middle of the night to feed my levain) and not necessary.

There are a few necessary tools in this process:

  • Stand mixer: In some recipes, a stand mixer is a nice to have. In this one, it’s a must have.

  • Panettone molds: I purchased from amazon. Feel free to order from elsewhere, but the recipe fits into a mold 6.75” diameter.

  • Skewers: Either wooden or metal will do, just make sure the length is 2 inches longer than diameter.

  • Thermometer: Helps determine when the panettone is done baking

Days 1 to 3: Prepare a strong levain that can properly leaven and support the dough

Starting with a mature sourdough starter, it takes ~3 days to refresh the starter so that it becomes an active levain. If you already have an active starter that can rise 4-5x in volume, you can go ahead and skip this step.

Feed the starter 3x a day (9am, 2pm, 9pm) at a ratio of 1:2:1 (starter/flour/water) at 50% hydration during the day (which only has ~7 hours in between feeds). Overnight, feed at a ratio 1:4:2 to extend the rise time overnight and prevent the starter from peaking too early and falling before the morning feed time. You can keep the volumes low during feeding to reduce wasted starter, until the final feed which requires a total of 70g.

Example: Daytime feeds can use 10 g starter, 10 g water, 20 g flour. Nighttime feeds use 10 g starter, 20 g water, 40 g flour.

If after three days your starter is not strong enough to rise 4-5x in volume, I would recommend to extend this period and continue feeding until your starter is strong enough to do so.

During this time, prepare any fillings you intend to use like candied orange peels (recipe included below).

Day 4: Make first dough & bulk fermentation overnight

2pm: Prepare final feed for starter, targeting a final weight of 70g of levain.

8pm: Prepare the first dough. The bulk fermentation lasts ~12 hours overnight in a warm spot.

Day 5: Prepare second dough and add fillings. Shape, proof, and bake.

8am: Prepare the second dough, incorporating the fillings. Dividing the dough into two stages helps develop the gluten.

9am: Shape the dough into a taut ball and allow to proof in mold for up to 8-10 hours, or until dough has risen over the edge of the mold (approx. tripled in size). Insert the skewers parallel across the bottom of the mold prior to adding the dough.

5pm (depending on proofing time): Score the surface and bake panettone for 45 min or until internal temp reaches 200F. Allow to cool upside down to prevent panettone from collapsing.

Comparing recipes

I scoured the internet for all the best panettone recipes out there, and noticed some notably wide discrepancies across ratios of ingredients. My recipe is a middle ground between some reputable sources, and I’ve included the bakers’ ratios below to help you compare.


panettone

serves 10

ingredients

candied orange peel

2 navel oranges

1/2 cup sugar

1 cup water

first dough

250 g bread flour

125 g water

70 g levain

5 g barley malt syrup (optional)

50 g egg yolks (3 eggs)

65 g sugar

55 g unsalted butter, room temp

final dough

60 g bread flour

50 g egg yolks (3 eggs)

60 g sugar

4 g salt

20 g honey

70 g + 15 g unsalted butter, room temp

70 g candied orange peel

70 g raisins, soaked in rum or water

40 g chestnuts, chopped

zest of one lemon

5 g vanilla paste

steps

candied orange peel:

1. Prepare the oranges: Peel the oranges just above the pith and into 1/4 inch strips

2. Blanche the peels: In a pot of boiling water, briefly blanche the orange peels for 10 seconds then remove and rinse under cool water. If you have little pith, only once is necessary but if you have more pith, repeat 2-3 more times to reduce the bitterness.

3. Cook the orange peels: In a saucepan over medium heat, add the orange peel, sugar, and water. Bring to a simmer and cook uncovered for 10-20 minutes, until the peels turn translucent and liquid becomes syrupy.

4. Cool and dry: Transfer the strips to a rack and let them dry

5. Cut into small chunks: To use in the panettone, cut the strips into 1/2 inch chunks and set aside in an airtight container until ready to use.

first dough:

1. Make base dough: In the bowl of a stand mixer with the dough hook attachment, add the flour, water, levain and malt (if using). Mix until a cohesive dough is formed, about 10 minutes.

2. Add in egg mixture: Mix together the egg yolks and sugar. Slowly pour the mixture into the dough a little at a time as the stand mixer continues on low speed, allowing the dough to fully incorporate the egg between adds.

3. Mix in butter: Once the egg yolks and sugar have been fully incorporated, add the butter a little at a time until mixed in. This should take another 10 minutes, and the dough should be smooth and pass the window pane test.

4. Bulk fermentation: Set the dough in a large bowl, cover and rest in a warm place for 12 hours. The dough should triple so find a bowl with ample space.

final dough:

1. Mix flour in with first dough: In the bowl of a stand mixer with the dough hook attachment, add the first dough and flour and mix for 10 minutes.

2. Add in egg mixture: Mix together the egg yolks, sugar, salt, and honey. Slowly pour the mixture into the dough a little at a time as the stand mixer continues on low speed, allowing the dough to fully incorporate the egg between adds.

3. Mix in butter: Once the egg mixture has been fully incorporated, add the 70 g of butter a little at a time until mixed in. This should take another 10 minutes and you should be left with a strong and smooth dough.

4. Add in fillings: Add in the candied orange peel, raisins, chestnuts, vanilla and lemon zest. Mix on low until just combined.

5. Prepare the molds: Take two skewers at least 2 inches longer than the diameter of the mold and poke them parallel across the mold near the bottom. The skewers will allow us to invert the panettone while cooling.

6. Shape and rest: Move the dough over to a flat surface. With the help of a bench scraper, make a taut round ball by rotating the dough against the surface of the bench (similar technique shown in this video). Place dough in the prepared mold with the skewers and cover and rest in a warm area for ~8-10 hours, or until the dough has risen over the edge of the mold and tripled in size.

7. Bake the panettone: Preheat oven to 350 F. Score a shallow cross over the surface of the dough use a lame or sharp nice and place the remaining butter in the middle of the cross. Bake for 40 - 50 minutes, or until the surface is golden brown and the internal temperature registers 200 F.

8. Invert and cool: To prevent the panettone from collapsing while cooling, it is essential to cool it upside down using the skewers. You can use a pile of books to hold up the skewers on either end of the panettone like I did, or use two stock pots if tall enough. Allow to fully cool for 2-3 hours and dig in!

brown butter sage mashed potatoes

brown butter sage mashed potatoes

While mashed potatoes - and just potatoes in general - are an essential staple in life and i’ll never tire of them, it can be fun to change it up at times. This version is a simple variation topped with flavorful brown butter and crispy sage. The brown butter adds a rich toasted nuttiness that complements the creamy mashed potatoes and frying the sage mellows out the herbiness while adding a crispy texture. Similar to how scallions are used in scallion noodles where they’re cooked down in oil to unlock a fragrant version of itself while toning down the harsher notes, the same can be done for herbs like sage or rosemary too. Crisp them up in some butter or olive oil to transform the flavors and put it on everything. Go crazy.

A side benefit? This recipe uses a lot less butter than most recipes since browning the butter packs a bigger punch that you don’t need a stick of butter to get the same effect.

A few tips:

  • There are few essential tools (I mean, you could even use a fork to mash the potatoes if you need), but if you have a stand mixer the process is incredibly fast and easy.

  • This recipe uses sage, but feel free to substitute with another herb.


brown butter sage mashed potatoes

serves 4

ingredients

4 potatoes, russet or yukon gold

1/2 cup milk

4 tablespoons butter, in two halves

handful of sage leaves

salt & pepper

steps

1. Prepare the potatoes: Peel and cut potatoes in medium sized chunks and place in a medium sized pot. Cover with cold water, add a generous pinch of salt, and bring to boil. Cook for 15-20 minutes until potatoes are soft and easily pierced with a knife. Drain water.

2. Mash the potatoes: Using a stand mixer with paddle attachment or by hand, mash the potatoes until no chunks remain.

3. Heat up milk & butter: In a saucepan or in the microwave, heat up the milk and 2 tablespoons of butter until melted.

4. Mix in with potatoes: Pour the milk and butter into the potatoes and mix until incorporated. Season with salt and pepper to taste.

5. Brown butter with sage: In a saucepan over low heat, add the remaining butter with sage leaves. The sage will slowly begin to crisp up as the butter browns. This should take a few minutes. Take care to not let the pan overheat as the butter can easily burn. Lightly salt the sage.

6. Serve: Plate the mashed potatoes, and drizzle the sage with brown butter over top.


black sesame paris brest

apple tarte tatin

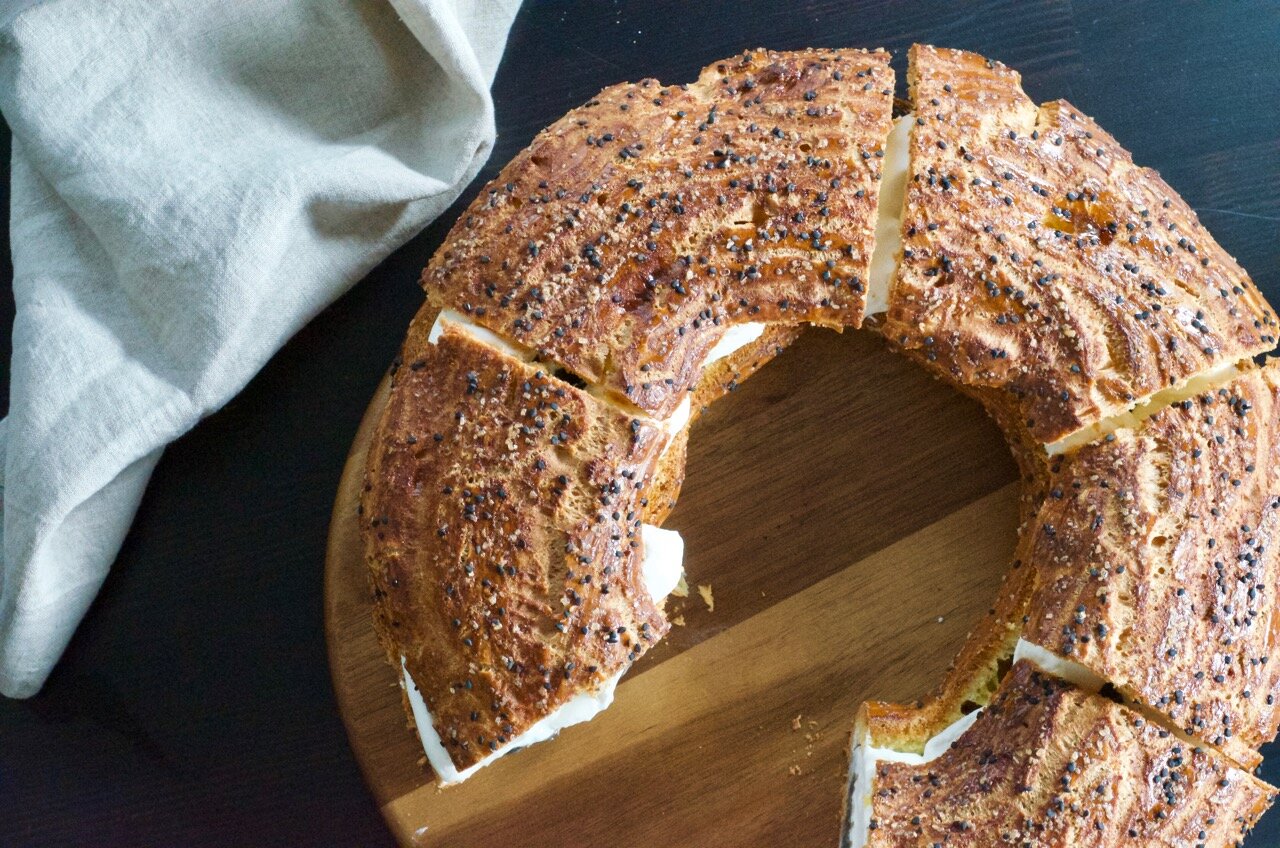
From Claire Saffitz’s new cookbook, Dessert Person, this was one of the many sensational looking desserts that immediately caught my eye. This version replaces the traditional praline cream (which as Claire notes, can be expensive and hard to find) with black sesame tahini.

What is a paris brest?

Originally created in honor of a bicycle race, the Paris Brest is a French dessert made of choux pastry and filled with cream. Instead of the typical eclair or cream puffs, this is shaped like a circular bicycle wheel. This is also a dessert that would provide competitors in a biking competition with plenty of energy so this is probably best shared with friends.

Where can I find black sesame tahini?

Whole Foods carries a black tahini and if you don’t have any near you, check your local health foods store. It’s also relatively simple to make your own, by toasting and blending black sesame seeds with some neutral oil to achieve a smooth paste. Black sesame offers a nuttier version of regular tahini with an undercurrent of bitter notes which help balance out the sweet creaminess of the pastry cream.

paris brest black sessame cream

Simplifying a dramatic dessert

This is a perfect example of an impressive dessert that can be easily broken down into manageable steps.

Choux Pastry

The choux pastry batter can be prepared and store in the fridge in an airtight container prior to baking. After baking the choux ring, let it cool at room temperature and fill it right before serving

Black Sesame Pastry Cream

Similar to the choux batter, this can also be easily made ahead of time and stored in the refrigerator.

Whipped Cream

I like to do this at the end as it only takes minutes to quickly whip up heavy cream. Keep the heavy cream chilled in the refrigerator so it’s ready to go.

IMG_2802.JPG
IMG_2804.JPG
IMG_2807.JPG

A few tips:

Choux pastry

  • If you don’t have pastry bags, use a large ziploc bag with a corner snipped off to pipe the round. It doesn’t have to be perfect because the dough will puff and expand dramatically in the oven.

  • As you cook the initial dough on the stove top, err on the side of cooking for an extra few minutes because you want to 1. cook the flour and 2. evaporate excess moisture

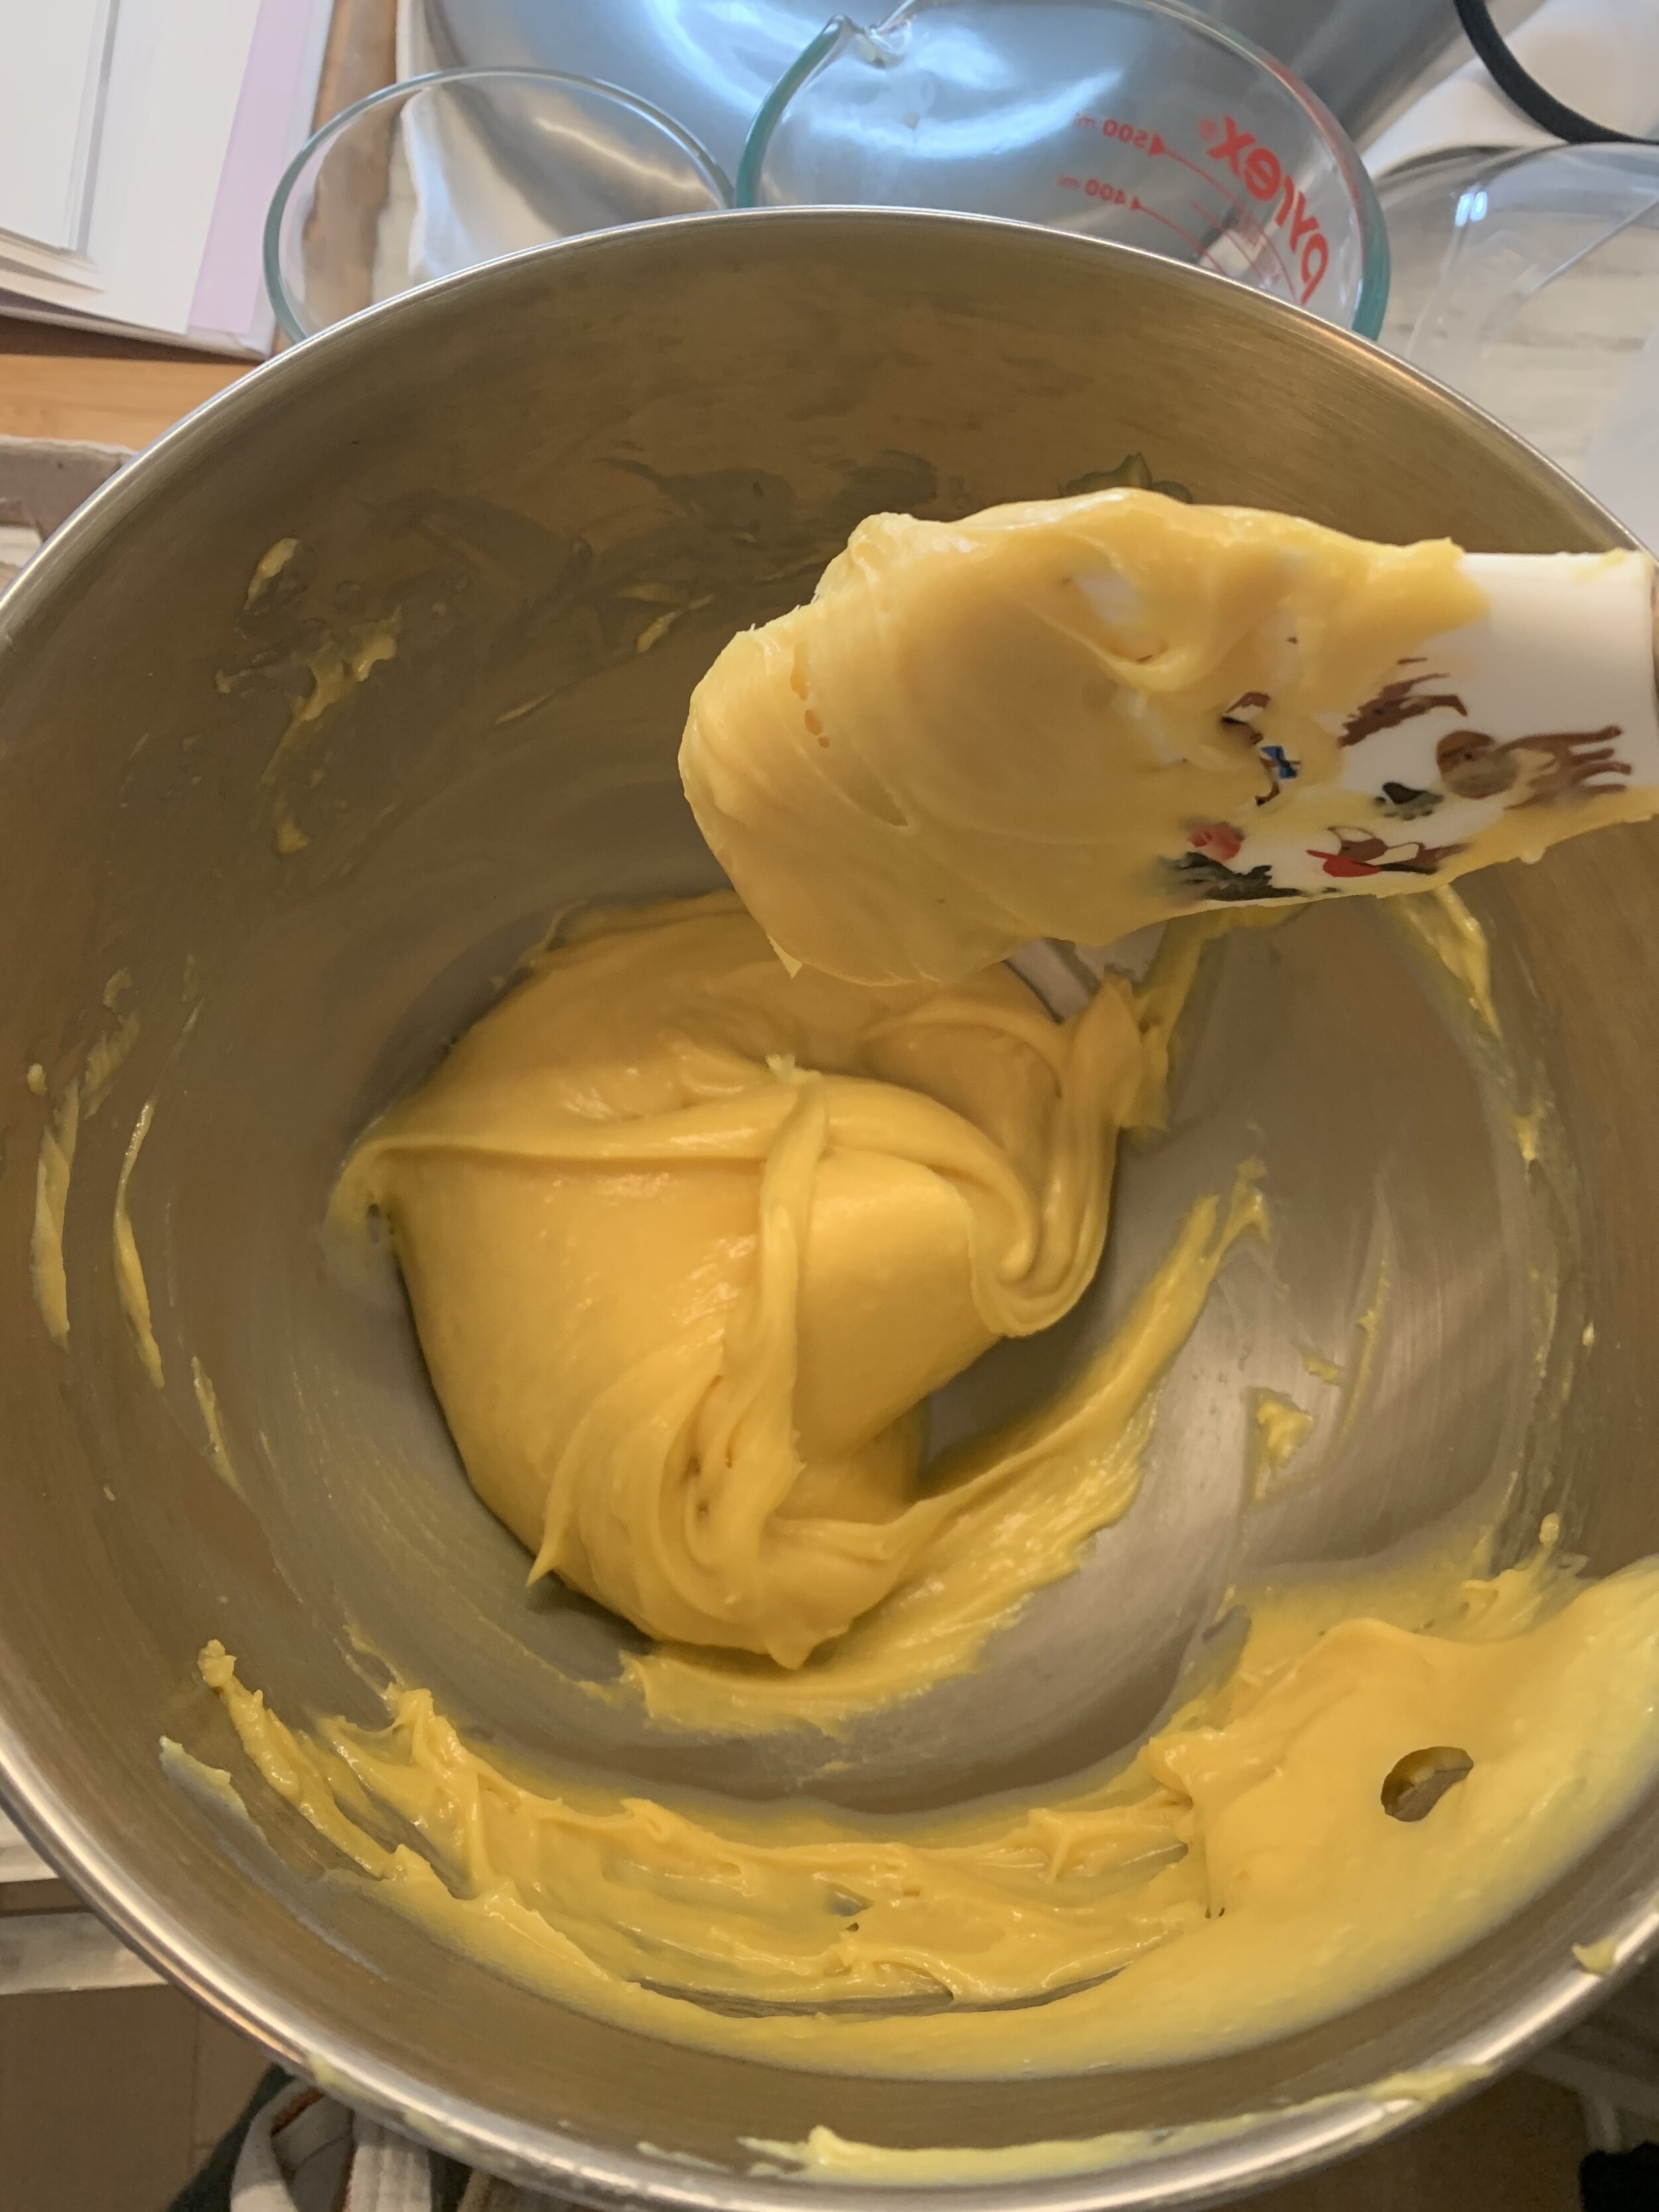
  • The exact amount of eggs to achieve the perfect consistency may vary. A few attributes of the perfect consistency: stiff enough to hold its shape when piped, but loose enough to be easily pipable and should leave a v-shaped trail from a spatula or spoon

  • No matter how tempted you may be, do not open the oven door for the first 25 minutes or you risk your choux collapsing. I’ve watched enough Great British Bake Off to witness what happens when you do that.


black sesame paris brest

from Dessert Person by Claire Saffitz

makes one 9 inch round, serves 8

ingredients

pâte à choux:

125g / 1/2 cup whole milk

13g / 1 tablespoon sugar

2g / 1/2 teaspoon salt

100g / 7 tablespoons unsalted butter

125g / 1/2 cup water

130g / 1 cup AP flour

300g / 5 eggs + 1 beaten egg

handful of black sesame seeds

demerara sugar

black sesame pastry cream:

456g / 2 cups whole milk

7g / 1 1/2 teaspoons vanilla paste

2g / 1/2 teaspoon salt

100g / 1/2 cup sugar

30g / 1/4 cup cornstarch

80g / 5 large egg yolks

85g / 6 tablespoons unsalted butter, cubed

140g / 2/3 cup black tahini

whipped cream:

312g / 1 1/3 cups heavy cream, whipped

steps

Pate à choux:

Preheat oven to 400 F.

1. Heat the milk and butter: In a small saucepan, combine the milk, sugar, salt, butter and water and bring to a simmer over medium low heat. Stir with a wooden spoon to melt the butter

2. Mix in flour: As the liquids are simmering, dump in the flour all at once. Initially stir slowly to incorporate with the liquid, and begin to stir vigorously after flour is fully mixed in until all the ingredients come together into a soft dough and a light film forms around the bottom and sides of the saucepan. Continue cooking and stirring for a few minutes as the dough forms a smooth ball.

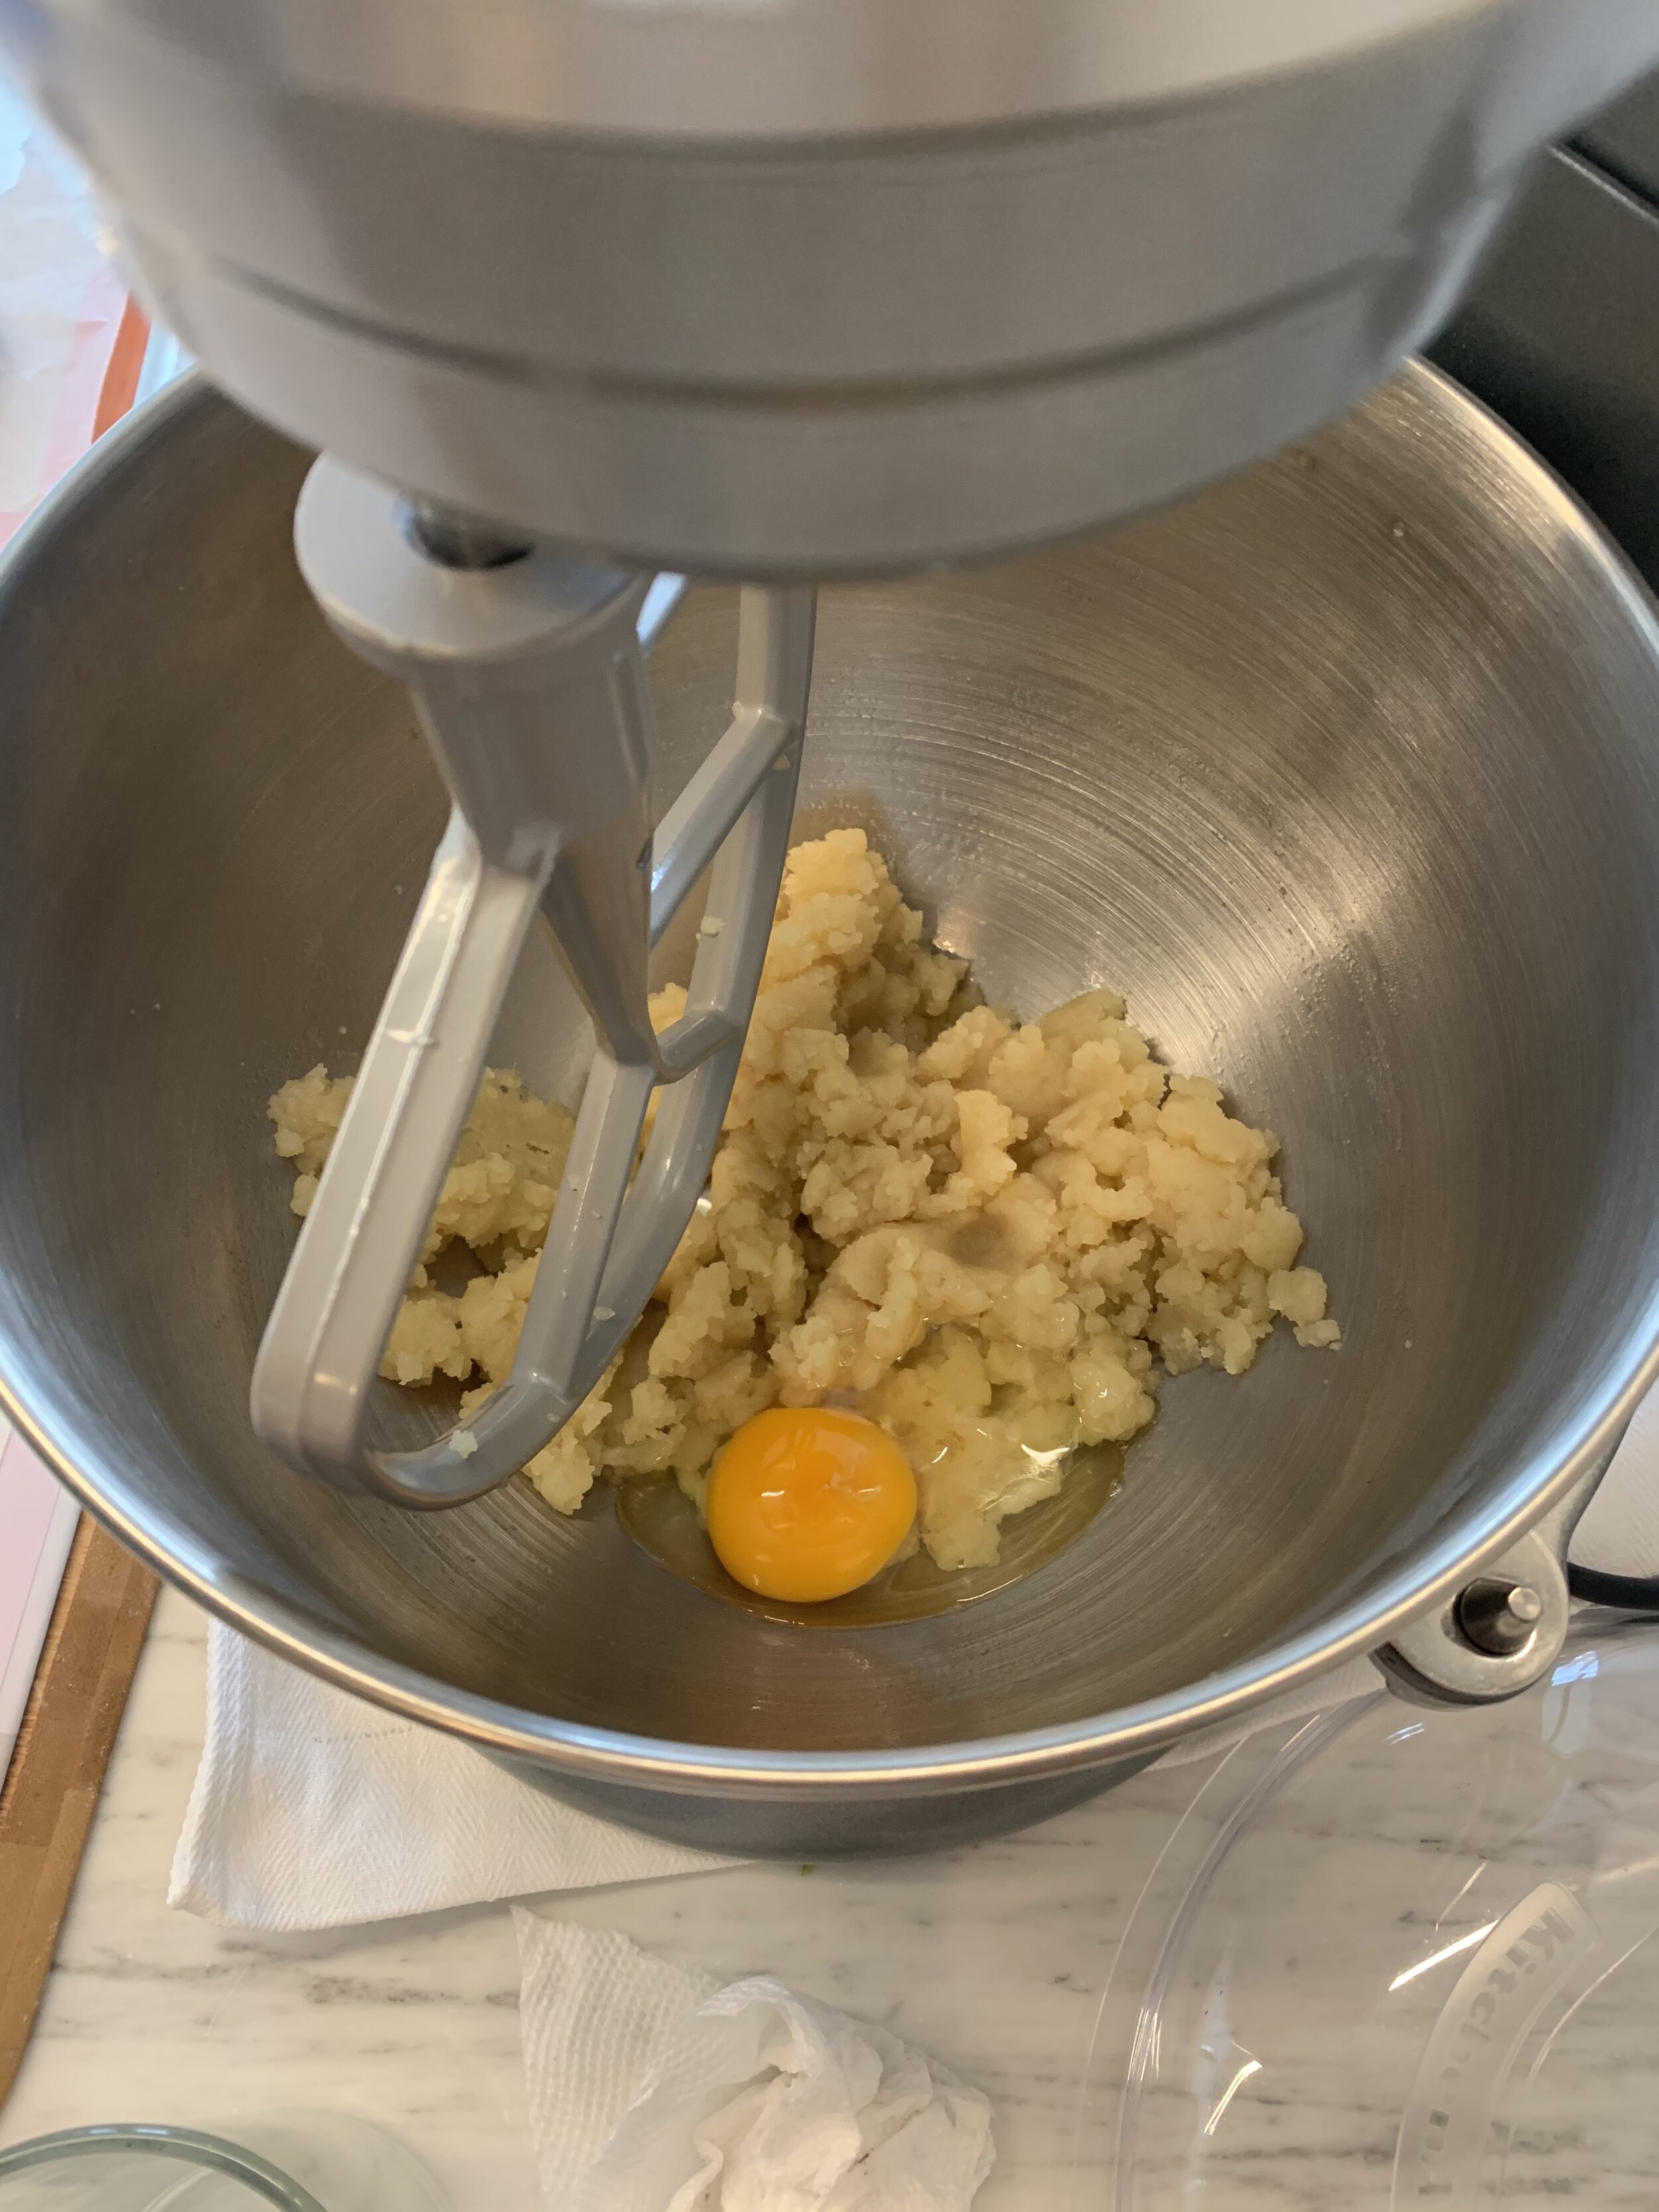
3. Beat in the eggs: Transfer the dough over to a stand mixer with the paddle attachment (or large bowl if mixing by hand) and start mixing in 5 of the eggs one at a time, beating thoroughly after each addition. The dough should start to become smooth and glossy with each egg until you reach the desired consistency where the dough is just loose enough to leave a thin v-shaped trail from the paddle. It may take fewer than 5 eggs to reach this consistency, so stop once you reach this point.

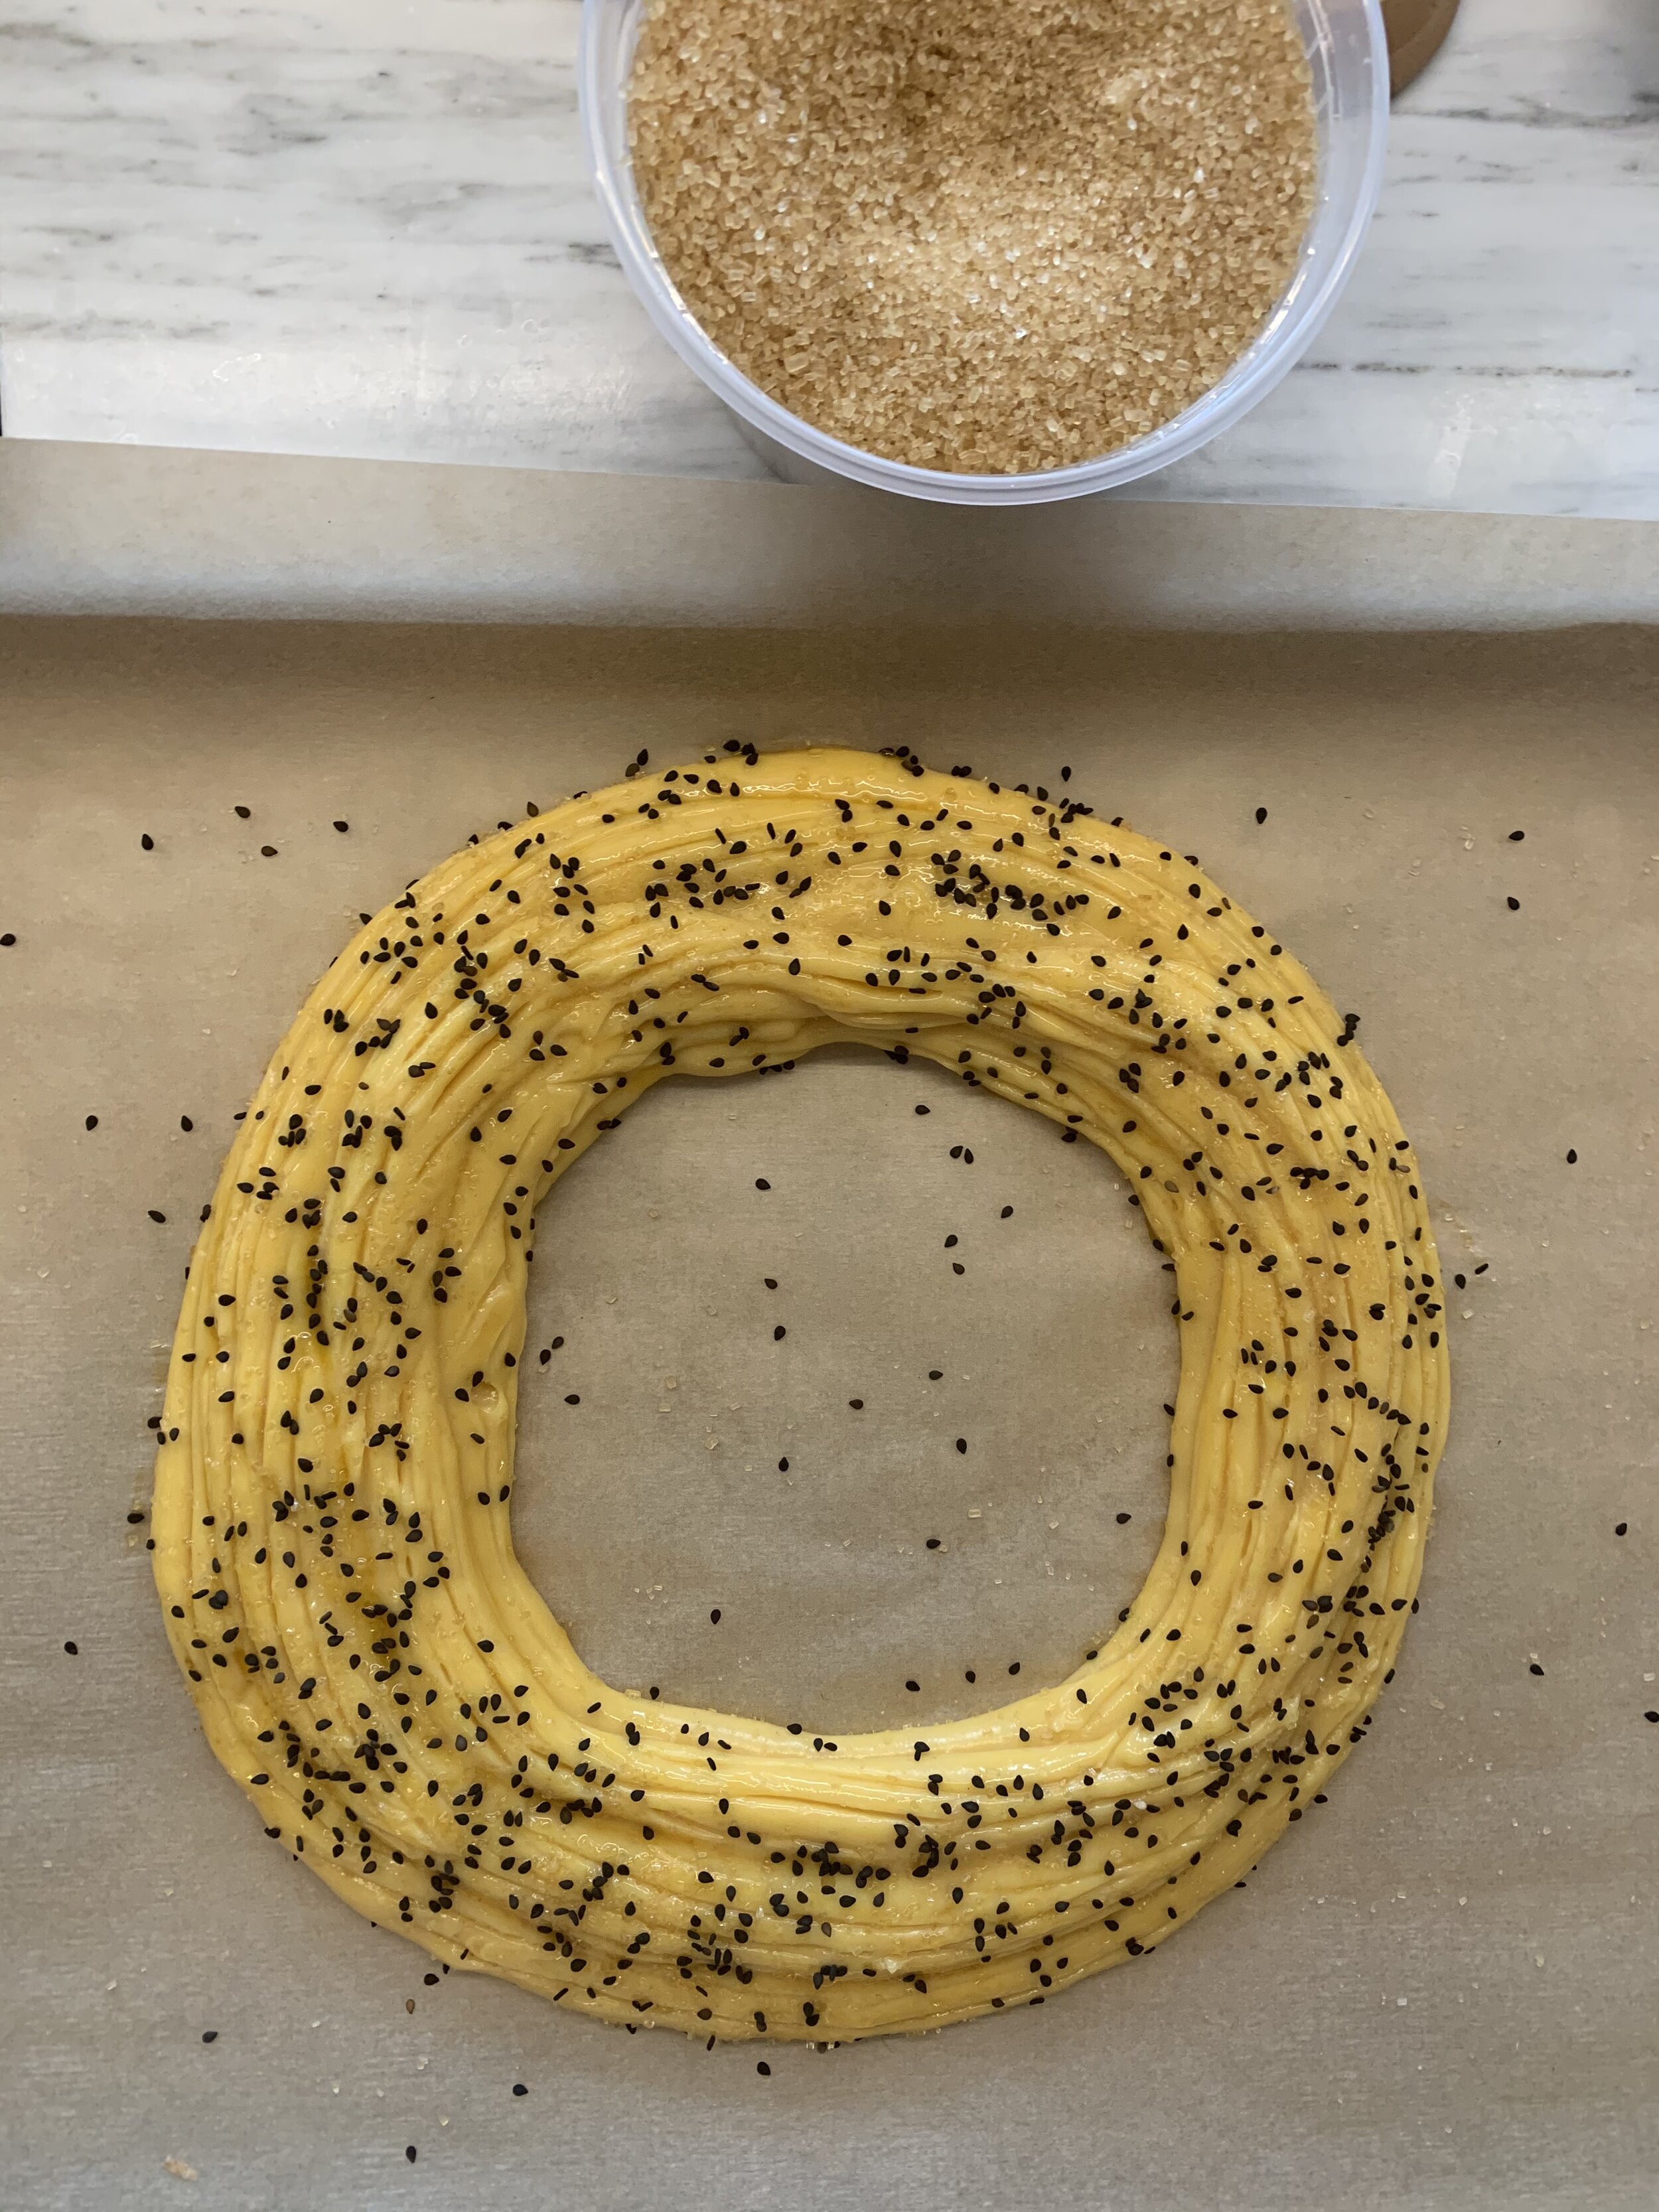
4. Pipe pâte à choux ring: Prepare a half sheet pan with parchment paper with a 9 in circle traced on the back side of the paper. Transfer the dough to a piping bag, snip a 1 inch opening at the end, and pipe the pastry along the traced circle. Continue piping a second ring adjacent and a third ring on top, each starting and ending at a different point.

5. Decorate the ring: Brush the pate a choux ring with the beaten egg and lightly score all around the ring using a fork. Generously sprinkle with black sesame seeds and demerara sugar.

6. Bake the pastry: Bake for 10 minutes at 400 F, before reducing oven temperature to 350F until pastry is puffed and golden brown, for about 45 -55 minutes. Make sure the pastry is thoroughly baked to avoid risk of collapsing. Remove from oven and poke several holes around the side of the pastry to release steam and return to the turned off oven with the door propped open for 10 minutes to help dry the dough out.


Black sesame pastry cream:

1. Heat up the milk: In a heavy bottomed saucepan over medium heat, combine the milk, vanilla, and salt and let mixture slowly come to a simmer, whisking continuously.

2. Mix eggs: As the milk is heating up, vigorously whisk together the egg yolks, sugar, and cornstarch until mixture is very pale, light in texture and thick. Slowly stream half of the hot milk into the egg mixture, tempering the eggs. Mix the egg mixture back in the saucepan with the remaining warm milk, whisking constantly

3. Cook cream: Continuing whisking the milk/egg mixture over medium heat until cream thickens like pastry and coats the back of a spoon (around 3 minutes) and the whisk leaves tracks.

4. Strain cream: Strain the scream through a mesh sieve to remove any solids. Whisk in the cold butter one piece at a time until smooth before stirring in the black tahini until well mixed.

5. Chill: Press a sheet of plastic wrap directly on the surface and refrigerate until cold for a few hours.

Assembling:

1. Prepare the choux ring: Once the pâte à choux is completely cool, use a serrated knife to slice the pastry horizontally to separate the narrow ring of pastry from the wider base below. Carefully remove the upper ring and cut into eighths (to help easily cut the pastry after it is filled). Scoop out and discard some of the doughy innards from the ring base.

2. Fill the pastry: Pipe dollops of the pastry cream into the base, followed by large dollops of the whipped cream on top. You can use either a pastry bag or a large spoon. Gently arrange the pieces of the pastry ring on top of the cream. Serve immediately.


key lime and passion fruit tart

apple tarte tatin

As the summer produce season begins to wrap up, green markets and grocery stores are flooded with the likes of tomatoes, corn, and peaches. However, there are some other delightful finds during this time that tend to fly under the radar that are a real treat, like key limes. While those in Florida may easily find an abundance of key limes, I rarely get my hands on some in New York so it’s always a treat to find some.

Key lime and passion fruit is a match made in heaven

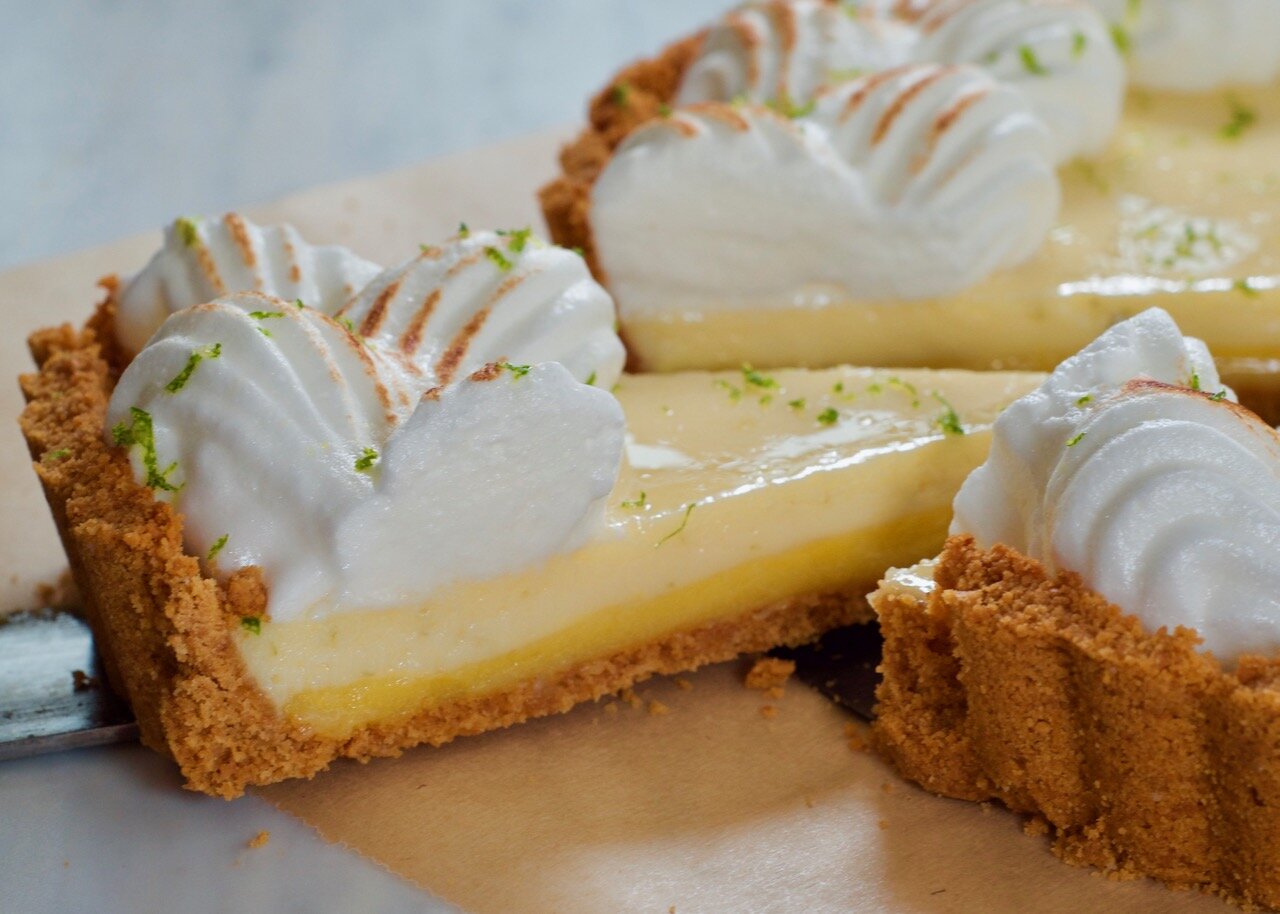
Passion fruits have an incredibly tart and fragrant flavor and shine in any dessert. The passion fruit curd complements the creamy key lime custard and cuts through the sweetness. The layers create an eye catching gradient from the dark golden crust toward the airy meringue, which also helps counterbalance the creaminess of the key lime filling and passion fruit curd. Always make sure to finish it off with a fresh dusting of lime zest

A few tips:

  • If you can’t find key limes, use regular limes. It can be such a pain to squeeze those tiny little limes, but don’t use the bottled lime juice

  • Instead of graham cracker crumbs, use whichever biscuits or crackers suit your fancy.

  • An easy alternative to buying actual passion fruit is frozen passion fruit puree. It’s cheap and can be found in many grocery stores.


key lime & passion fruit tart

makes one 11 inch tart

ingredients

graham cracker crust:

210 g / 1 3/4 cup graham cracker crumbs

2 g / 1/2 teaspoon salt

85 g / 6 tablespoons unsalted butter, melted

for the passion fruit curd:

3 passion fruits or 80 g / 1/3 cup passion fruit purée

60 g / 1/4 cup lemon juice

100 g / 1/2 cup sugar

4 egg yolks + 1 whole egg

56 g / 4 tablespoons unsalted butter

for the key lime filling:

160 g / 2/3 cup lime juice (approx. one bag of key limes)

43 g / 2 egg yolks

397 g / 1 can sweetened condensed milk

5 g / 2 teaspoons lime zest

for the meringue (optional):

110 g / 3 egg whites, room temp

150 g / 3/4 cup sugar

60 g / 1/4 cup water

15 g / 1 teaspoon lemon juice

steps

graham cracker crust:

Preheat oven to 350 F.

1. Prepare crumb mixture: Mix the crumbs, salt, and butter until evenly incorporated. The mixture should resemble wet sand.

2. Pack it into the pan: With the help of a measuring cup (or any flat bottomed surface), pack the crumbs into the tart pan starting from the middle and moving out towards the edges.

3. Parbake: Bake for 10 - 13 minutes until crust hardens and starts to brown around the edges. Let cool.

passion fruit curd:

1. Prepare passion fruits: If using whole passion fruits, sieve out the pulp and juice and discard seeds. If using the frozen purèe, defrost and proceed.

2. Mix it together: Whisk together the passion fruit, lemon juice, sugar, and eggs. Save the whites for the meringue.

3. Heat up gently: Pour egg and passion fruit mixture into a heavy bottomed saucepan over low-medium heat. Cook the curd continuously whisking until it begins to thicken and the whisk leaves tracks. Be careful of overheating it as the mixture can curdle - if you’re uncertain, you can use the double broiler method with the egg mixture in a bowl over hot water.

4. Whisk in butter: Once the curd thickens, whisk in the butter until mixed in.

5. Chill: Pour the lemon curd into the prepared crust and smooth it out with an offset spatula. Gently lay a sheet of plastic wrap over the surface to prevent a skin from forming and let it set in the fridge for at least 2 hours.

key lime filling:

1. Whisk egg yolks: Either by hand using a whisk or an electric mixer, thoroughly whisk the egg yolks until it thickens and becomes a pale yellow.

2. Mix everything else in: Mix in the lime juice, condensed milk, and lime zest with the egg yolks.

Preheat oven to 350 F

3. Pour into tart: Remove the plastic from the surface of the passion fruit curd in the tart. Pour the key lime filling over top and bake for 10 minutes until just set. Let cool before serving or piping meringue over top.

meringue:

1. Preparing sugar syrup: In a saucepan over medium heat, bring the sugar and water to temperature of 235 F. When the syrup reaches 210 F, start whisking the meringue.

2. Whisking egg whites: In a separate clean bowl, start whisking the egg whites with the lemon juice until soft peaks form. At this stage, the sugar should reach the right temperature. Slowly pour in the syrup with the mixer still running on slow, and bring the mixer back up to a high speed to continue beating until you reach stiff peaks.

3. Pipe the meringue: Use your favorite piping tip (I used a large star tip) to pipe patterns over the tart or just pile it high.

4. Finish off with zest: Finish with some lime zest

two little red hens' brooklyn blackout cake

apple tarte tatin

Two Little Red Hens is a beloved bakery on the Upper East Side in NYC and they’re well known for pies and cheesecakes amongst many other delicious baked goods but in particular, their brooklyn blackout cake is superb. It is a rich and decadent explosion of chocolate and not for the faint of heart. While the cake itself is light, once sandwiched between layers of pudding each bite is velvety smooth. Did I maybe consider proximity to Two Little Red Hens a factor when looking for an apartment? Perhaps.

I would encourage everyone to make it a pit stop when visiting NYC (over some other well known bakeries, like Magnolia) but I hate to be the bearer of bad news. Unfortunately, Two Little Red Hens has been closed for renovations for the past year and are now looking for a new location (hopefully still in this neighborhood) with no estimated date for reopening. This has clearly been a very challenging time for people in this neighborhood.

Finally, I decided to take matters into my own hands and I present to you my version of the Two Little Red Hens brooklyn blackout cake.

brooklyn blackout cake

What is brooklyn blackout cake?

Think chocolate on chocolate on chocolate with a side of chocolate. We’ve got 4 layers of chocolate cake filled with chocolate pudding and covered in a chocolate fudge frosting. Then throw on some nice chocolate crunchies and there you go. If you like, no, love chocolate then this is the cake for you.

This is a cake where the quality of the ingredients really shines. Invest in the high quality cocoa powder and chocolate (I prefer Valrhona) because you will use these in every element of the cake. If you have more of a sweet tooth, feel free to use a lower percentage chocolate - I prefer 60% bittersweet - or bump up the sugar a bit to your taste. I wanted more of the bittersweet qualities of the chocolate to shine through as this is a cake that can easily get weighed down by all its components.

IMG_2992.JPG
IMG_2996.JPG
IMG_3004.JPG

A few tips:

  • It is very important to make sure the cakes are properly cooled before slicing and frosting.

  • Build the cake on a cake board which helps you move the cake and keep your layers neat and organized. It is cheap to order a pack from Amazon or any cake supply shop.

  • Each of the components can be easily made ahead of time and stored in the fridge until you’re ready to build the cake.

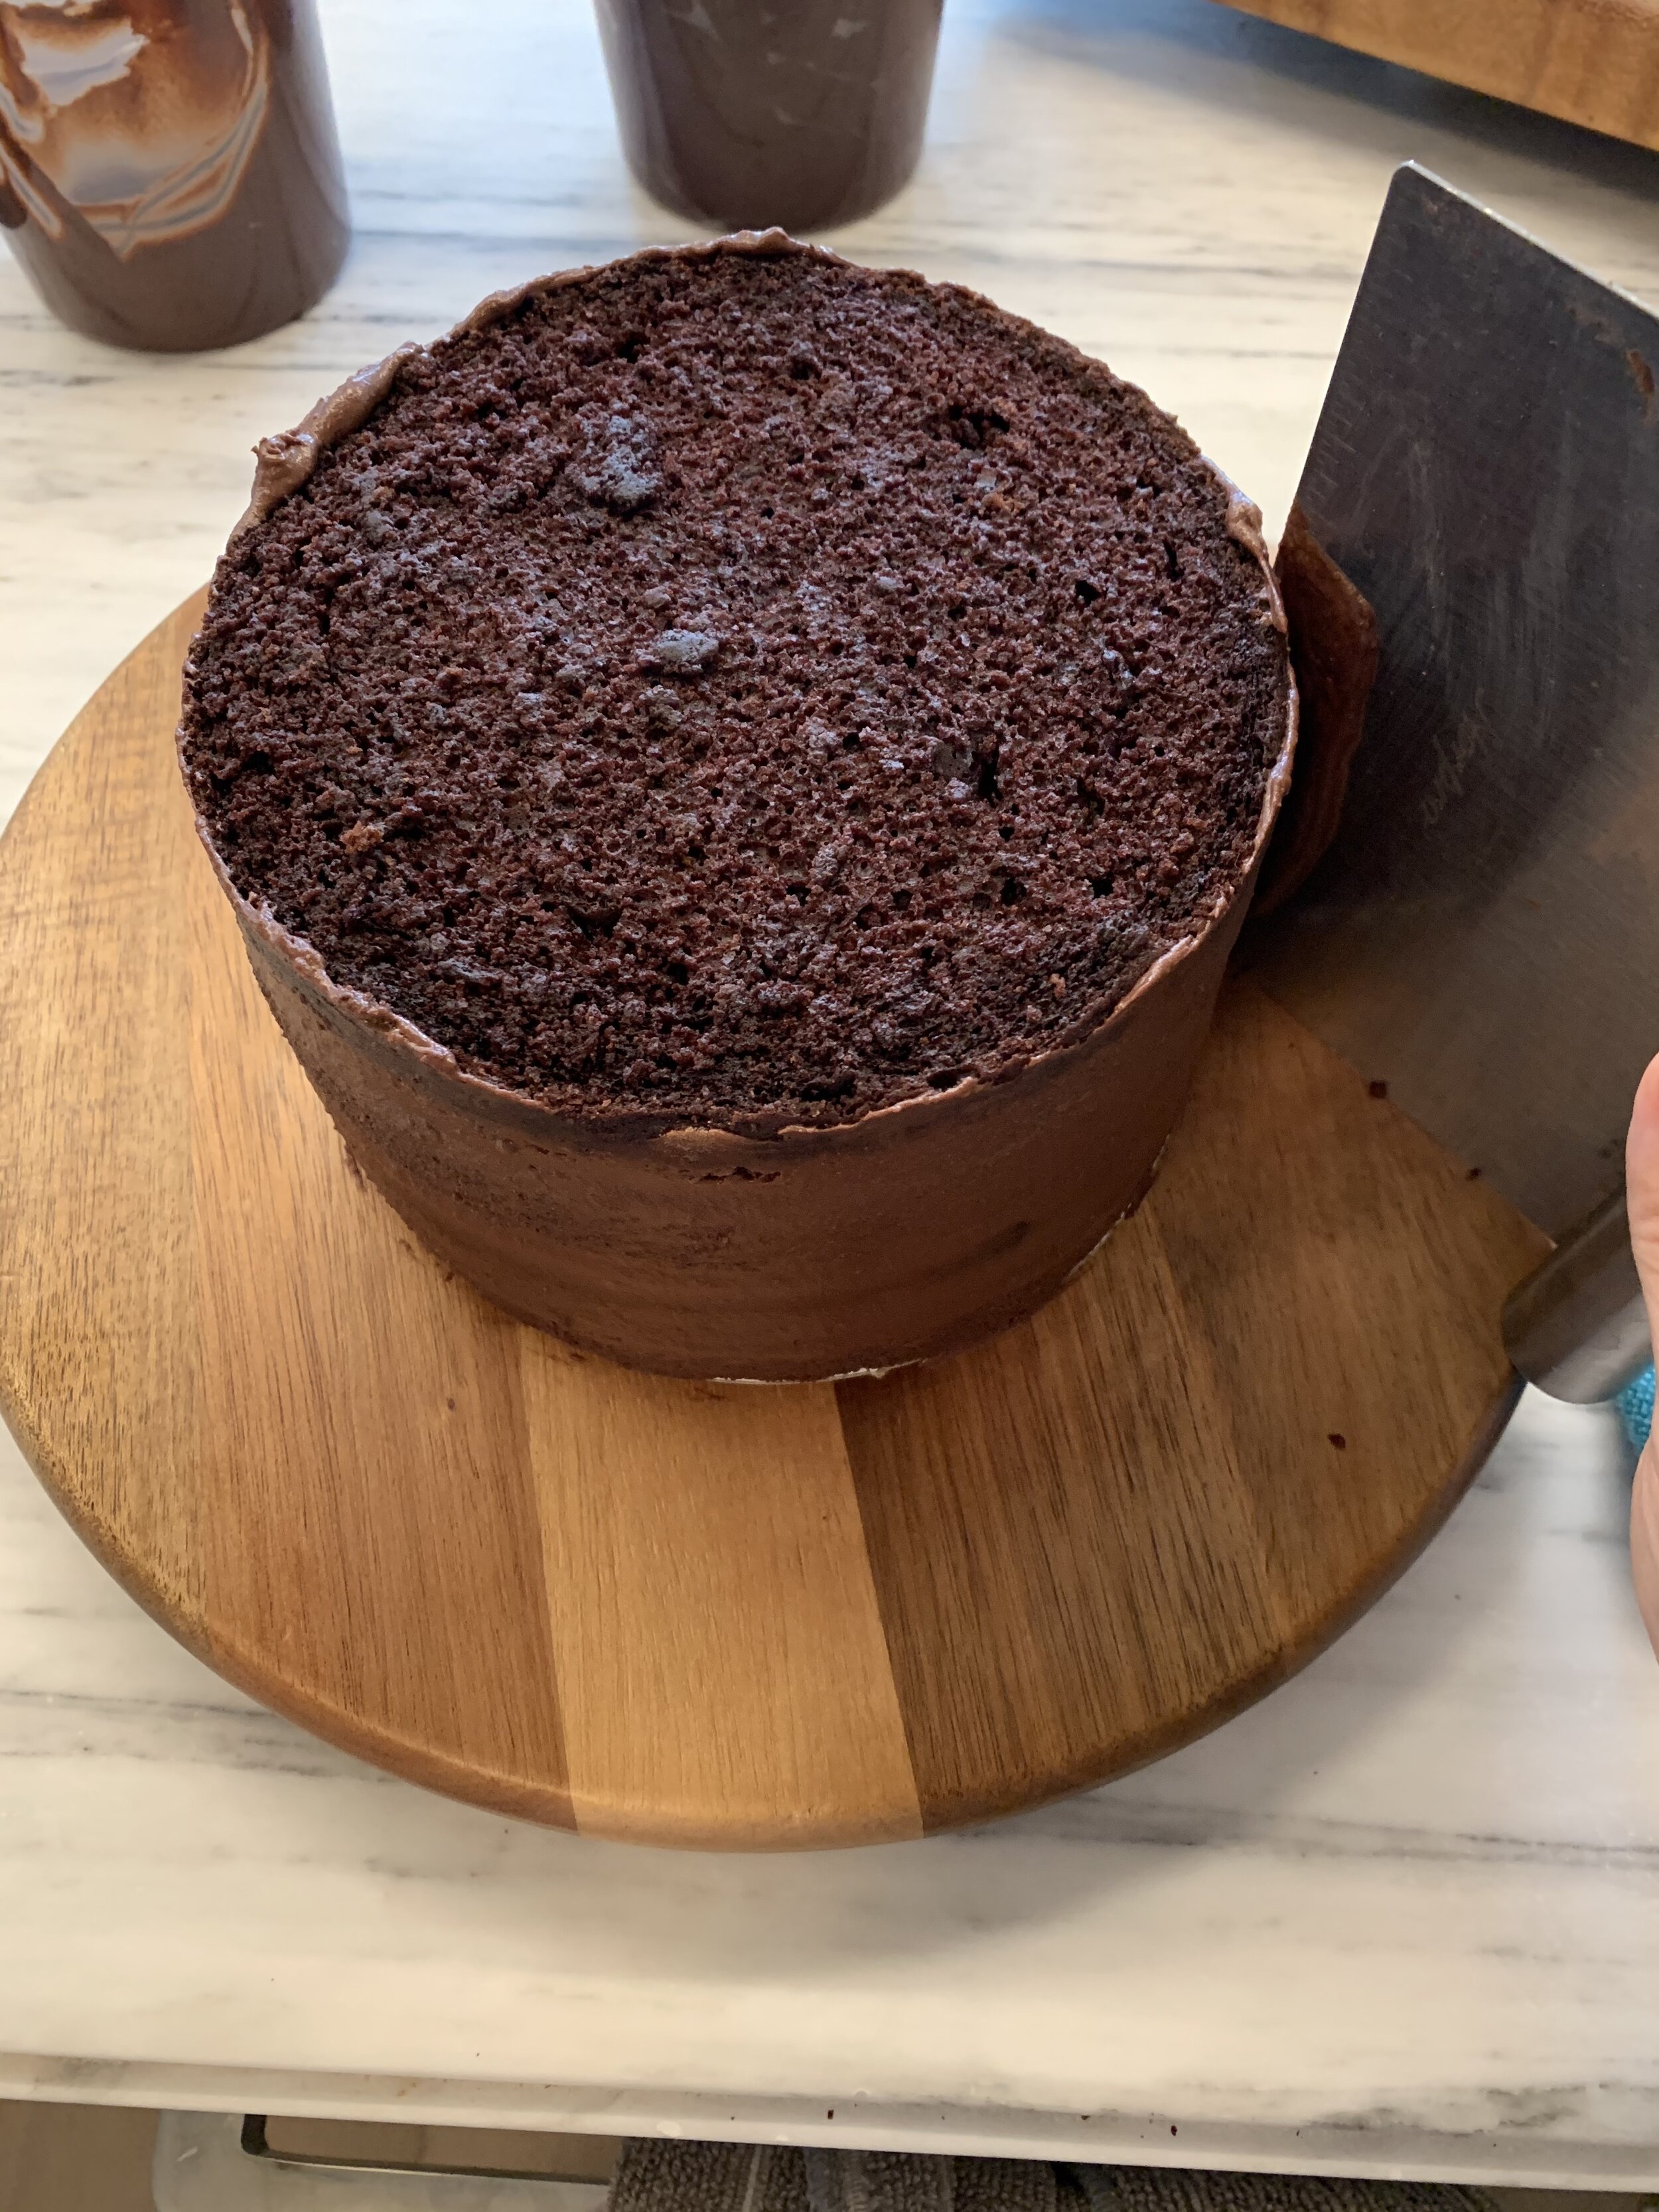
  • The tools you need to create a neatly iced cake are an offset spatula and bench scraper. Use the offset spatula to spread the icing onto the cake and the bench scraper to create the clean edges. To create the patterned look on top, use a serrated knife to lightly scrape the frosting.

  • When frosting, starting with a crumb coat is necessary to create a clean finished look and prevents any cake crumbs from mixing in with your final frosting. To make the final frosting even easier, stick the cake into the fridge for 20 min after applying the crumb coat to firm it up a little bit.


two little red hens’ brooklyn blackout cake

makes one 6 inch cake

ingredients

for the chocolate cake:

2 cups AP flour

1/2 cup high quality cocoa powder (Valrhona)

1 cup sugar

1 teaspoon salt

2 teaspoons baking soda

1 teaspoon baking powder

2 eggs

1/2 cup vegetable oil

1/4 cup sour cream

3/4 cup buttermilk

1/2 cup hot water

1 shot espresso (optional)

1/2 teaspoon vanilla paste (optional)

for the chocolate pudding:

2 + 1/2 cups of whole milk

1/2 cup sugar

1 teaspoon salt

2 tablespoons cornstarch

3 tablespoons cocoa powder (Valrhona)

1 egg + 2 egg yolks

5 ounces bittersweet chocolate (60%), chopped

2 tablespoons unsalted butter

1/2 teaspoon vanilla paste (optional)

for the fudge frosting:

1 stick (1/2 cup) unsalted butter, room temp

3/4 cup powdered sugar

1/4 cup cocoa powder

3/4 cup heavy cream

5 ounces bittersweet chocolate (60%), chopped

for the chocolate crumble:

1/3 cup AP flour

2 teaspoons cornstarch

1/4 cup sugar

1/3 cup cocoa powder (Valrhona)

4 tablespoons melted butter

steps

chocolate cake:

Preheat oven to 350 F.

1. Prepare the 6 inch cake pans: Wipe the inside of your cake pans with butter and dust with some flour. Cut a sheet of circular parchment paper to line the bottom of your pan to ensure that your cakes will have no problem coming out.

2. Mix dry ingredients: Sift together the flour, cocoa powder, sugar, salt, baking soda, and baking powder in large bowl. Set aside.

3. Combine wet ingredients: Mix together the eggs, vegetable oil, buttermilk, sour cream, espresso and vanilla paste (if using). You won’t be able to explicitly taste the espresso and vanilla but it helps deepen the chocolate flavor.

4. Mixing everything together: Using the paddle attachment of a stand mixer, mix together the dry ingredients with the wet. As the mixture begins to come together, pour in the hot water. Mix until just combined - you will have a thin batter - and pour evenly between your two prepared cake pans.

5. Bake: Bake in the preheated oven for ~25 minutes, or until the cake is springy to the touch and an inserted toothpick in the center comes out clean.

6. Trim the cake tops: Once cake is completely cool, remove from pan and using a serrated knife, cut off the domed top of the cakes until flat. Wrap in plastic and store in refrigerator until ready to frost.

chocolate pudding:

1. Make a cornstarch slurry: In a small bowl, mix together 1/2 cup milk, cornstarch and cocoa powder until no lumps remain.

2. Heat up milk: In a saucepan, bring the rest of the milk, sugar, and salt to a boil. Stir to make sure the sugar gets dissolved evenly. Mix in the cornstarch mixture whisking constantly until the mixture thickens to coat the back of a spoon.

3. Mix in eggs: In a heatproof bowl, whisk the eggs together. Gradually whisk in half of the hot milk mixture until evenly mixed and pour everything back into the saucepan. Continue cooking over moderate heat, continuing to whisk, until mixture comes to a boil.

4. Finish with chocolate and butter: Mix in the chocolate, butter, and vanilla (if using) and whisk until everything is melted and fully incorporated. Transfer pudding into a container with plastic wrap directly pressed against the surface and refrigerate for ~2 hours.

fudge frosting:

1. Cream butter: In a stand mixer with paddle attachment, cream the butter until smooth at medium speed. Adjust to low speed and mix in the powdered sugar and cocoa powder until evenly mixed.

2. Mix in chocolate: Heat up the heavy cream in a saucepan until simmering and pour over the chocolate. Leave for 30 seconds, and mix until all the chocolate and heavy cream are evenly mixed into a chocolate ganache. Pour the chocolate into the buttercream and mix on medium speed until evenly incorporated. Refrigerate for 30 min to let the frosting firm up.

chocolate crumble:

Preheat oven to 300 F

1. Mix dry ingredients: In a stand mixer with paddle attachment, add the flour, cornstarch, sugar, and cocoa powder and mix together on low speed.

2. Add butter: Add in the butter and continue mixing to evenly mix with the dry ingredients until the mixture starts to clump together.

3. Bake: Spread onto a baking sheet and bake for 20 minutes. The crumbs will still be somewhat soft and will harden as they cool.

putting it all together:

preparing the cake: once the cake is fully cool, use a serrated knife to slice off the domed tops of the cakes and slice each cake in half through the middle horizontally to get 4 even layers of cake.

the rest of the cake should be compiled as follows. You should have the pudding, fudge, and chocolate crumble ready at hand along with an offset spatula and bench scraper.

  1. Prepare a cardboard cake round on a spinning turntable. Add the first layer of cake followed by a layer of pudding using an offset spatula. Continue alternating between cake and pudding until you add your final layer of cake. Use the leftover pudding to apply a thin crumb coat.

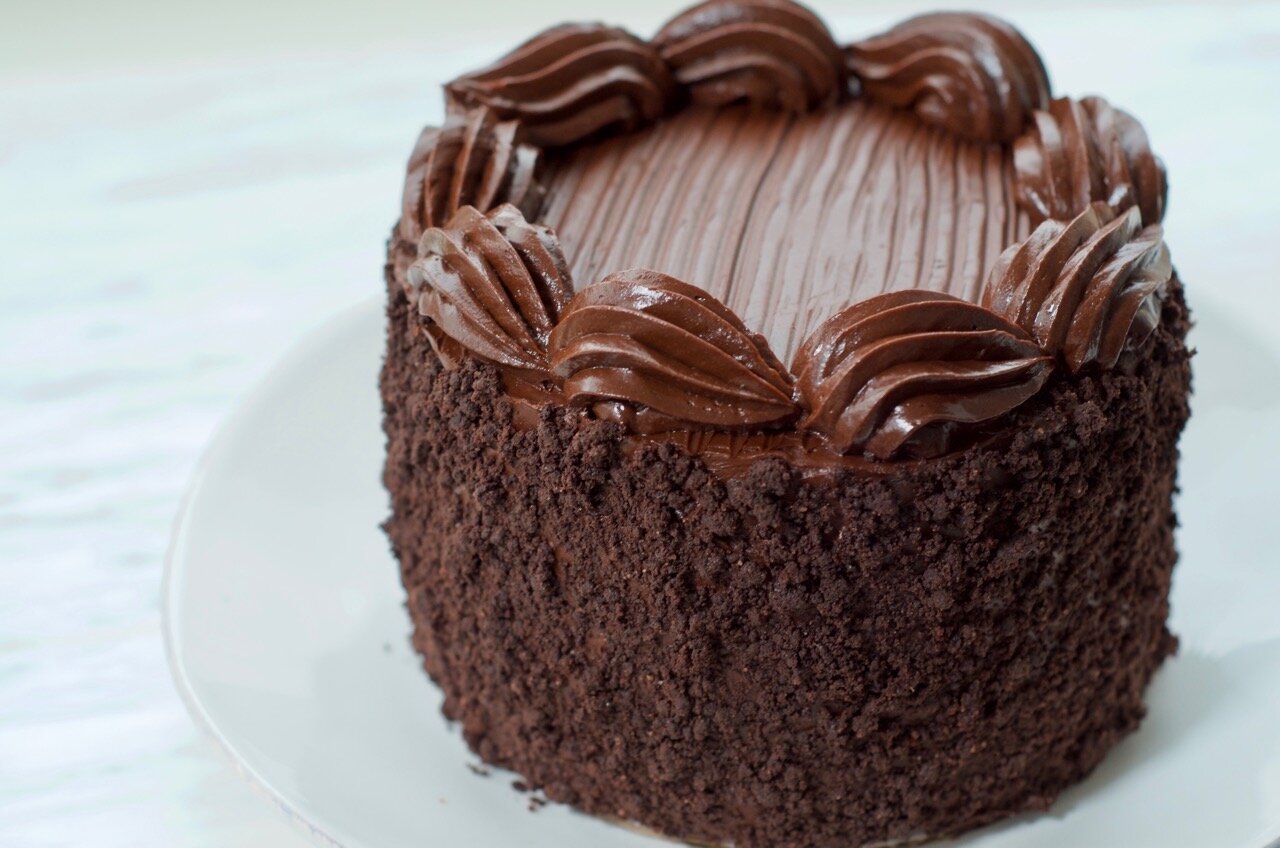
  2. Frost the outside layer with the fudge frosting, using the bench scraper to help even out the frosting. Use a serrated knife to gently imprint a pattern on the top of the cake.

  3. Gently press the chocolate crumble around the sides of the cake

  4. Prepare a piping bag fitted with a large star tip and fill with all the leftover fudge. Pipe large shells around the edge on top of the cake.

pierre hermé's ispahan macaron

apple tarte tatin

In my mind, Pierre Hermé is indisputably the king of macarons not only for his mastery of the skill and technique but more so for his inventive flavor combinations and the ispahan macaron is one of those incredible creations. If you get the chance, definitely get yourself one from Pierre Hermé but it can be surprisingly easy to make at home.

What flavor is ispahan?

Named after a type of rose, the ispahan macaron is filled with a rose flavored white chocolate cream with lychees along with fresh raspberries. Macarons can be heavy to eat at times, especially if they are oversized like these, but this is not a problem for the ispahan; the cream is light and delicate while the fresh raspberries cut through the creaminess of the white chocolate cream and the sweet macaron shells.

pierre herme ispahan macaron r

How to put it together

The macaron shells

Prepare the macaron batter normally however before you fill the piping bag, find a jar or something you can trace that’s approximately 3.5” in diameter. I alternate between using parchment or silpat to line my baking sheet, but I would recommend parchment in this situation to easily trace circles. Don’t forget to flip the parchment over so that the pencil lined side is facing down and not in direct contact with the macaron batter.

As you pipe the macarons, start in the middle of the circle and while keeping even pressure start moving the piping tip in small circles to help distribute the batter. Stop piping once the batter fills up ~80% of the circle as it will continue to spread out to fill out the rest of the circle.

Building the macarons

ispahan macaron step 1
ispahan macaron step 2
ispahan macaron step 3

Start by arranging a ring of raspberries around the outside of a macaron shell. Add a dollop of the rose white chocolate cream and add another raspberry in the center. Arrange the lychee in a ring around the center raspberry on top of the cream. Finish by adding a generous spoon of the cream before adding the second macaron shell on top.

A few tips:

  • I’m aware that Pierre Hermé typically uses the Italian meringue method for making macarons (using sugar syrup), but I find the french method which I include below to be quicker and easier and with fewer pots to clean.

  • Go easy when adding floral flavors like rose or lavender because if you add too much it can easily start to taste “soapy” or like your grandmother’s potpourri. The amount I wrote out below is a relatively muted rose flavor so if you’re a big fan, feel free to add more per your tastes.

  • Wash the raspberries gently as they fall apart easily, and dry thoroughly to prevent any extra moisture from getting onto the macaron shells

  • Store in an airtight container in the fridge for a few hours before serving to let everything come together. The macaron shells can be a little harder coming straight from the oven but they will settle into the perfect consistency after sitting in the fridge.

  • I find it easiest to buy lychees canned in syrup with the seeds removed but if you want to use fresh you can as well.


pierre hermé’s ispahan macarons

serves 6

ingredients

for the macaron shells:

200 g almond flour

200 g powdered sugar

160 g egg whites (~4 large egg whites), room temp

1 teaspoon vinegar or lemon juice

160 g granulated sugar

red gel food coloring

for the filling:

100 g high quality white chocolate, chopped

100 g heavy cream, split into 50 + 50 g

3 - 4 teaspoons rose water

optional:

5 lychees, canned in syrup

1 pint raspberries, washed and dried carefully

steps

macaron shells:

1. Sift together dry ingredients: Sift together the almond flour and powdered sugar and evenly mix the two together.

2. Whisk meringue: Add the egg whites and vinegar/lemon juice to the bowl of a stand mixer with the whisk attachment. Start beating on medium speed until soft peaks and slowly add in the granulated sugar. Continue whipping on high speed until medium stiff peaks. The meringue will look glossy and peaks should form at the tip of your whisk that can hold its shape as you hold your whisk up.

3. Macaronage: In 1/3’s, fold in the almond/powdered sugar mixture along with a few drops of red food coloring. Continue with the rest until there are no more visible dry streaks. This is now when you have to take your time. Gently fold the mixture, making sure scrape from the edge of the bowls. As you continue folding the mixture and the meringue deflates, you will see the meringue become glossy and form ribbons when you lift the spatula. Stop mixing when the batter is just loose enough to form a figure 8 without breaking. I prefer to stop mixing one or two folds short, knowing i’ll deflate the mixture a bit more when I go to fill the piping bag and as I’m piping out the macarons.

4. Piping the macarons: Prepare two half sheets lined with parchment paper with a total of 12 3.5” circles penciled out. Pipe the macarons using a piping bag with a piping tip similar to the Wilton 2A tip. Use a little of the meringue in each corner of the parchment paper to stick the paper in place. Holding the pan with one hand, use the other to tap the pan from below to help any trapped air bubbles escape. Use a tooth pick to pop any stubborn ones at the surface. Let the macarons rest until a dull skin forms on top (this can take anywhere between 15 min - 1 hour depending on the humidity). Preheat the oven to 350 F as the macarons rest.

5. Baking the macarons: Bake the macarons one sheet at a time. After putting them in the oven, turn the oven down to 325 F. After 5 minutes, rotate the pan to help the macarons grow evenly. At this stage, you should see the feet start to develop. Continue baking for another 15 - 20 minutes until the macarons no longer move when nudged gently. It is better to err on the side of slightly overbaking as that can be corrected once you fill and refrigerate the macarons, but if you underbake, the feet may shrink coming out of the oven leaving you hollow shells and potentially sticking to the parchment. Let macarons fully cool on the baking sheet before using.

rose white chocolate cream: (this can be made ahead of time)

6. Make the ganache: In a small saucepan, heat up 50 g of the heavy cream until simmering. Pour over the chopped white chocolate and let it sit for 30 seconds before stirring together into a smooth chocolate ganache. Mix in the rose water, and cover and let the ganache firm up in the fridge.

7. Finishing the cream: In a stand mixer with whisk attachment, whisk the white chocolate ganache on medium speed for 2 - 3 minutes. The ganache may look liquid at this point. Slowly pour in the rest of the heavy cream (50 g) and whip until cream firms up to desired consistency. Be careful not to overmix.

putting it all together:

8. Prepare lychees: Roughly chop the lychees and pat dry any excess liquid.

9. Building the macarons: Build the macarons by arranging the raspberries and layering the cream and lychees. Refer to the images above for a detailed description. Make sure to store in an airtight container in the refrigerator for a few hours before serving.

duck confit and ramp hand pies

apple tarte tatin

As picnic season begins to ramp (hehe) up, are you wondering how you can up your picnic game this year? Bring a few of these hand pies to share with friends and family and I can guarantee you will be invited back for the next picnic. Encased in a ridiculously flaky crust, these pockets hold tender shredded duck confit, caramelized onions, duck fat potatoes, and finished with some quickly seared ramps. The filling is the perfect balance between the saltiness of the duck legs, the sweetness of the caramelized onions, and the kick from the ramps all held together by the potatoes.

What exactly are ramps?

I’d never tried or even heard of ramps until I moved to the east coast and hit what I call the “green market circuit” here in New York. When I walked into Whole Foods this week I was delighted to find a giant display of ramps, ripe for the picking. They’re so seasonal they only appear for a few weeks in the year. They’re packed with flavor and I’d describe it as a cross between a scallion, onion, and leek with a garlicky punch. In these hand pies, they help cut through the richness of the duck confit filling. If you’re looking to make these the other 50 weeks of the year, you can easily replace the ramps with chives or scallions.

DSC_4430.jpg

Duck confit the easy way

If you’ve never made duck confit, it may sound like an intimidating process but it needn’t be. Traditionally, duck legs are cooked long and slow submerged in duck fat. Conveniently, duck legs (and especially the moulard duck legs sold at whole foods) are already packed with fat. The shortcut method just uses the fat that’s already in the duck legs, and slowly cooks the legs down in the oven at a low heat.

A few tips:

  • If ramps are not available, replace with chives

  • There may be additional filling leftover (which is great to munch on!), but don’t try to overfill the hand pies or else it will be challenging to close the seams

  • The duck confit takes a few hours, but is almost entirely hands off so the active prep time is far shorter


duck confit and ramp hand pies

serves 4

ingredients

for the pie crust:

1 1/4 cup AP flour

1/2 teaspoon salt

1 stick butter, cut into large cubes

4 - 6 tablespoons ice water

for the filling:

1 duck leg

salt & pepper

1 onion, diced

1 teaspoon olive oil

1 tablespoon sugar

1 medium yellow potato, diced

1 bunch of ramps

optional:

1 egg

flaky salt

steps

Pie crust:

1. Mixing dry ingredients with butter: Combine the AP flour and salt. Toss in the butter cubes (make sure the butter is as cold as possible) until the individual cubes are covered in flour.

2. Flatten the butter: Working quickly (so the butter doesn’t warm up too much), start flattening the butter pieces between your fingers but leave them in large chunks.

3. Hydrate: Drizzle in the ice water, and toss with the flour/butter mixture (like you would toss a salad - do not knead). The optimal hydration for your dough is to have it hold together in a ball with no floury streaks. If your dough is still too crumbly, add water slowly as a little water can go a long way. Start with 4 tablespoons and continue adding the rest of the water slowly to prevent over hydrating your dough. The dough should be just hydrated enough to be able to hold together without dry flour, but it shouldn’t be tacky to the touch. Form into a disk, wrap tightly and rest in the fridge for at least 30-60 min.

4. Extra folds: This step is optional, but this is the key to getting a really flaky crust. Roll out the dough into a long rectangle and fold into thirds like an envelope. Rotate 90 degree, and repeat the process of rolling and folding 2 more times. The dough should start to smooth out by the third fold. Let it rest in the fridge for another 30 min.

Filling:

5. Make the duck confit: Generously season the duck leg with salt and pepper. Prick the skin all over using the tip of a sharp knife to help the fat render while cooking. Preheat the oven to 350 F, and in a small baking pan, bake skin side down for 20 minutes. Flip the leg over and cover the pan with aluminum foil. Turn the oven temperature down to 325 F, and bake for 2 hours until the meat is incredibly tender and falls right off the bone. Shred once cool enough to handle and set aside. Save 2 tablespoons of the duck fat for the potatoes.

6. Make the caramelized onions: In a medium hot pan, heat up the olive oil and add the caramelized onions. Toss to evenly coat the onions in olive oil and cook while stirring every few minutes to prevent any the onions from burning. After 10 minutes, sprinkle with some some sugar and salt and continue cooking and stirring sporadically for the next 30 - 45 minutes. If the onions start burning before finishing caramelizing, add a few tablespoons of water.

7. Cook the potatoes: In a medium hot pan, add the diced potatoes along with 1 tablespoons of the leftover duck fat. Sear the potatoes until crisp and tender on the inside, approximately 5 - 10 minutes. Salt to taste.

8. Sear the ramps: Carefully wash the ramps to remove any dirt. Roughly chop and quickly sear in a medium hot pan with 1 tablespoon of leftover duck fat. Salt to taste.

9. Combine filling: Mix together the shredded duck confit, caramelized onions, potatoes, and ramps together.

Preheat oven to 375 F

10. Fill the hand pies: Roll out the pie crust into a 12 x 8 in rectangle and cut into 8 smaller 3 x 4 in rectangles. On one layer, add the filling to the center and brush the edge with water. Layer a second rectangle on top, and use a fork to crimp the edges of the crust. Repeat with the rest of the dough and filling.

11. Egg wash: Beat one egg until no more streaks. Brush the tops of the hand pies with a layer of egg wash and cut some vent holes on top. Top with flaky salt (optional).

12. Bake: On a sheet of parchment paper, bake for 25 minutes until golden brown.

spring asparagus and pesto rye tart

apple tarte tatin

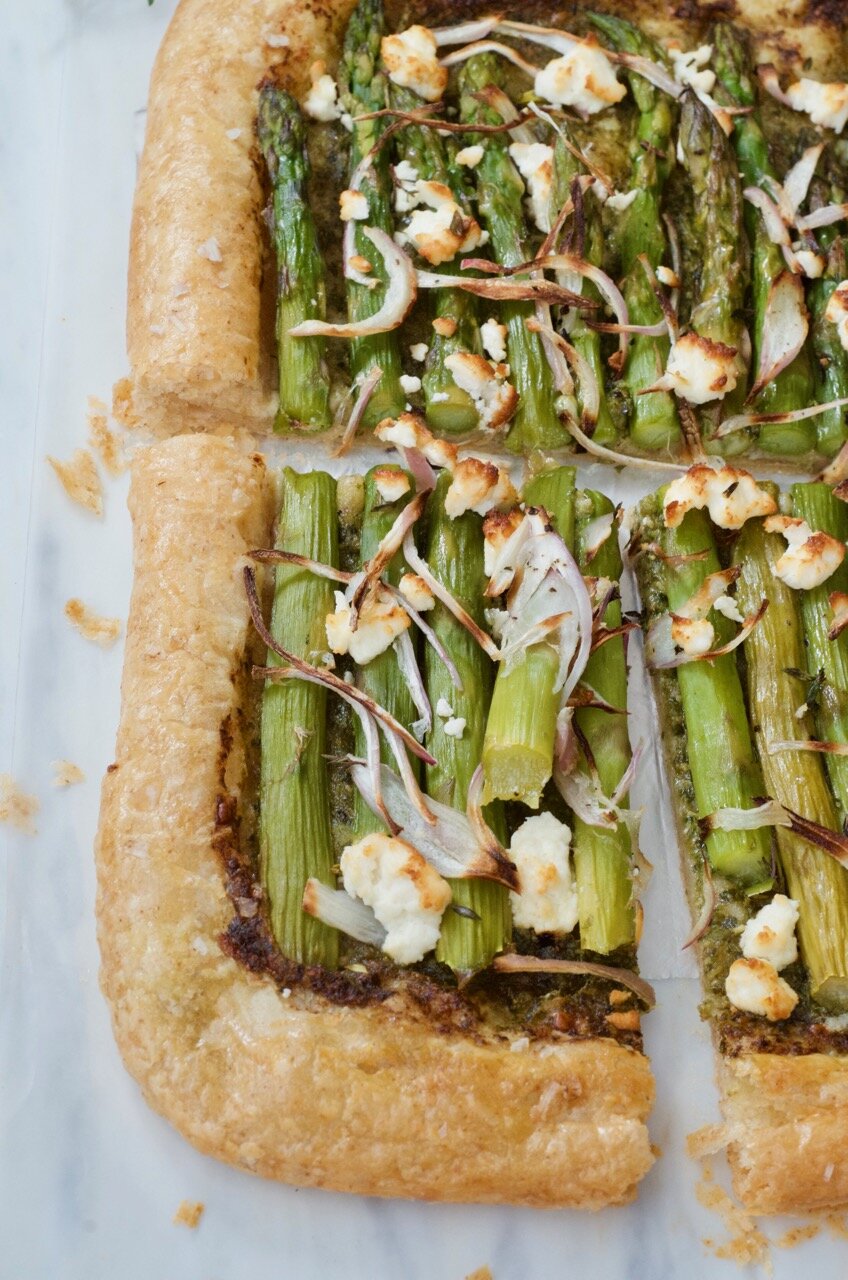
As the weather warms and the trees blossom, my favorite sign of spring is when asparagus season hits. The green stalks are bright and tender, and it’s a telltale sign of a cornucopia of seasonal produce to come.

Sitting on top of a flaky rye crust, the pesto brings together the asparagus, shallots, and crumbly feta cheese. The rye offers a deeper and more complex alternative to all purpose flour, which complements all the bright flavors coming from the topping.

The rye tart crust

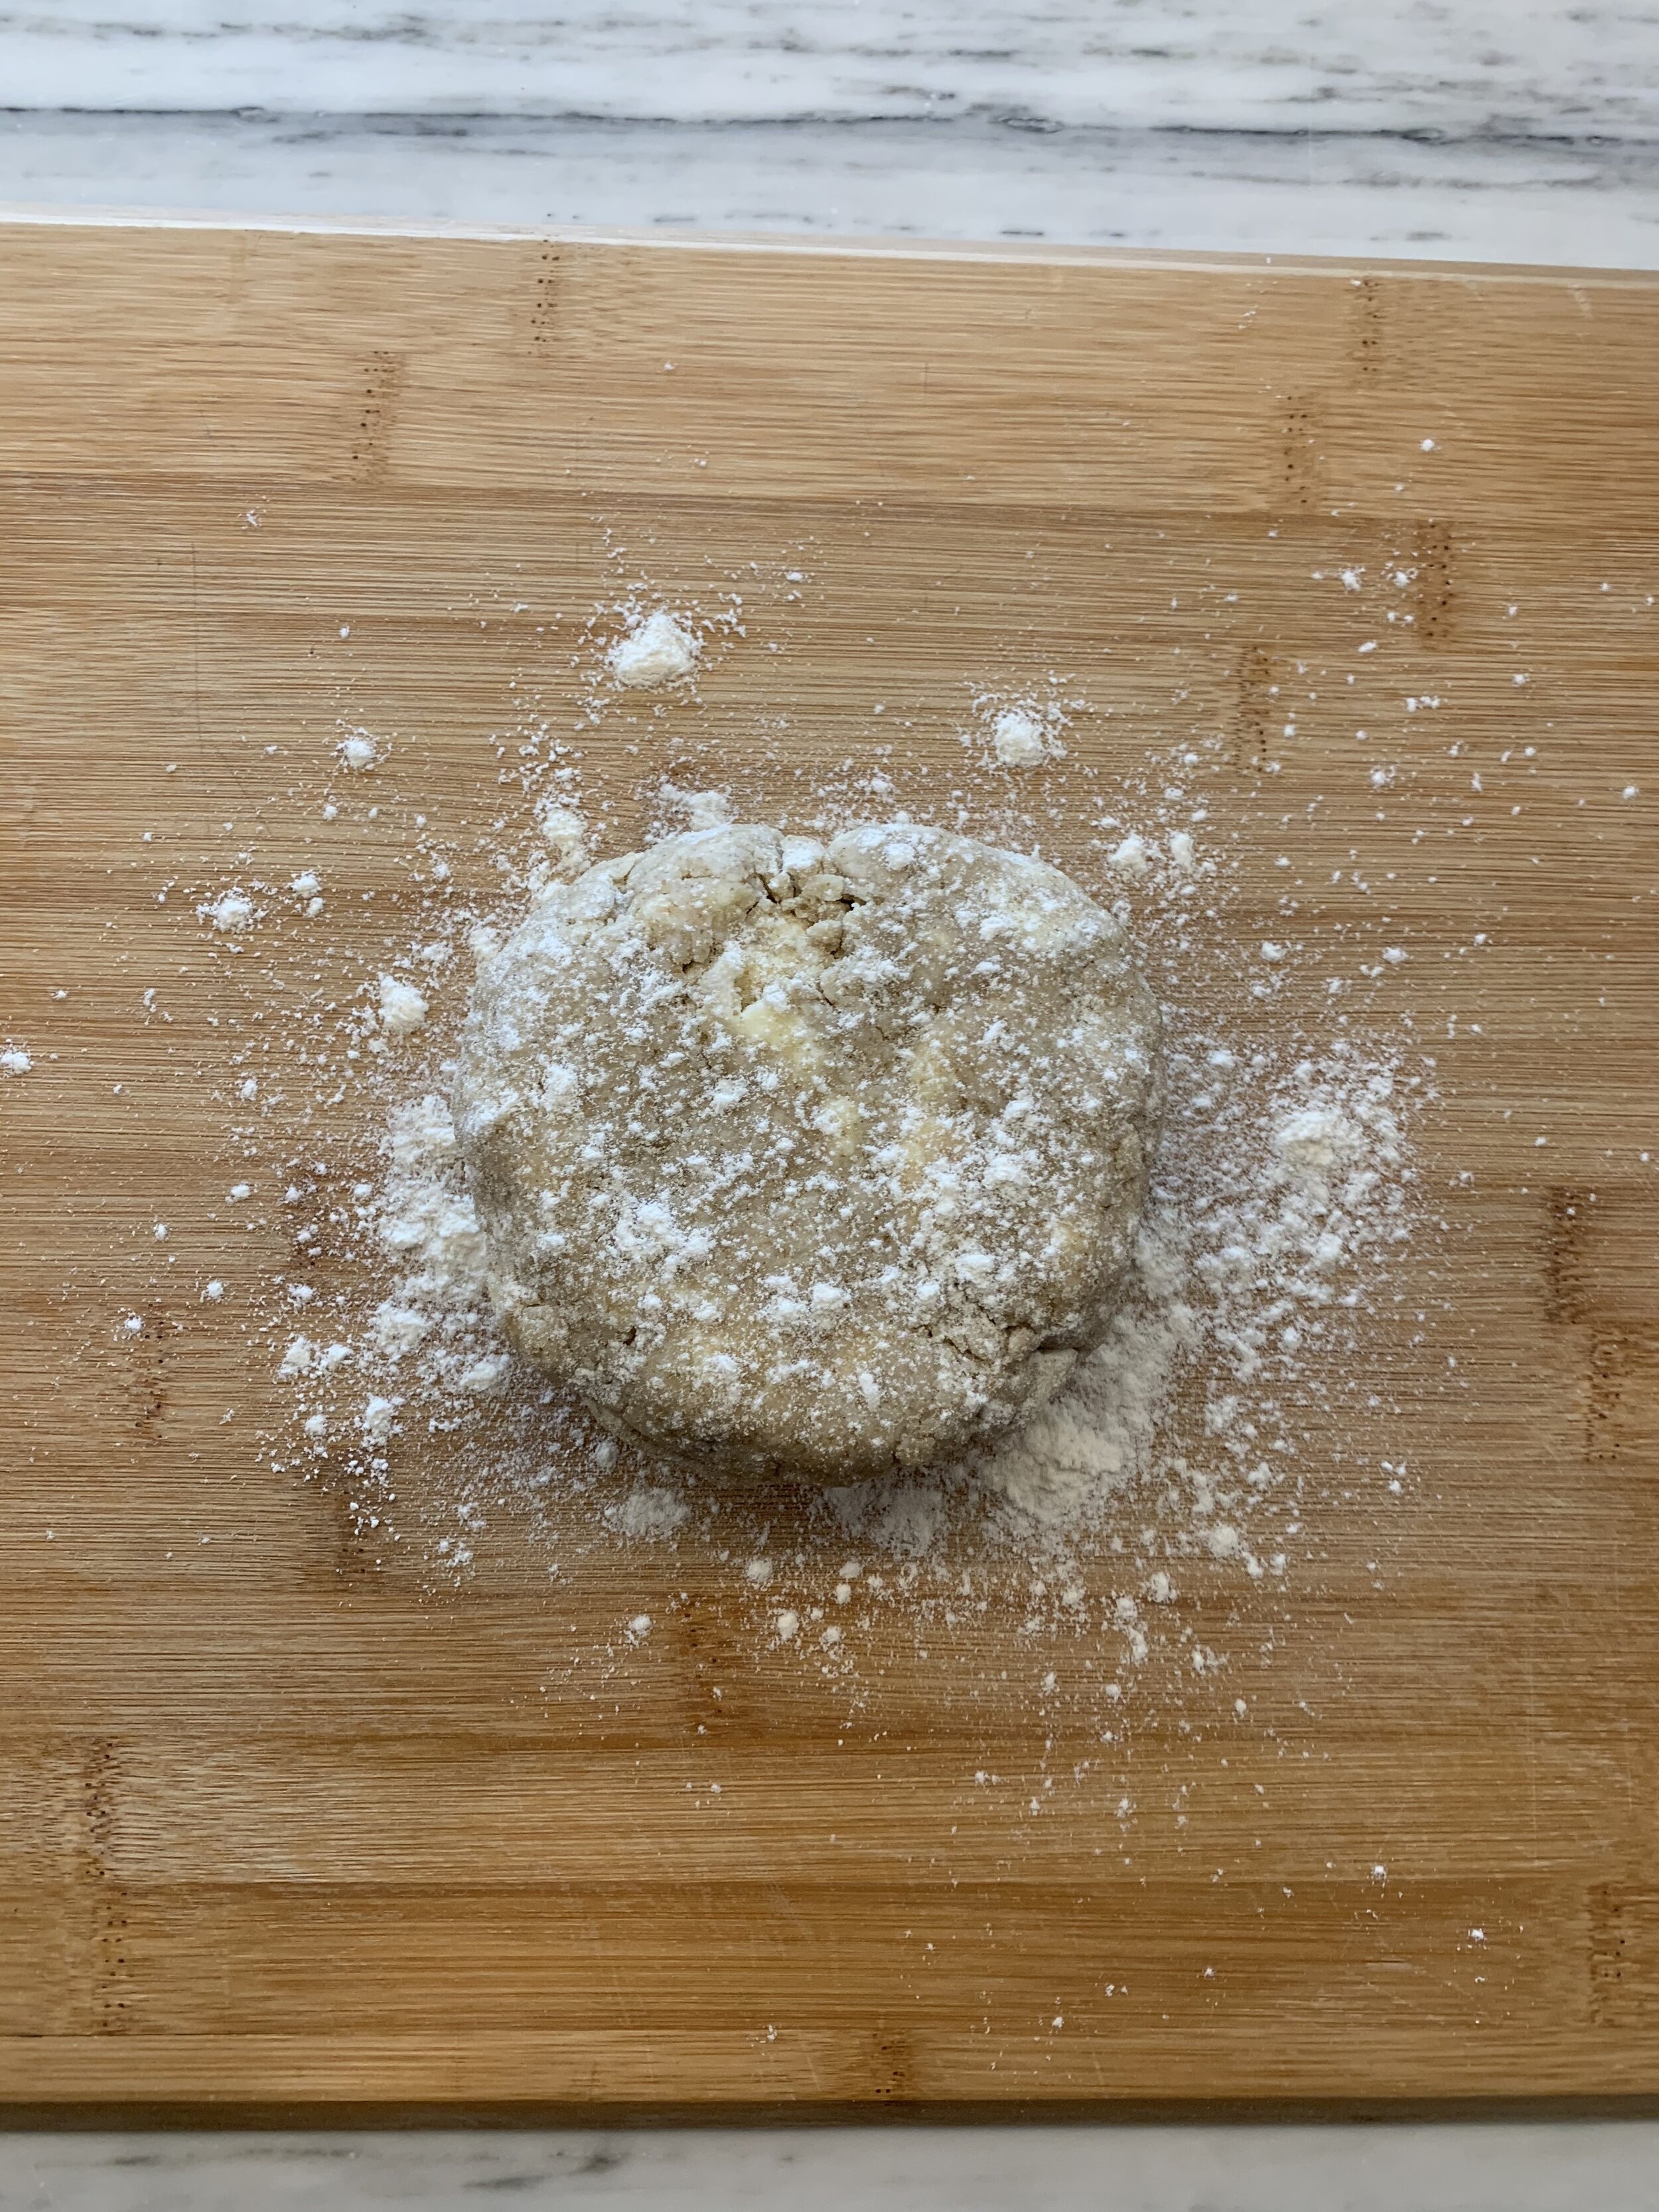
To create a shattering tender crust, make some extra envelope folds in your dough before rolling it out. Keep the initial butter chunks large, as they will get incorporated into the crust more as you fold the layers. The initial dough will be craggly with bumps and ridges, but as you make the folds, the dough will smooth out.

rye tart dough
IMG_2789.JPG
IMG_2792.JPG

A few tips:

  • Trim the tough bottoms off the asparagus - you can even break them off with your hands

  • Keep the dough cool at all times, and leave some space in your fridge to easily pop in the dough if it starts to warm up

  • Feel free to customize to your taste. You can leave out the shallots if you don’t like them or switch out the feta for another cheese like parmesan or goat cheese.


spring asparagus and pesto rye tart

serves 6

ingredients

for the rye crust:

1 cup AP flour

1/4 cup rye flour

1/2 teaspoon salt

1 stick butter, cut into 1 inch pieces

4 - 6 tablespoons ice water

for the topping:

1 bunch asparagus

4 tablespoons pesto

1/2 shallot, thinly sliced

1 teaspoon olive oil

1/2 cup feta cheese, crumbled

1 egg, whisked (optional)

flaky salt (optional)

steps

Rye crust:

1. Mixing dry ingredients with butter: Combine the AP flour, rye flour and salt. Toss in the butter cubes (make sure the butter is as cold as possible) until the individual cubes are covered in flour.

2. Flatten the butter: Working quickly (so the butter doesn’t warm up too much), start flattening the butter pieces between your fingers but leave them in large chunks.

3. Hydrate: Drizzle in the ice water, and toss with the flour/butter mixture (like you would toss a salad - do not knead). The optimal hydration for your dough is to have it hold together in a ball with no floury streaks. If your dough is still too crumbly, add water slowly as a little water can go a long way. Form dough into a disk, wrap tightly and rest in the fridge for at least 30-60 min.

4. Extra folds: This step is optional, but this is the key to getting a really flaky crust. Roll out the dough into a long rectangle and fold into thirds. Rotate 90 degree, and repeat the process of rolling and folding 2 more times. The dough should start to smooth out by the third fold. Let it rest in the fridge for another 30 min.

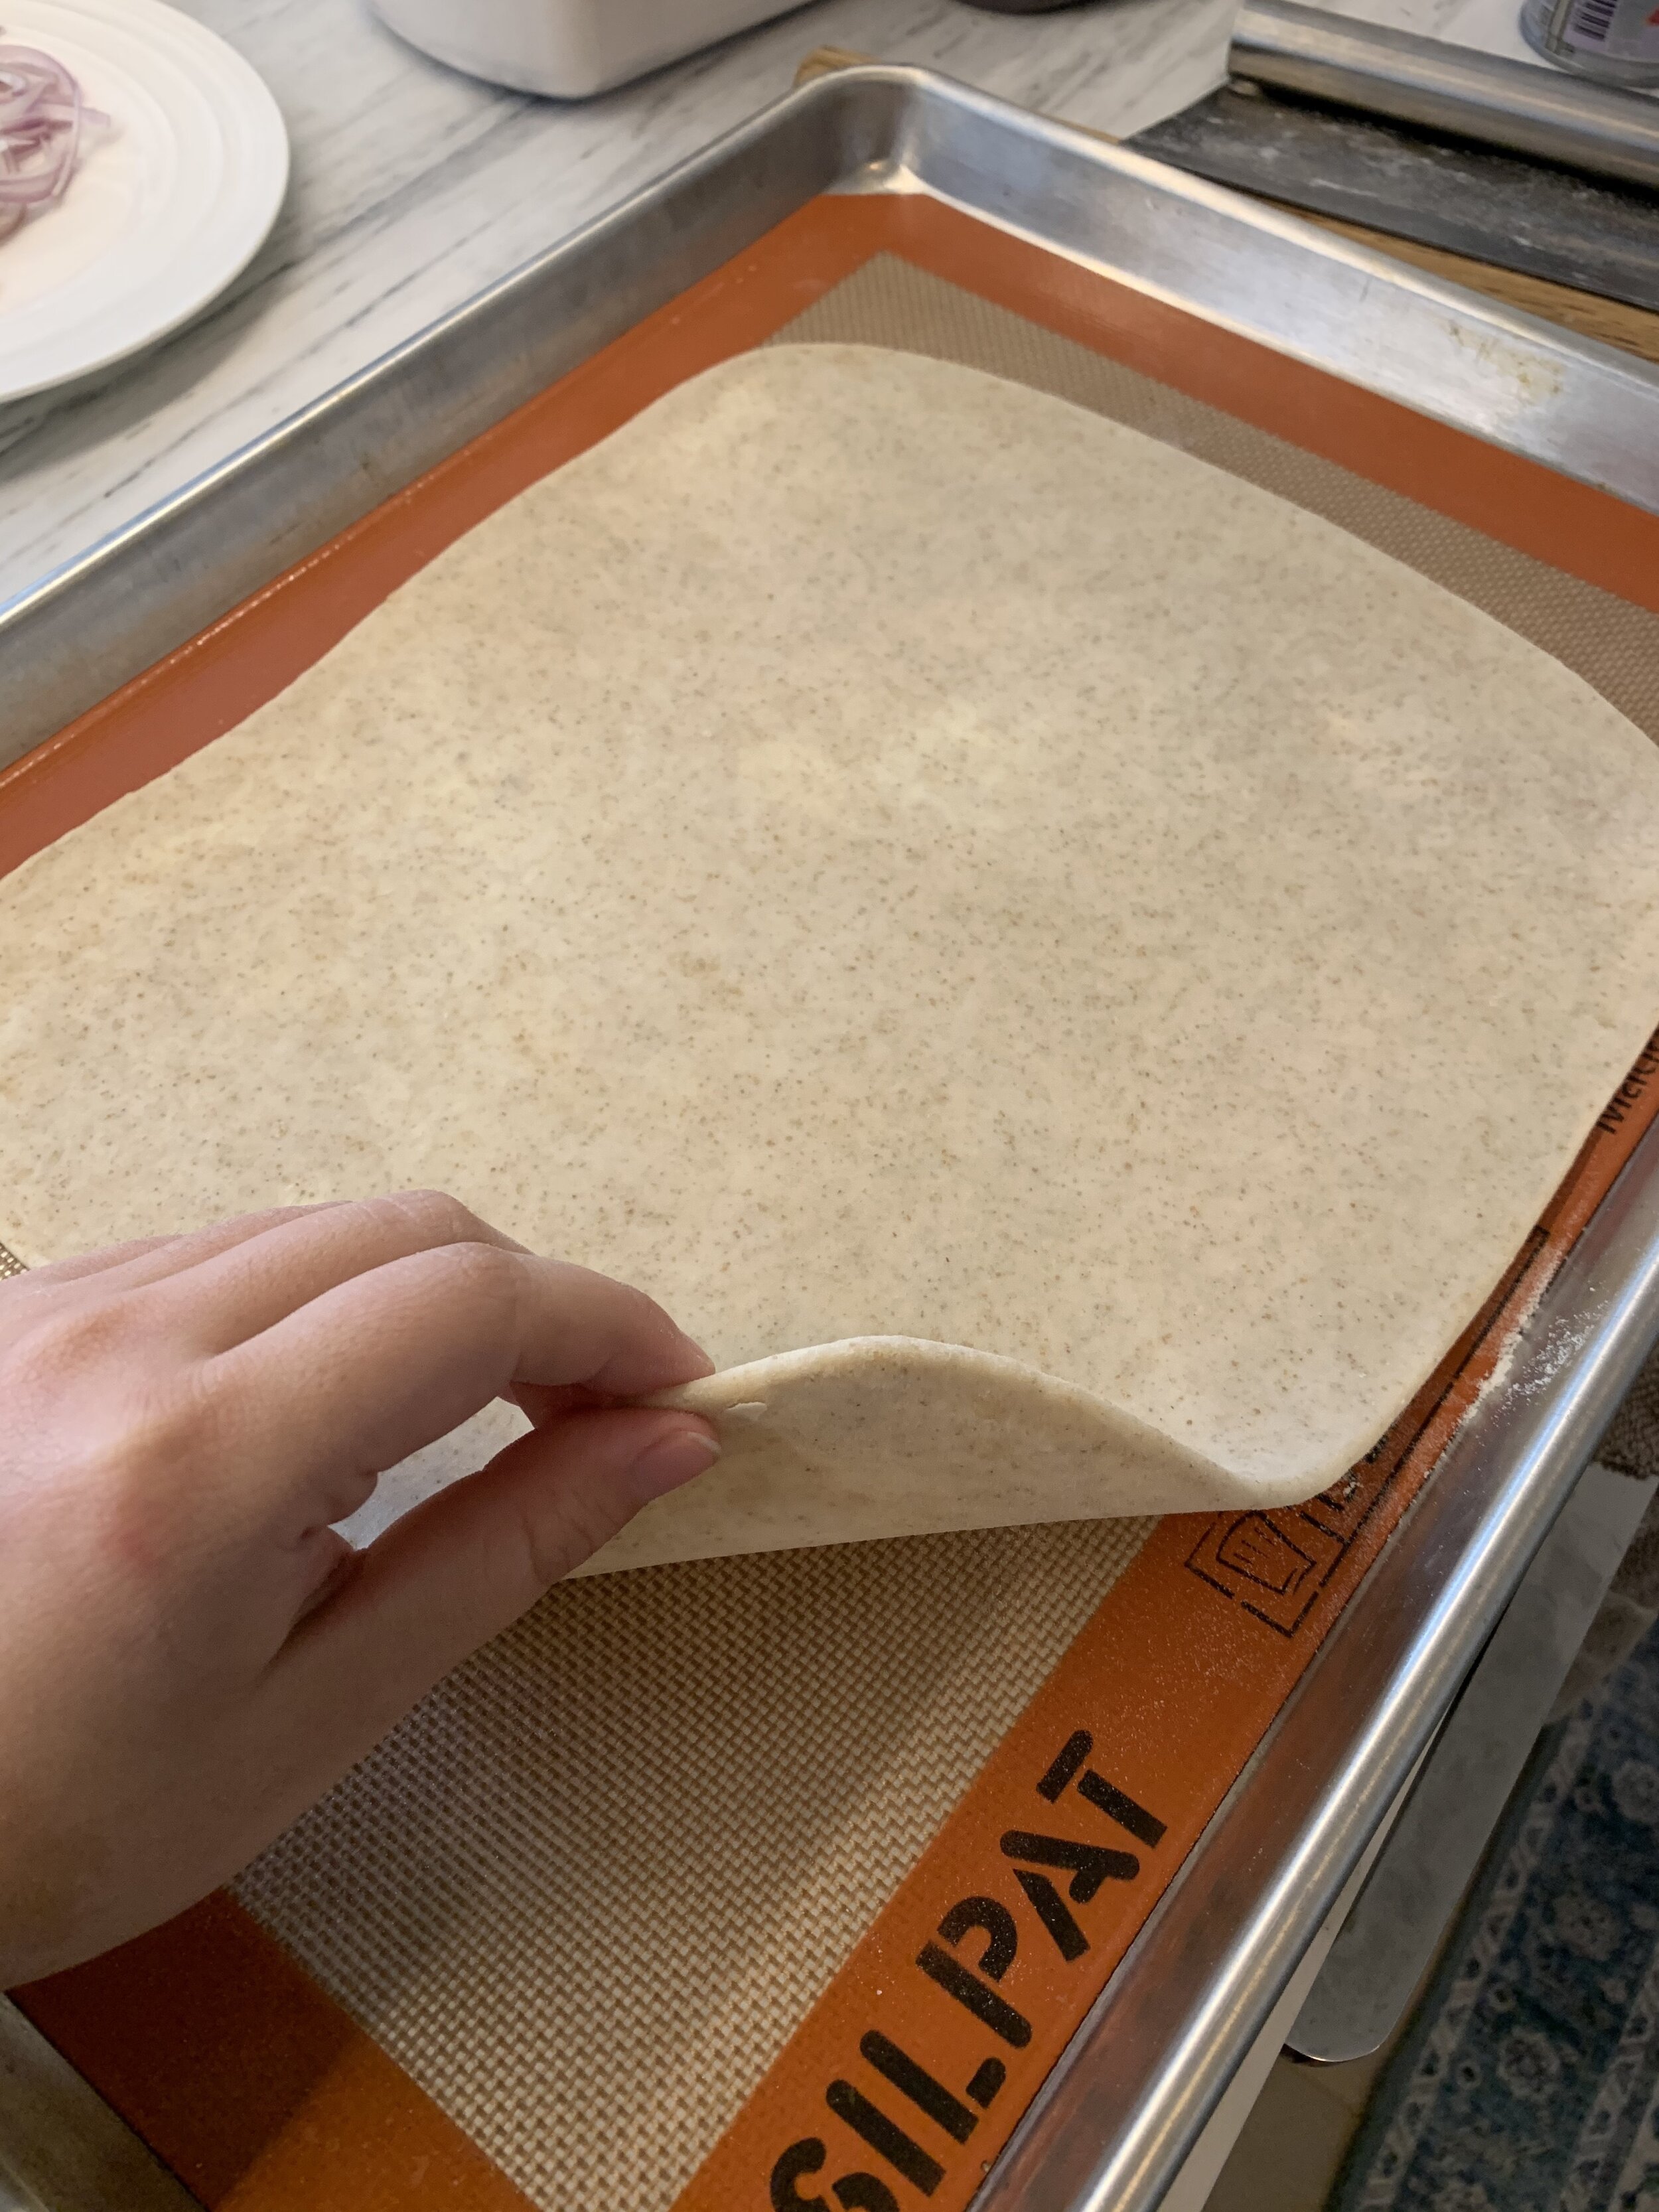
5. Roll out dough: Trying to keep the dough in a rectangular shape, roll out the dough until 1/4 inch thick. The shape should be long enough to hold the asparagus stalks. You can trim the edges of your dough to get a perfect straight edge if you’d like, but I kept mine as is to avoid wasting any dough. Let the rolled out dough rest in the fridge as you prepare the rest of the toppings.

Preheat oven to 375 F

Topping:

6. Blanch the asparagus: Bring a pot of water to boil over high heat and quickly drop the asparagus in, cooking for ~2 min. Transfer the asparagus over to an ice bath to stop the cooking and pat dry.

7. Build the tart: Thinly spread a layer of the pesto over the tart. Arrange the asparagus in a single layer. Toss the shallot slices in a teaspoon of olive oil, and add on top of the asparagus along with the feta. Optional: brush the edges with egg, and top with flaky salt.

8. Bake: Bake in a preheated oven for 25 - 30 min, or until the edges turn golden brown. If the shallots start browning too quickly, turn the heat down to 350 F midway.

ultimate ice cream birthday cake

apple tarte tatin

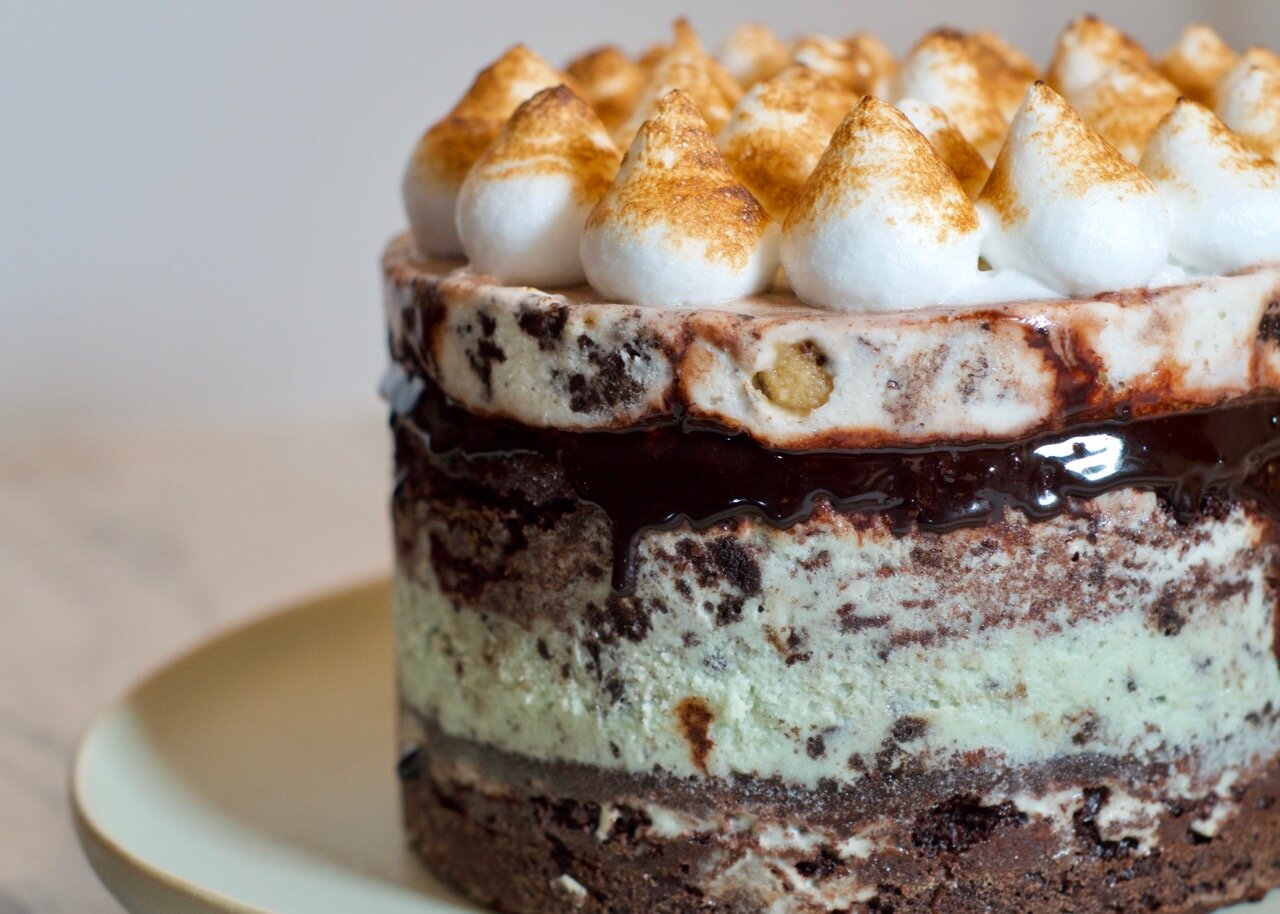
Ice cream cakes deserve far more love beyond your 12th birthday party. As much nostalgia I have for the large rectangular slabs of ice cream cake from Baskin Robbins or Cold Stone, ice cream cakes can be reimagined to become a go-to celebration cake no matter your age.

slice of chocolate ice cream cake with meringue

Ice cream cake should be cake

Ice cream cakes can deliver so much more beyond being ice cream in the shape of a cake. Ice cream acts as a fantastic alternative to frosting that is both the star of the show and a complement to cake - because at the end of the day, what is ice cream cake without cake?

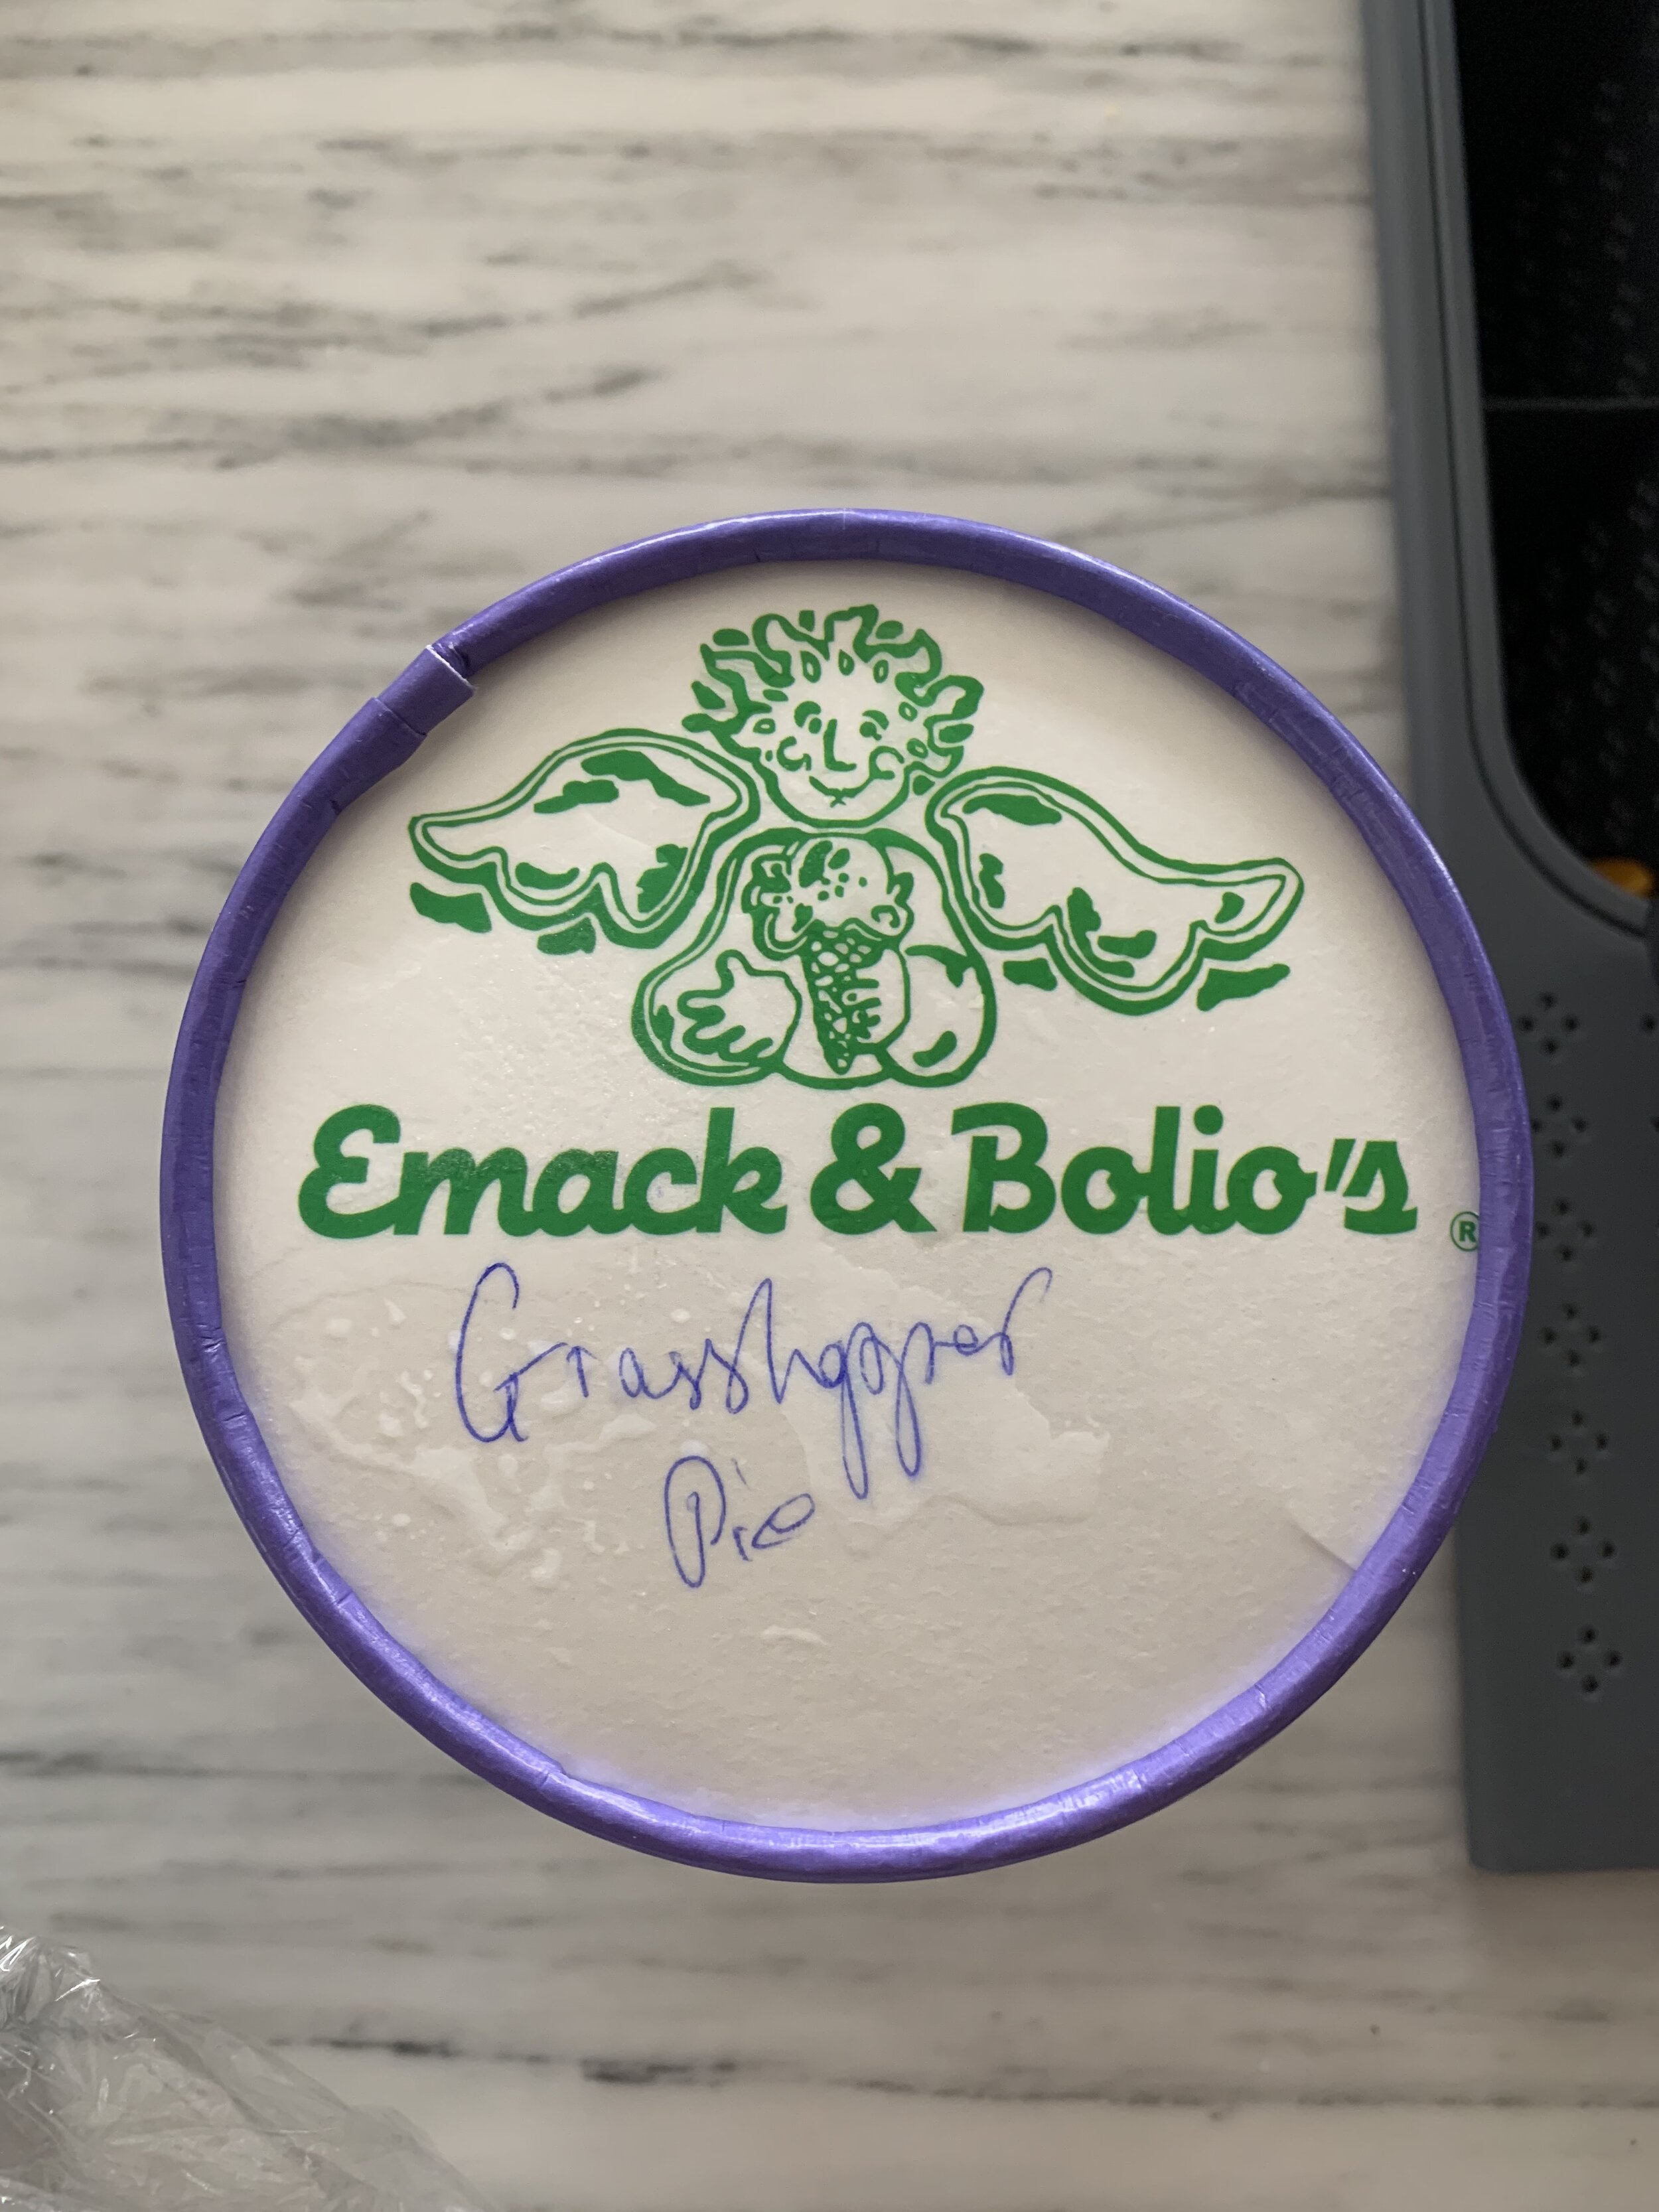
To save time, I bought some ice cream from a neighborhood ice cream shop Emack & Bolio’s, grasshopper pie and cookie monster. You can choose to use whatever combination of ice cream flavors, but I would recommend sourcing high quality ice cream with some mixin’s, whether you head to a local ice cream shop or make it yourself.

The two layers of moist chocolate cake is the foundation for the ice cream cake. It is made with vegetable oil and buttermilk, keeping in mind that we need the cake to stay soft and moist in a dry freezer. The fudge drizzle (recipe from David Lebovitz) doesn’t solidify in the freezer, and helps keep the cake moist while acting as delicious chocolate glue joining the cake and ice cream layers.

The italian meringue adds the perfect light, fluffy topping to the cake and if you have a kitchen torch on hand, gives it a a nicely toasted color and flavor.

How to decorate ice cream cake?

I took inspiration from how Milk Bar compiles their famous birthday cakes (which aren’t made of ice cream) by building the layers of cake and ice cream in acetate sheets. It helps create a beautiful ice cream cake with clean lines and minimal effort.

The layers are as follows: cake + fudge drizzle + ice cream (flavor 1) + cake + fudge drizzle + ice cream (flavor 2) + meringue topping (optional)

chocolate cake layer with fudge drizzle
carton of emack and bolio's for ice cream cake
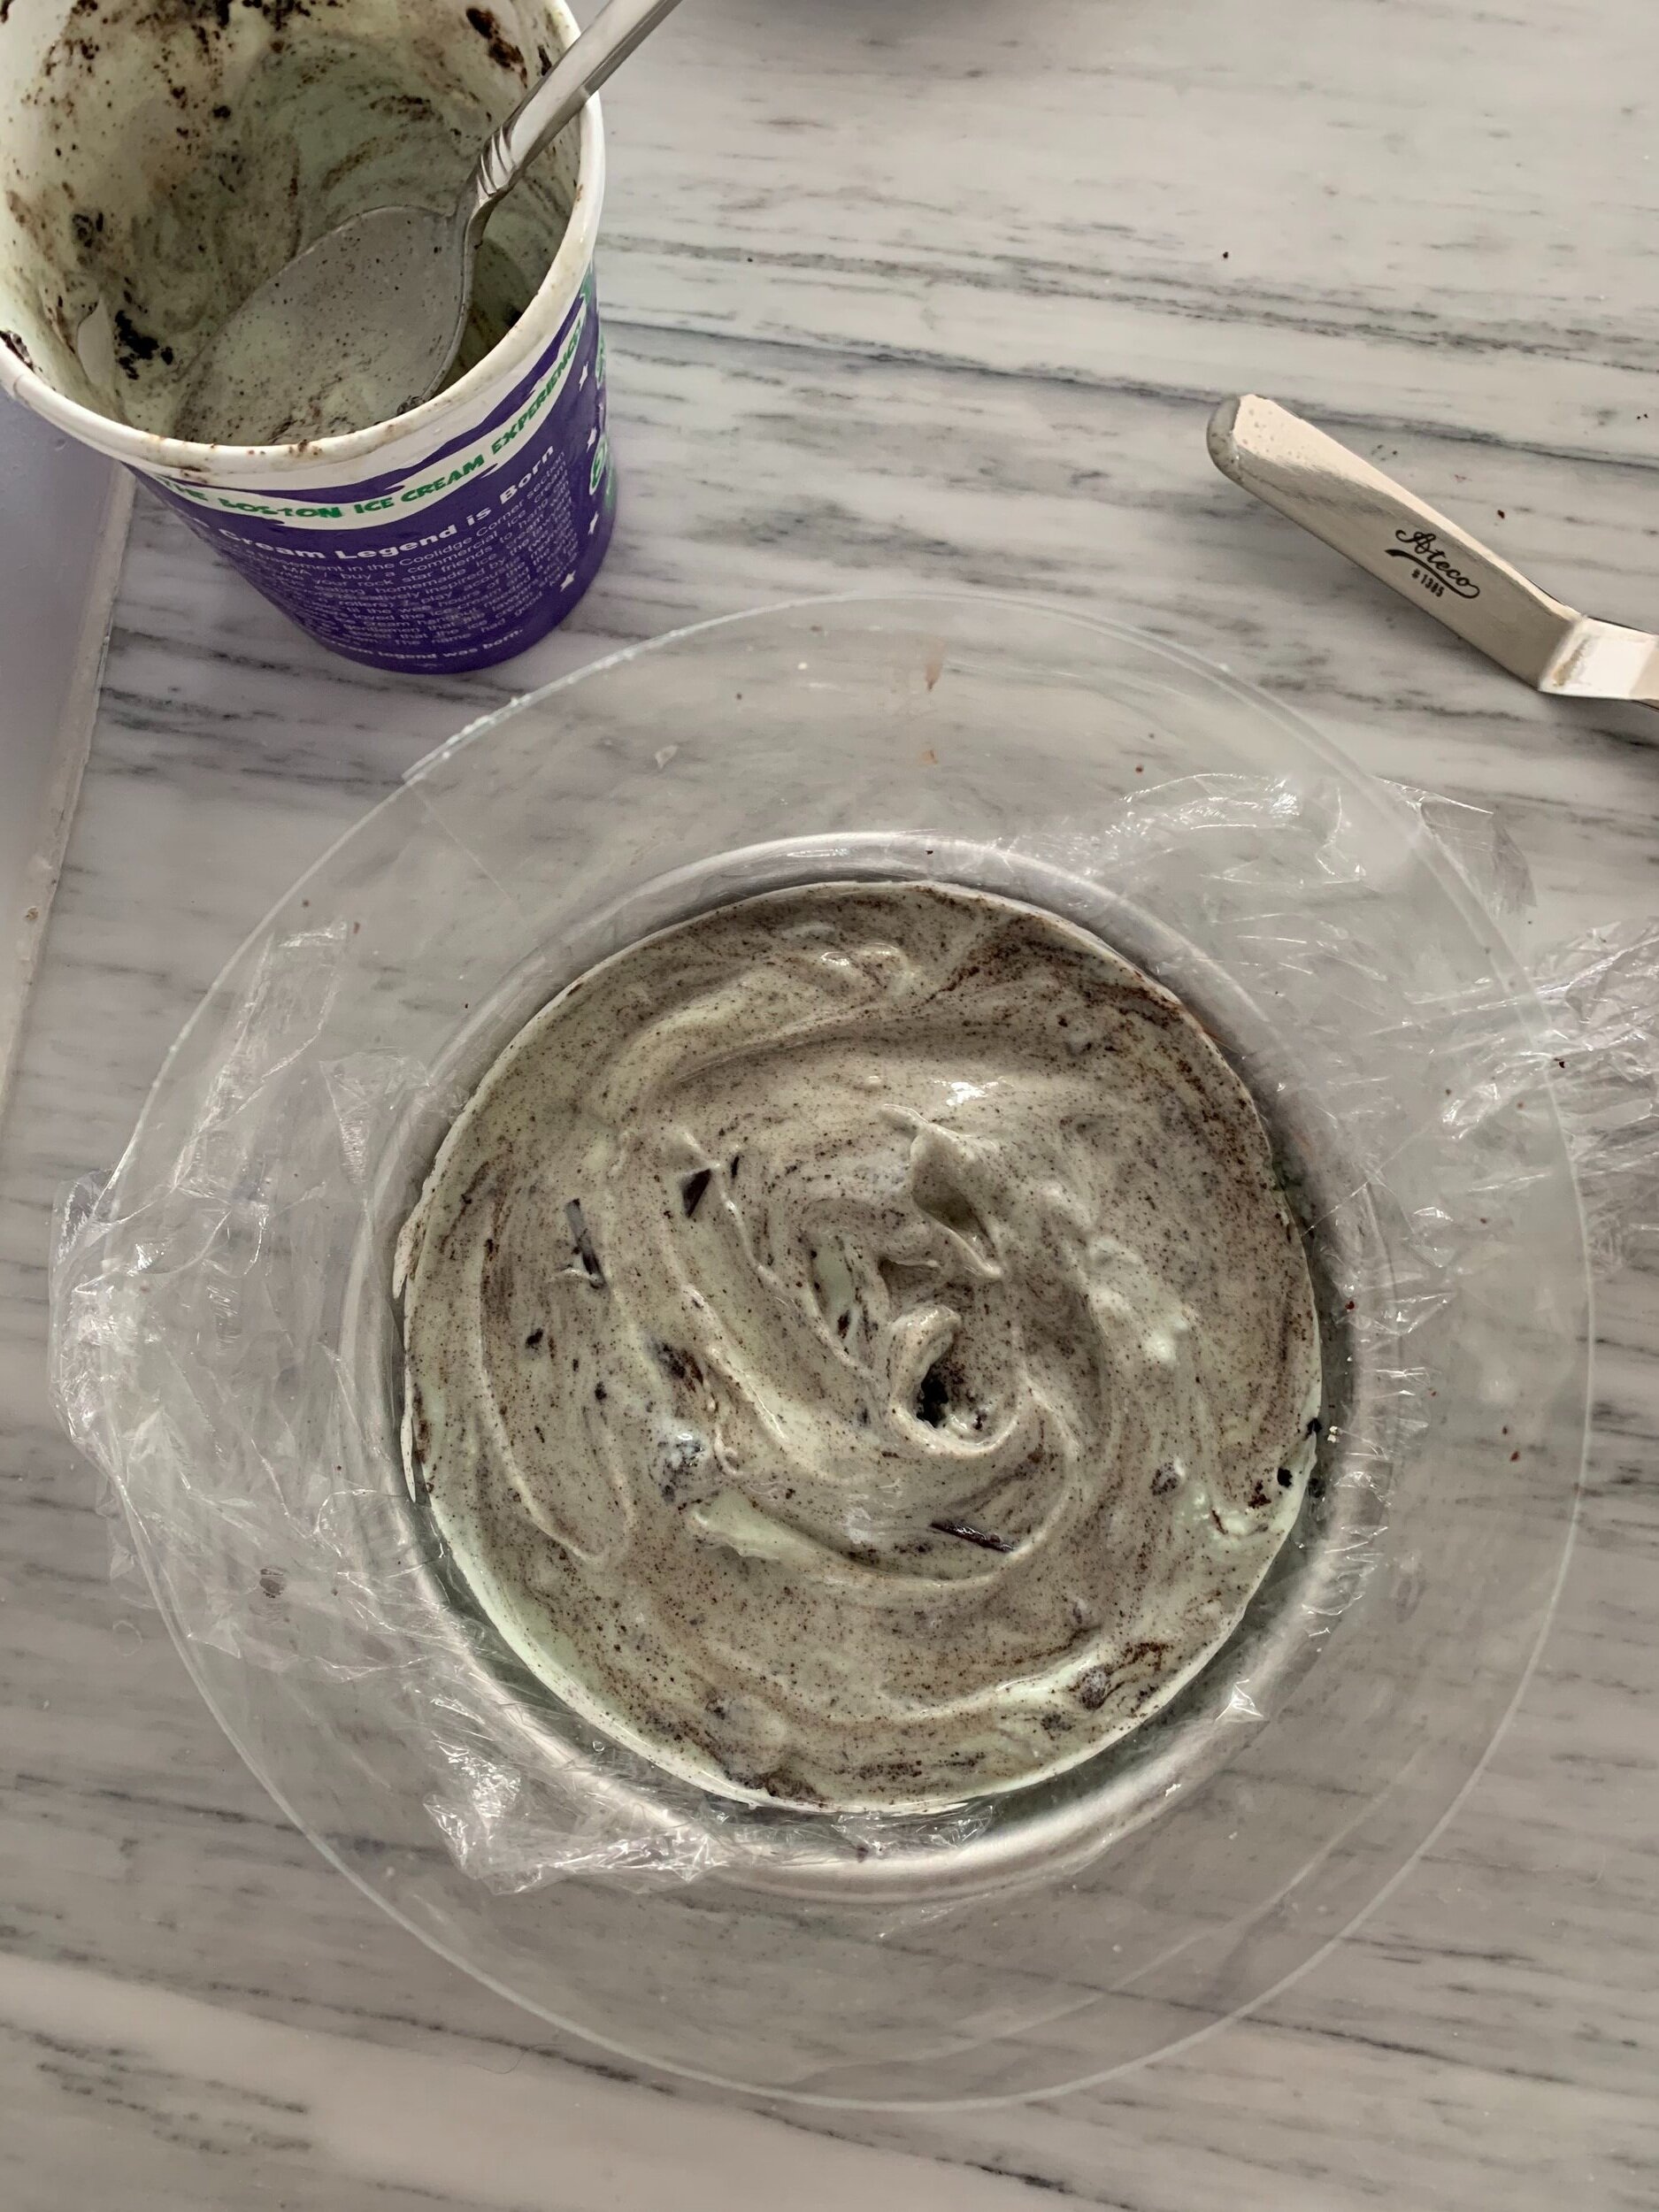
first layer of ice cream cake

Use either a springform or just one of the cake pans that you baked the cakes in, line the bottom with plastic wrap to help later extract the cake from the pan, and cut a rectangular sheet of acetate a little longer than the circumference of the cake pan so that it sits just inside the walls of the cake pan with some overlap to prevent any fudge ice cream from spilling out.

I used an offset spatula to try to spread the drizzle and ice cream, but since we’re basically working in a tall cylinder, the easiest method would be to use a spoon bent 90 degrees. I did not feel like sacrificing any spoons, and while it may take a little longer, a small offset spatula will get the work done.

Planning ahead

This is a cake that you can easily make ahead of time, and keep it in the freezer until ready to serve. Each of the main components (cake, ice cream, drizzle) can be prepared ahead of time.

A few tips:

  • Move the ice cream from the freezer to the fridge 2-3 hours prior to building the cake so that it becomes soft and spreadable without melting

  • Make sure the cake is cooled completely. If you’re making it all in one day, move the ice cream into the fridge as you begin making the cake.

  • Let the cake sit in room temperature for 10-15 min before serving, as both the ice cream and cake will be too hard right out of the freezer

  • Clear enough space in the freezer prior to putting together the cake because you do not want to be scrambling to find space with your cake melting on the counter

  • You don’t have to use 6 inch cake rounds, but I wanted to make a cake that was feasible to finish for two people. Feel free to size up the cake for larger rounds or more tiers.


chocolate ice cream birthday cake

makes one two-tiered 6 inch cake

ingredients

for the chocolate cake:

2 cups AP flour

1/2 cup high quality cocoa powder (Valrhona)

1 cup sugar

1 teaspoon salt

2 teaspoons baking soda

1 teaspoon baking powder

2 eggs

1/2 cup vegetable oil

3/4 cup buttermilk

3/4 cup hot water

1 shot espresso (optional)

1/2 teaspoon vanilla paste (optional)

for the fudge drizzle:

1/4 cup sugar

2 tablespoons barley malt or corn syrup

1/4 cup water

3 tablespoons cocoa powder (Valrhona)

1/4 teaspoon vanilla paste

building the cake components:

2 pints of ice cream, softened in the fridge

2 layers of chocolate cake, chilled

fudge drizzle

for the italian meringue topping (optional):

2 egg whites, room temperature

1/2 teaspoon vinegar (optional)

1/2 cup sugar

1/4 cup water

steps

Chocolate cake:

Preheat oven to 350 F.

1. Prepare the 6 inch cake pans: Wipe the inside of your cake pans with butter and dust with some flour. Cut a sheet of circular parchment paper to line the bottom of your pan to ensure that your cakes will have no problem coming out.

2. Mix dry ingredients: Sift together the flour, cocoa powder, sugar, salt, baking soda, and baking powder in large bowl. Set aside.

3. Combine wet ingredients: Mix together the eggs, vegetable oil, buttermilk, espresso and vanilla paste (if using). You won’t be able to explicitly taste the espresso and vanilla but it helps deepen the chocolate flavor.

4. Mixing everything together: Using the paddle attachment of a stand mixer, mix together the dry ingredients with the wet. As the mixture begins to come together, pour in the hot water. Mix until just combined - you will have a thin batter, and pour evenly between your two prepared cake pans

5. Bake: Bake in the preheated oven for ~25 minutes, or until the cake is springy to the touch and an inserted toothpick in the center comes out clean.

6. Trim the cake tops: Once cake is completely cool, remove from pan and using a serrated knife, cut off the domed top of the cakes until flat.

Fudge drizzle:

In a saucepan, whisk together the sugar, syrup, water, and cocoa powder and cook over low-medium heat. Continue to whisk until mixture comes to a simmer for 1 minute. Stir in vanilla paste. Set aside and chill.

Building the cake:

Prepare the pan: Line a 6 inch cake pan with plastic wrap, with enough around the edges to help lift your cake out later. Line the walls of the cake pan with a sheet of acetate, cut to fit. The walls should extend past your cake pan depending on how tall you want your cake.

Start layering:

  1. First layer of cake

  2. Spread half the fudge drizzle on the cake. The ice cream will help push the drizzle out to the edges so focus more on the middle

  3. Spoon 1/2 - 3/4 pint of ice cream and evenly spread it over the cake. Make sure to fully meet the edge of the acetate. Firm up in the freezer for 15 minutes

  4. Second layer of cake

  5. Remaining fudge drizzle

  6. Spoon 1/2 - 3/4 pint of second ice cream. Take care to keep this layer as even as possible as this will be visible when serving. Let it sit in freezer, with the acetate and in the cake pan, for at least 4+ hours. Once the ice cream has firmed up again, you should be able to easily pop the cake out in one piece from the cake pan with the help of the plastic wrap, and remove the acetate.

Italian meringue topping (optional):

1. Meringue base: Using the whisk attachment, start beating the egg whites and vinegar together until soft peaks form.

2. Sugar syrup: I’m using an Italian meringue method to partially cook the meringue as we won’t be baking it. Simultaneously as you start running the mixer with the egg whites, add the sugar and water to a saucepan and bring to a temperature of 235 F, otherwise known as the soft ball stage. If you meringue is going faster than your sugar syrup, turn down the speed of the mixer but don’t stop it.

3. Adding in the sugar: Once the sugar has come to temp, keep mixer on low as you pour in the sugar syrup into the meringue. Make sure to do this along the edge of the bowl where it meets the meringue. Once the sugar is in, turn the mixer back on high until the meringue reaches stiff peaks. Use this meringue to pipe immediately.

4. Optional torching: If you have a kitchen torch handy, quickly bronze the dollops of meringue and return cake to freezer for 30 min before serving.

la viña's basque cheesecake

apple tarte tatin

Basque cheesecake is the rebellious teenager of the cheesecake world. It breaks every rule in the book, and the result is a light and creamy cake with a deeply caramelized crust. It’s also incredibly easy to make - just mix it all together and throw it into a hot oven. Forget about the water bath or stress about cracks. You want all the cracks and the craggy edges. The cheesecake will rise substantially in the hot oven and settle back down into the nooks and crannies as it cools.

I added lemon zest to lighten up the cake, though the original La Viña version does not have any so add according to your personal preference. The cake is delicious the same day, or chilled straight out of the fridge, but make sure to let the cheesecake cool completely before slicing, as the middle may still be custardy while warm (not that it’s a bad thing). Serve with a cup of coffee and it will make your day!


La Viña Basque Cheesecake

makes one 8 inch cake

ingredients

4 packs (32 ounces) cream cheese, room temp

5 eggs

1 1/2 cups heavy cream

3/4 cup sugar

1 teaspoon salt

2 tablespoons flour

zest of one lemon (optional)

steps

Preheat oven to 425 F.

Mix it all together: Using the paddle attachment or vigorously by hand, mix the cream cheese until smooth with no lumps. Mix in the eggs one at a time, then adding in the heavy cream, sugar, salt, flour, and lemon zest until well incorporated. Scrape down the sides as you mix to avoid any lumps.

Prepare the pan: Line an 8 in. springform pan with an oversized piece of parchment paper. Don’t cut it to fit, as we want all the wrinkles and edges that form along the walls of the pan. Pour the batter into the parchment lined pan (it will be a very wet batter).

Baking the cake: Bake at 425 F for 40 - 50 minutes. The cheesecake should be browned across the top with the middle still jiggly. Let the cake cool completely (at least 2 hours) before serving.

blueberry lemon pie

apple tarte tatin

This recipe comes from Erin McDowell’s new cookbook, The Book on Pie. It is the type of pie to bring a smile to anyone’s face and the perfect antidote to a dreary winter day. The first thing you taste when you bite into a slice is an explosion of blueberry, followed by a bright pop of lemon with subtle hints of vanilla and cinnamon. Replacing the top layer of crust with fresh blueberries and fresh lemon zest basically makes this a fruit salad right?

A few tips for success:

  • The hardest part of this is letting the blueberry cool long enough to hold its shape when you cut out a slice. Give it at least 2-3 hours to cool out of the oven. (I think I’ve failed at this endeavor every time)

  • Yep, you didn’t read it wrong - the entire half lemon is added to the filling, not just the juice

  • The pie crust and filling can be separately made ahead of time

  • You can use fresh or frozen blueberries for the filling, just let the frozen blueberries defrost in the fridge overnight (or quickly zapped in the microwave if you can’t plan ahead like me).


Blueberry Lemon Pie

makes one 8 inch pie

ingredients

pie crust

1 1/4 AP flour

pinch of salt

1 stick cold unsalted butter, cut into 1 in cubes

6 tablespoons ice water + sprinkle more if needed

blueberry filling

5 cups blueberries

1/2 lemon

1 tablespoon vanilla paste

3/4 cup AP sugar

1/2 cup AP flour

1/2 teaspoon cinnamon

1/2 teaspoon salt

2 tablespoons unsalted butter

to finish

1 cup blueberries

lemon zest

mascarpone whipped cream (optional)

steps

pie crust:

Mixing dry ingredients with butter: Combine the AP flour and salt. Toss in the butter cubes (make sure the butter is as cold as possible) until the individual cubes are covered in flour.

Flatten the butter: Working quickly (so the butter doesn’t warm up too much), start flattening the butter pieces between your fingers until they’re the size of the walnut halves.

Hydrate: Drizzle in the ice water, and toss with the flour/butter mixture (like you would toss a salad - do not knead). The optimal hydration for your dough is to have it hold together in a ball with no floury streaks. If your dough is still too crumbly, add water slowly as a little water can go a long way. Form dough into a disk, wrap tightly and rest in the fridge for at least 30-60 min.

Roll out the dough: On a well floured surface, roll out the dough until it is 1 inch larger than your pie pan. Transfer dough into the pan, trim the excess dough to leave a 1 inch overhang. Fold the edge of the dough under itself and press down until you have a smooth ridge. Crimp the edges using whatever style you prefer - I pinched the dough between my thumb and index finger on one hand, and my index finger on the other, forming a wavy edge. Dock the dough with a fork, and let the dough chill in the freezer for 30 min. At this point, preheat the oven to 425F.

Par bake: Line the pie with parchment/aluminum, and fill with weights (pie weights, beans, rice etc.). Bake for 15 minutes, before removing the weights and continuing to bake for another 5-10 minutes until edges are brown and the bottom is cooked through. Set aside to cool.

blueberry filling:

Prepare the lemon: Remove the seeds. Roughly chop the half of a lemon including the peel, saving any lemon juice that squeezes out.

Cook the filling: In a medium pot, add the lemon we just chopped, 2 cups of blueberries, vanilla paste, 1/2 cup sugar over medium heat until the blueberries break down (8 - 10 minutes). Blend the mixture together until smooth. I used an immersion blender right in the pot. Bring mixture back to a simmer, and whisk in remaining 1/4 cup sugar with flour, cinnamon, and salt. Cook while whisking constantly until mixture comes to a simmer again and begins to thicken, 1 to 2 minutes. Stir in the remaining 3 cups of blueberries and butter. Let cool with plastic wrap directly on the surface.

Finishing the pie: Preheat oven to 425 F. Pour the blueberry filling into the par-baked crust and bake for 30 minutes. Once pie is cool to the touch, top with fresh blueberries, lemon zest, and some mascarpone whipped cream if desired. Let fully cool before serving.

Mascarpone whipped cream: Whisk a 50/50 mixture of mascarpone and heavy cream with honey to taste until soft peaks form.

ganbara's basque wild mushrooms

apple tarte tatin

In the coastal city of San Sebastian located in Spanish Basque country, you’ll find scores of bars serving pintxos, which are essentially the basque take on tapas. The counters of each bar is filled to the brim with plates of incredible small bites, often served on bread, along with a vast selection of options you can order from the kitchen. It is truly one of my favorite places in the world, and I could spend everyday hopping between bars filling up on pintxos, washed down with some txakoli, a local lightly sparkling wine poured from way up high.

Ganbara is an essential stop on a pintxos crawl in the heart of San Sebastian, so you’ve got to be assertive to get up front and get your order in amongst the crowded bar. You may be swayed by the mouthwatering spread across the bar (and if they have the carb tartlettes, definitely get yourself a few of those), but you’d be remiss to not order a plate of their seared wild mushrooms, or hongos a la plancha. Anthony Bourdain called it one of his favorite dishes, and I couldn’t agree more. The selection of mushrooms vary depending on the season, but they’re always seared in a garlic olive oil before topped with a fresh egg yolk and a light sprinkle of truffle salt. If you’re feeling extra fancy, you can add a piece of seared foie gras on the side as well. It’s a simple dish that highlights the earthy flavors of the wild mushrooms (that you probably paid a pretty penny for) brought together with the creaminess of the egg yolk.

DSC_4221.jpg

A few tips for success:

  • It can be hard to find wild mushrooms, but feel free to use any combination that you can locate. I used chanterelles (pricy but delicious) and king oyster mushrooms. If you live near one, Eataly is a great place to locate wild mushrooms.

  • Cook each mushroom type separately as different varietals cook at different rates.

  • Don’t crowd the pan - we want to get a nice sear on these mushrooms without overcooking.

  • Make sure to use an egg yolk from the highest quality egg you can find.

  • The recipe below is for a pintxo-sized portion, but can be easily doubled.


Ganbara’s Basque Seared Wild Mushrooms

makes an appetizer for 2

ingredients

1/2 pound mix of wild mushrooms (e.g. chanterelles)

2 cloves garlic, minced

1/4 cup high quality olive oil

salt & pepper

2 tablespoons finely chopped parsley

finishing salt (truffle or flaky salt), optional

1 egg yolk (high quality), optional

steps

Infuse the olive oil: Mix together the minced garlic with the olive oil and let it sit for 30 min.

Prepare the mushrooms: Because we are using wild mushrooms, be sure to clean the mushrooms with a wet cloth thoroughly. Slice mushrooms into bite sized pieces, not too small, and keep each type separate as we will be cooking them separately.

Sear the mushrooms: In a medium hot pan, add the olive oil only along with one type of mushroom at a time if you’re using a mix. Sprinkle with salt and pepper. Don’t move the mushrooms around the pan too much to get a nice sear. Once you have a nice color on them, throw in some of the minced garlic once the mushrooms are almost done for some extra flavor. Don’t add it too early or the garlic may burn. Finish with parsley once the mushrooms are done.

Plating: Plate the mushrooms by grouping the mushrooms by type. In the middle, add an egg yolk before sprinkling with some either flaky or truffle salt for an extra layer of earthy flavor. Serve immediately, and mop up all the extra yolk and juices with some bread.


blood orange meringue pie

apple tarte tatin

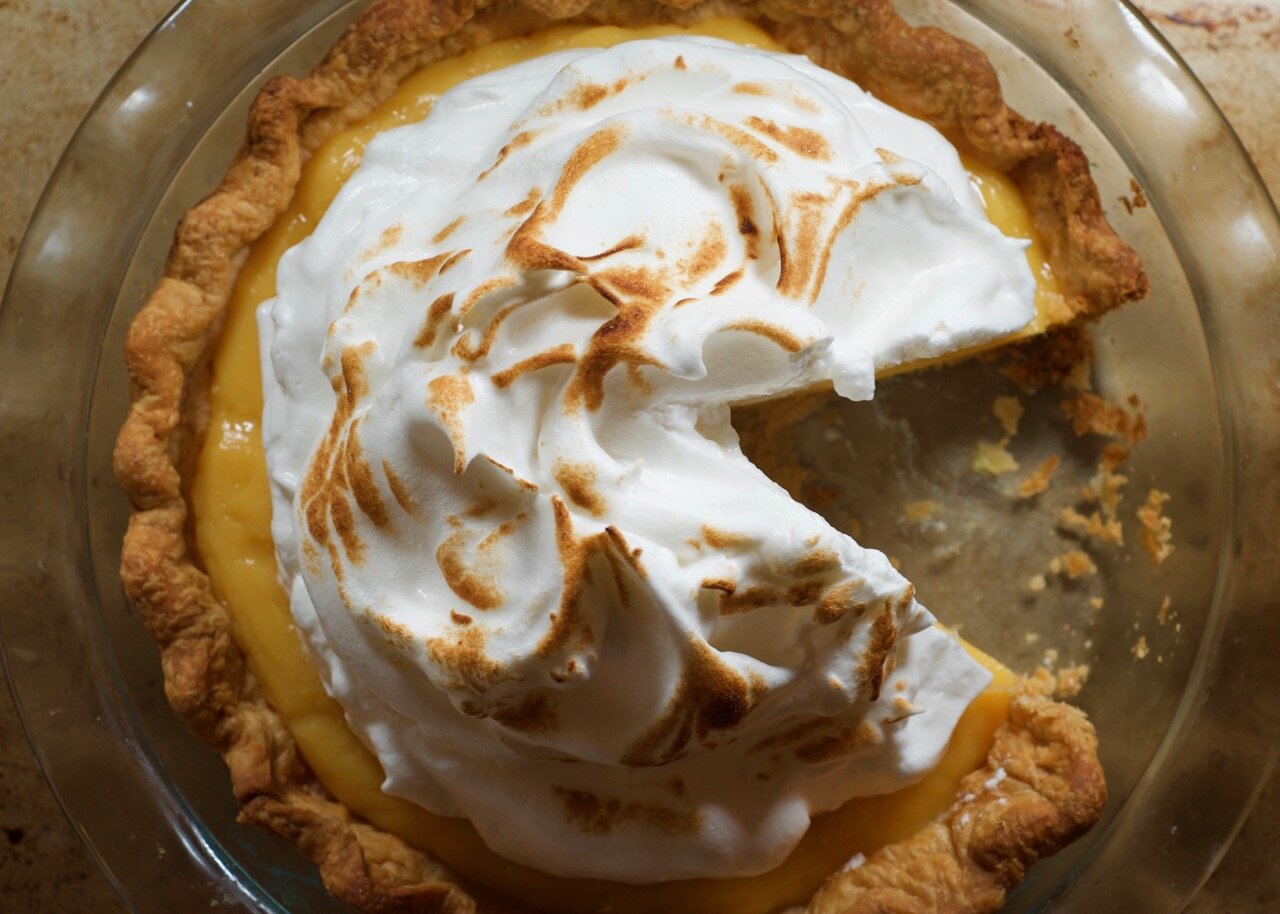
This pie is an easy alternative to the classic lemon meringue pie, using cold pressed blood orange juice which adds a more complex citrus note with a hint of bitterness. Topped with a mound of sky high airy meringue, this is the perfect antidote to those cold, wet dreary days.

DSC_4079.jpg

I use Erin McDowell’s all butter pie crust recipe for all my pies, which I’ve included below.

A few tips for success:

  • Don’t be afraid to properly hydrate your pie dough, I’ve found that a number of recipes often undershoot the amount of water needed for the dough to come together cohesively

  • The pie crust and filling can each be made ahead of time as we are making a fully cooked blind baked crust with a cooked curd.

  • I used a small kitchen blowtorch to toast the meringue, but if you don’t have one yet (I don’t love accumulating excess kitchen gadgets, but there is something incredibly satisfying with torching something!!), you can throw it under the oven broiler for a few minutes


Blood Orange Meringue Pie
makes 9.5 inch pie

ingredients

pie crust

1 1/4 AP flour

pinch of salt

1 stick cold unsalted butter, cut into 1 in cubes

6 tablespoons ice water + sprinkle more if needed

blood orange curd

1 1/2 cups blood orange juice

1/4 cup lemon juice (~ 1 lemon)

1/4 cup water

1 cup sugar

1/3 cup cornstarch

4 egg yolks (save the whites for the meringue)

italian meringue

2/3 cup sugar

1/4 cup water

4 egg whites (room temp)

1/2 teaspoon vinegar/lemon juice

steps

pie crust:

Mixing dry ingredients with butter: Combine the AP flour and salt. Toss in the butter cubes (make sure the butter is as cold as possible) until the individual cubes are covered in flour.

Flatten the butter: Working quickly (so the butter doesn’t warm up too much), start flattening the butter pieces between your fingers until they’re the size of the walnut halves.

Hydrate: Drizzle in the ice water, and toss with the flour/butter mixture (like you would toss a salad - do not knead). The optimal hydration for your dough is to have it hold together in a ball with no floury streaks. If your dough is still too crumbly, add water slowly as a little water can go a long way. Form dough into a disk, wrap tightly and rest in the fridge for at least 30-60 min.

Roll out the dough: On a well floured surface, roll out the dough until it is 1 inch larger than your pie pan. Transfer dough into the pan, trim the excess dough past 1 inch. Fold the edge of the dough under itself and press down until you have a smooth ridge. Crimp the edges using whatever style you prefer - I pinched the dough between my thumb and index finger on one hand, and my index finger on the other, forming a wavy edge. Dock the dough with a fork, and let the dough chill in the freezer for 30 min. At this point, preheat the oven to 425F.

Blind bake: Line the pie with parchment/aluminum, and fill with weights (pie weights, beans, rice etc.). Bake for 15 minutes, before removing the weights and continuing to bake for another 10-15 minutes until crust is golden brown. Set aside to cool.

blood orange curd:

Making the curd: In a saucepan, mix together the blood orange juice, lemon juice, water, sugar and cornstarch. Bring to a boil while whisking constantly until mixture begins to thicken.

Temper the egg yolks: Pour in a little of the orange curd and quickly whisk in with the egg yolks. Once thoroughly mixed, slowly pour the tempered egg yolks back in with the curd. Continue cooking on low heat while stirring until mixture is bubbling and thickened. Let cool, covered with plastic wrap directly on the surface to prevent a skin from forming.

italian meringue:

Preparing sugar syrup: In a saucepan over medium heat, bring the sugar and water to temperature of 235 F. When the syrup reaches 210 F, start whisking the meringue.

Whisking egg whites: In a separate clean bowl, start whisking the egg whites with the vinegar until soft peaks form. At this stage, the sugar should reach the right temperature. Slowly pour in the syrup with the mixer still running on slow, and bring the mixer back up to a high speed to continue beating until you reach stiff peaks.

putting it all together:

Fill the pie crust with the blood orange curd, leveling off the surface. Dollop the meringue over the curd, using the back of spoon to make decorative swirls. Give it a light toast with a blowtorch if you’d like, and serve immediately.

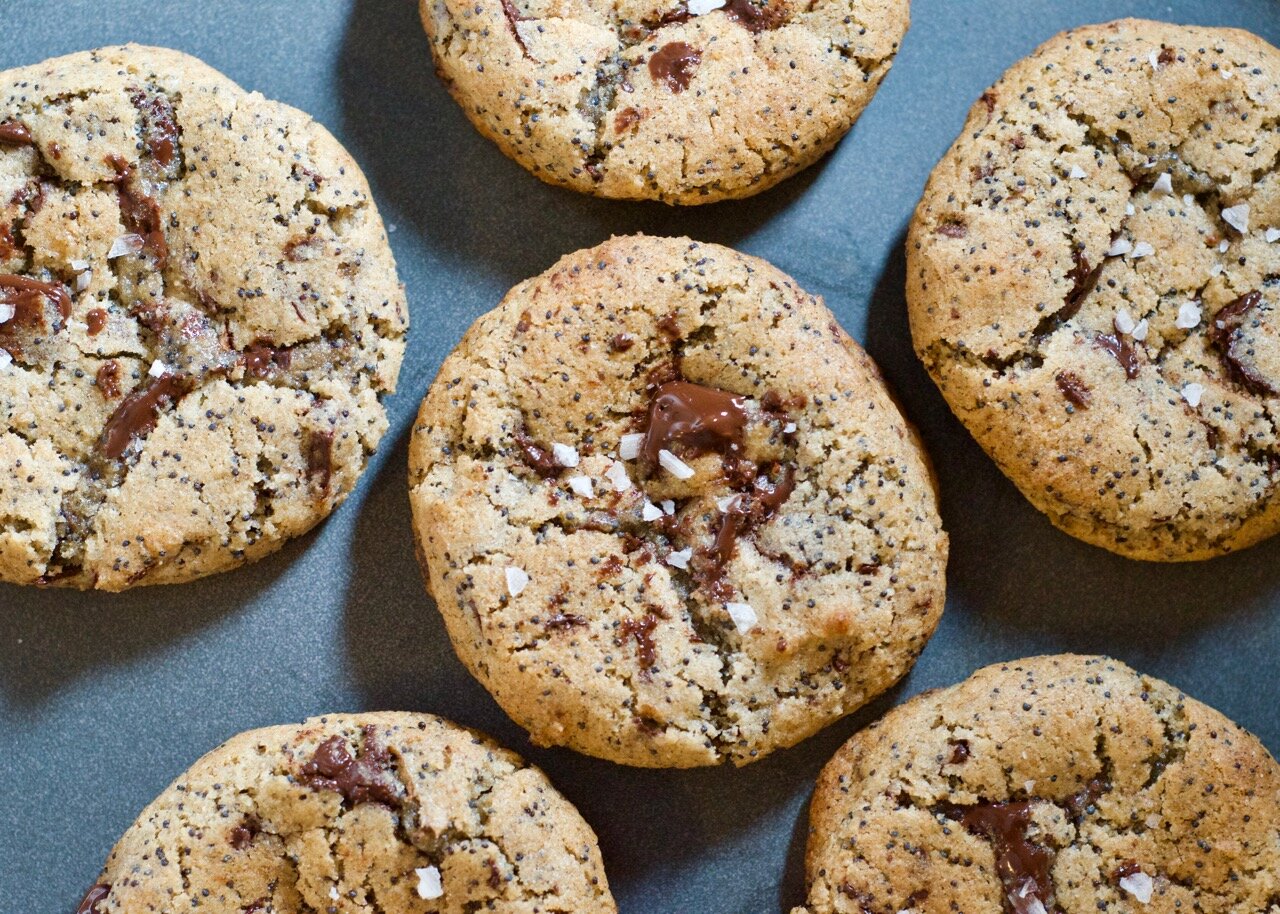
rye and poppy seed chocolate chunk cookies

apple tarte tatin

After a red eye flight from New York to Paris, I dropped my luggage off at my hotel and immediately headed out for my late lunch reservation at a little restaurant in the 11th arrondissement called Mokonuts. I was only in Paris for a few days before taking the train down to Bordeaux and this was the only reservation time available during my time in Paris, and no matter how bleary eyed I was coming off of the red eye, I was determined to make it to Mokonuts. If you google the name, you’ll find lots of hype around the husband and wife duo that run this charming cafe and it is certainly well deserved.

mokonuts paris
mokonuts duck breast

However, what they might be most famous for are Moko’s cookies. You don’t know what flavors you’re going to get every day, but it is guaranteed to be creative and delicious. Using unconventional flavors like miso or rye, Moko has reinvented the cookie. Next time i’m in Paris, Mokonuts will be my first stop again.

Dorothy Greenspan has published a recipe for a mokonuts cookie on NY Times (link) and the recipe below is a variation of that. The rye adds a nutty complexity that pairs perfectly with the bitter undertones of the dark chocolate, and the poppy seeds provide a little extra crunch. It’s quick and easy to whip up a batch, and even easier to keep some of the dough in the freezer so you can have freshly baked cookies at any time.

A few tips for success

  • Feel free to swap in additional add-ins like pumpkin seeds, nuts, cranberries etc. but be sure to a high quality chocolate. If you don’t like dark chocolate, feel free to swap in milk chocolate.

  • Tapping the still soft cookies right out of the oven helps give the cookies a chewier center


Rye & poppy seed chocolate chunk cookies
makes 7 cookies

ingredients

1/2 cup rye flour

1/4 cup AP flour

1/2 teaspoon baking powder

1/4 teaspoon baking soda

pinch of salt

4 tablespoons unsalted butter, room temp

1/4 cup sugar

1/4 cup brown sugar

1/2 egg, whisked

1/3 cup dark chocolate chunks

2 tablespoons poppy seeds

flaky salt

steps

Mixing dry ingredients: Combine the rye flour, AP flour, baking powder, baking soda, and salt.

Cream butter: Using the paddle attachment, cream together the butter, sugar, and brown sugar until light and fluffy and mix in the egg.

Mix and shape: Fold in the dry ingredients with the butter, in addition to the chocolate chunks and poppy seeds (along with any other additions you want to include). Divide the dough into 7 balls, and refrigerate for at least 3 hours. At this stage you can easily freeze the dough to bake at a later time.

Bake: Preheat the oven to 425 F. Set the dough balls at least 2 inches from each other, sprinkle on some flaky salt and bake for 10 minutes. Let the cookies cool for a minute, before gently flattening the center with a spatula. The cookies will be very delicate at this stage, and will firm up as it cools. Serve warm while chocolate is still melted.

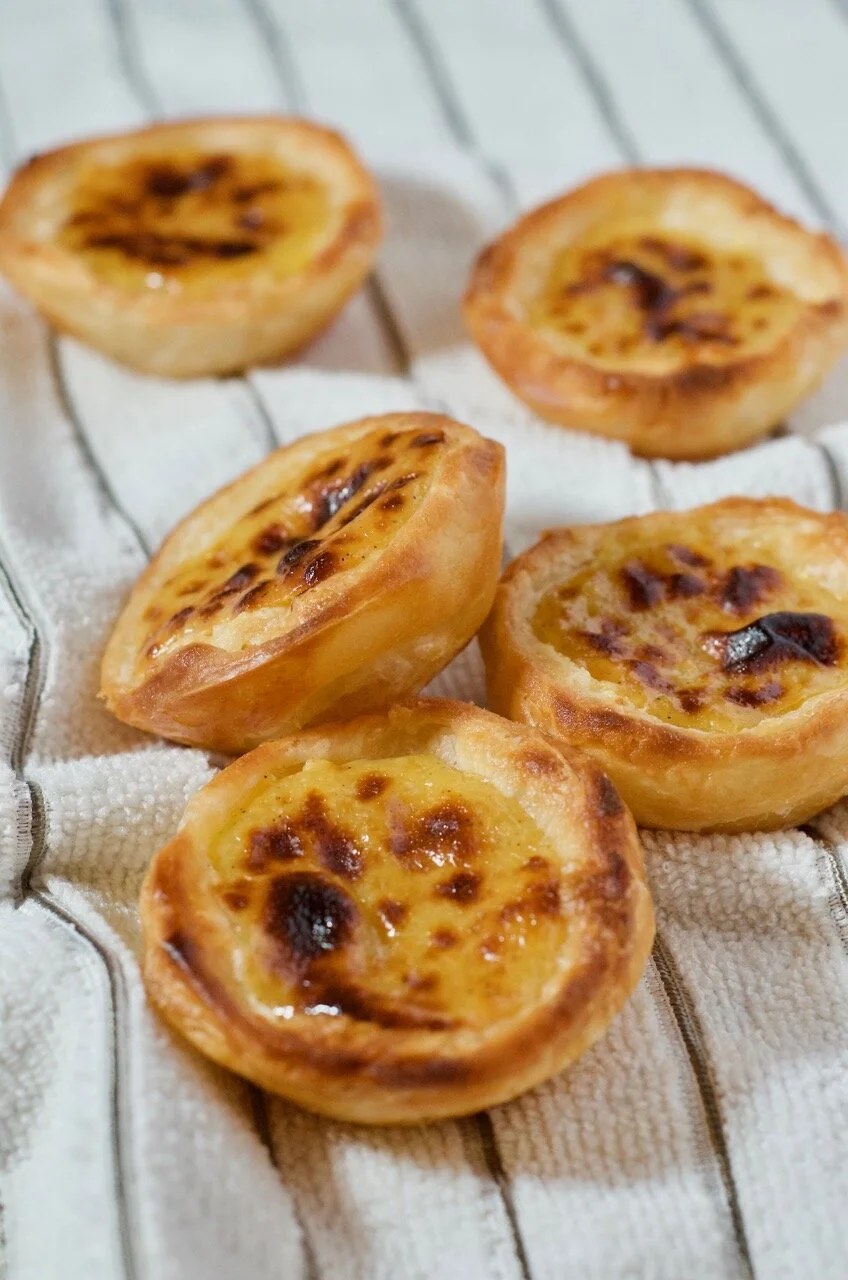
pasteis de nata (portuguese custard tarts)

apple tarte tatin

Pasteis de nata are delightful Portuguese custard tarts with an extremely flaky crust, a burnished caramelized top, and filled with a smooth rich custard. You can find them in every cafe across Lisbon, and most famously, at Pasteis de Belem. Overlooking the Atlantic ocean in the neighborhood of Belem, a monastery began selling these tarts nearly 200 years ago. They’ve kept their original recipe a closely guarded secret, but I’ve come up with my version below.

What is the difference between a Portuguese custard tart and a regular custard tart?

A Portuguese custard tart stands out for its exceptionally flaky crust that shatters are you bite into it. The custard is rich and creamy with notes of lemon, cinnamon and vanilla. Unlike other custard desserts that are often cooked gently, Portuguese tarts are quickly cooked in a blazing hot oven reaching impossibly high temperatures that home ovens can not reach. However, by pre-cooking the custard we are able to cook off some of the excess moisture on the stove top before hitting the oven allowing us to get that deliciously burnished crust on top of the custard.

How long do the tarts keep?

The tarts at best served fresh out of the oven. However, as I’ve learned from carrying these tarts home in my carry on from Lisbon, these freeze perfectly and if you just reheat them in the oven, they taste like they were freshly baked.

A few tips for success:

  • If your custard is too liquid, make sure to thicken up the mixture on the stovetop before baking. Don’t skip this step, or else you won’t get the toasty lookin’ tops (like the traditional ones do).

  • You want to bake these tarts at as high of a temp your oven will go (my oven goes to 550 F). Keep a close eye as it cooks quickly at these temperatures, and if you see your pastry cooking more quickly than your custard is caramelizing, finish it off with a few minutes under the broiler.

  • Adjust the cooking time based on what mold you use. I used smaller tart molds, but you can also use a muffin tin. Since the tart molds make smaller tarts, adjust the cooking time if you’re making larger tarts.

  • You can make the pastry dough and custard ahead of time, so that it’s less of a project to make these tarts.


Pasteis de Nata
makes 10 - 12 tarts

ingredients

for the pastry dough:

1 cup AP flour + 2 tablespoons

pinch of salt

1/2 cup water

1 stick softened butter

for the custard filling:

1.5 tablespoons flour

1/2 cup milk + 2 tablespoons

3 egg yolks

2/3 cup sugar

1/3 cup water

1 cinnamon stick

lemon peel

1/4 teaspoon vanilla paste

To finish:

icing sugar and cinnamon (optional)

steps

Preparing the dough

Mix dough: In a medium sized bowl or using a stand mixer, mix together the 1 cup of flour, salt, and water. Mix with dough hook of knead for a few minutes until dough comes together. The dough should be soft and tacky, but shouldn’t stick to your hands - add 2 more tablespoons flour if too sticky. Cover dough, let rest for 15 min.

Lamination: Clear out a large workspace, and dust generously with flour. The dough is relatively wet and will stick easily. The lamination can be broken down into 3 stages, and make sure to keep your work surface well floured throughout each roll. Use a bench scraper to help you maneuver the dough.

a. Roll out dough into approx. 12 in square - it’s ok if it’s not perfect. Gently spread 1/3 of the butter across the left 2/3 of the dough, keeping an inch border around the edge. Using the bench scraper, fold the right unbuttered 1/3 over the middle, followed by the left 1/3 like you would fold an envelope. Dust off any excess flour, push out any air bubbles in between the folds, and seal in the butter around the edges.

b. Rotate the dough 90 degrees clockwise, so that the seam is now facing you. Roll the dough back out to a 12 in square, and repeat the same buttering and folding process.

c. For the final roll, rotate dough 90 degrees clockwise once more. With the edge facing you 12 in wide, roll out dough into a rectangle that’s 14 in long. Spread the rest of the butter across the entire dough. Starting from the edge closest to you, roll the dough up into a tight log, dusting off the excess flour as you go. Trim off the uneven ends of the log, cover in plastic wrap, and let it rest in the fridge for 30 minutes as you start on the custard.

Preparing the custard

Preheat oven to 550 F

Prepare sugar syrup: In a saucepan, add the sugar, water, cinnamon stick, and lemon peel. Without stirring, bring to a simmer until it reaches 225 F. Set aside.

Start custard: In another saucepan, whisk together flour and 2 tablespoons milk until you get a paste with no lumps. Slowly mix in the rest of the milk as you continue to whisk. Cook over low heat, continuing to stir, until the milk thickens and the whisk leaves tracks.

Mix in eggs: In a separate bowl, first whisk the egg yolks. Fold in some of the hot milk, quickly whisking with the egg yolks to avoid cooking the eggs, before mixing the eggs with the rest of the milk mixture in the pot. Mix in the sugar syrup, leaving out the cinnamon stick and lemon peel, along with the vanilla paste. You should now have a very liquid mixture. Bring the pot back over low heat, continuously stirring until the custard thickens up enough to coat the back of a spoon.

Making the tarts

Transferring dough into the molds: Retrieve the log of dough from the fridge, and cut into 2/3 inch sections if you’re using mini tart molds - cut them into 1 inch sections if using a muffin tin. Arrange them cut side up in lightly greased molds, where you can see the swirls of butter. Using your thumb, press the dough down in the middle, and continue pressing the dough along the walls of the mold. If sticking, lightly dampen your fingers with water. The dough should be thin around the bottom, but make sure not to make any holes.

Filling and baking the tarts: Fill the tarts 3/4 full with the cooled custard. Bake them for ~8 minutes in the preheated oven, and finishing the last 2 minutes with the broiler. Keep a close eye on the tarts as they bake, as you want a well cooked pastry without burning it.

Let cool for a few minutes, before removing pastries from the mold. Serve warm, with some optional powdered sugar and cinnamon sprinkled over top as the Portuguese do.


pear torte

apple tarte tatin

Inspired by the famous plum torte recipe by Marion Burros (which has quickly become one of my favorite recipes), I’ve made a fall variation for when the plums disappear and are replaced by a bounty of pears. It’s quick and easy to throw together, and a fantastic fall treat to pear (get it??) with a cup of coffee. Alternatively, we ate this with a scoop of ice cream because why not.

A few tips for success

  • Use ripe but still firm pears, and don’t over poach them to maintain a better texture.

  • After coming out of the oven, feel free to glaze the pears with some simple syrup and top with some powdered sugar


Pear Torte
makes a 9 in. cake

ingredients

for poaching the pears:

3 pears, peeled

4 cups water

1 cup sugar

half a lemon

1 cinnamon stick

and the rest:

3/4 cup AP flour

1/4 cup almond flour

1 teaspoon baking powder

pinch of salt

6 tablespoons butter, room temp

1/2 cup sugar + 2 tablespoons

2 eggs

2 tablespoons sour cream or yogurt

zest and juice of one lemon

1 teaspoon cinnamon

steps

Poaching the pears

Prepare poaching syrup: In a sauce pan, bring the water, sugar, lemon, and cinnamon stick to a simmer.

Poach the pears: Carefully add the pears to the liquid and simmer for 10 minutes. Remove from the heat, and let the pears cool in the poaching liquid. Once cool, remove pears from the liquid, cut in half, and scoop out the core and stem. Slice each pear half into thin horizontal slices, slightly fanning out the slices but keeping them in the shape of the pear halves.

Making the cake

Preheat oven to 350 F

Mix dry ingredients: Sift together the flour, almond flour, baking powder and salt.

Cream butter: Using the paddle attachment, cream together the butter and sugar until light and fluffy. Mix in the eggs one at a time. If your mixture starts curdling, alternate adding the eggs with the dry ingredients and the sour cream. Continue folding in the rest of your dry ingredients along with the lemon zest.

Assemble: In a parchment line cake pan, spread the batter evenly - this will be a relatively thick batter. Arrange the slices pear halves fanning out from the center, gently nestling the pears in the batter but don’t push down too hard as the batter will rise around the pears. Arrange them tightly but neatly - I was able to fit 5 pear halves, leaving one pear half to snack on. Sprinkle juice of half a lemon over the pears, and sprinkle the leftover sugar and cinnamon over top.

Bake: Bake in preheated oven for 50 - 60 minutes, until cake is rich golden crust. Let cool for 15 minutes, and dig in! Serving this immediately has a fantastic crumb topping but it’s also delicious after refrigerating overnight.

flaky austrian apple strudel (apfelstrudel)

apple tarte tatin

A delicately flaky, well balanced apfelstrudel is the Austrian answer to the all American apple pie.

Austrian pastries don’t get nearly enough love, and I admit I too often turn to French desserts when I think of pastry. In Vienna, there’s a cafe called Demel where I discovered the apfelstrudel amongst a mouth watering selection of cakes. It’s rich enough to satisfy as dessert, but also light enough with a cappuccino for breakfast.

I wanted to make a version of apfelstrudel that stayed true to the original and included the instructions for making the dough below. It can be a little tricking managing the dough, and it took me a few tries before I succeeded. Alternatively, you can use store bought phyllo dough to save time. The texture won’t be the same, but it’ll still be delicious nonetheless.

apple strudel apfelstrudel
apple strudel

A few tips for success:

  • Don’t be afraid to over-knead your dough. The more gluten you form, the easier it will be to stretch it out without ripping the dough later.

  • Feel free to get creative with the filling with various spices, nuts, raisins. And if you don’t like any of the components, feel free to omit!

  • Make sure to use an apple varietal that is firm so that the apples don’t turn to mush while baking.


Austrian Apple Strudel
makes one roll - serves 5

ingredients

for the dough:

1 cup bread flour

pinch of salt

1/2 egg, whisked

1/3 cup warm water

1 tablespoon vegetable oil

1/2 teaspoon vinegar

for the filling:

4 medium sized firm apples (e.g. pink lady)

lemon juice & zest (from half a lemon)

1/4 cup toasted and chopped nuts (walnut, hazelnut)

1/2 teaspoon cinnamon

1/4 teaspoon nutmeg

1/4 cup brown sugar

pinch of salt

1/4 cup raisins (approx. one of the small boxes)

2 tablespoons rum or water

3 tablespoons butter

2/3 cup breadcrumbs

1/4 cup sugar

To finish:

3 tablespoons butter, melted

icing sugar to dust

steps

Preparing the dough

1. Mix dry ingredients: In a medium sized bowl, mix together the flour and salt

2. Add liquids: Mix together the egg, water, oil, and vinegar in with the flour until you have a shaggy dough. On a flat surface, start firmly kneading the dough until it forms a smooth ball, alternating between slapping the dough on the table. The texture should be soft enough to be tacky without sticking to your hands - if it’s too wet, add more flour as you knead. The goal is to activate the gluten so that we can create a very thin stretched out dough later.

3. Rest: Form the dough into a ball, grease lightly with some vegetable oil, and let it it room temperature in a covered bowl for 30 min to let the gluten relax.

Preparing the apples

Preheat oven to 375 F

1. Prepare apples: Peel, core, and cut apples into thin slices or use a mandolin. Toss with lemon juice, lemon zest, nuts, cinnamon, nutmeg, brown sugar and salt. Set aside - the apples will release some of their juice as it sits.

2. Soak raisins: Soak the raisins in rum (if using - use water if you’d rather not use rum) for 10 minutes. Mix with apples. Optional.

3. Toast breadcrumbs: Melt the butter in a small saucepan on low heat. Mix in the breadcrumbs until well incorporated - the breadcrumbs should look sandy. Continue cooking on low, stirring the breadcrumbs until they are lightly toasted. Keep a close eye on the breadcrumbs, they burn easily. Let cool, and mix with sugar.

Putting it all together

1. Stretch out the dough: Clear out plenty of counter space as the dough can get very large. Lay out a clean tablecloth or dish towel and lightly dust with flour. Start by rolling out the dough with a rolling pin. Once it is relatively rolled out, start stretching the dough out with your hands, taking care to avoid any rips. Slip your hands underneath, and with the dough over your knuckles and the assistance of gravity, gently stretch out the dough like you would with a pizza. Take care to stretch out the edges, as the middle tends to stretch out more easily. Dust with flour to prevent dough from sticking to itself as it becomes more stretched out. You should continue until the dough is thin enough to see through it. Trim off any edges that are thicker.

6. Arrange apples: At one end of the stretched out dough, sprinkle half the breadcrumbs, leaving enough space around the edges to initially cover half the apples (about an inch around the sides, and 2 inches at the front). Leave any of the excess liquid that has accumulated in the bowl. Arrange the apples on top of the breadcrumbs in a log-like shape, and top with the rest of the breadcrumbs.

7. Butter her up: Brush the 3 tablespoons melted butter carefully over the uncovered dough. Be gentle as the dough can be quite thin in areas. Keep the leftover butter to brush at the end.

8. Roll up the strudel: Wrap the edges of the dough around the short ends over the apple mound. With the help of the kitchen towel, roll the log down the remaining dough. Apply some pressure to ensure a snug log. Transfer over to a baking sheet lined with parchment with the seam side down. Generously brush the top with the remaining butter.

9. Bake: Bake the strudel for 30-40 minutes, until the crust is golden brown. If you have some extra melted butter left, feel free to give it an extra brush of butter for extra crispiness after the first 15 minutes.

10. To serve: Let the strudel cool for 20 minutes before serving. Cut into 4-5 servings, and generously sprinkle with icing sugar. Serve with some whipped cream or creme fraiche. Enjoy!


apple tarte tatin

apple tarte tatin

As we head into fall, I’m just sitting here wondering where the summer went? While I didn’t get to take some of the bigger vacations I had planned, this has been an unexpected opportunity for us to explore our own backyard a little more. We’ve spent the summer visiting farms throughout the Hudson Valley and gathering the seasonal produce as we went from strawberries and asparagus to blueberries and now peaches and corn. I’m a little sad to see the long summer days go, but as Taylor Swift said so wisely, “August sipped away like a bottle of wine”.

apple tarte tatin dessert

However, with the crisp air comes apple season! As you start to haul home your bags of freshly picked apples, this is the perfect time to get a little creative and instead of making a traditional apple pie, why not try a tarte tatin? It may be a few extra steps, but it is 100% worth it. The apples are cooked in a rich caramel until they melt in your mouth and topped with a buttery, flaky pastry crust before being flipped upside down to serve. Cooking the apples in caramel gives you a deep, rich flavor that you don’t get in regular apple pie.
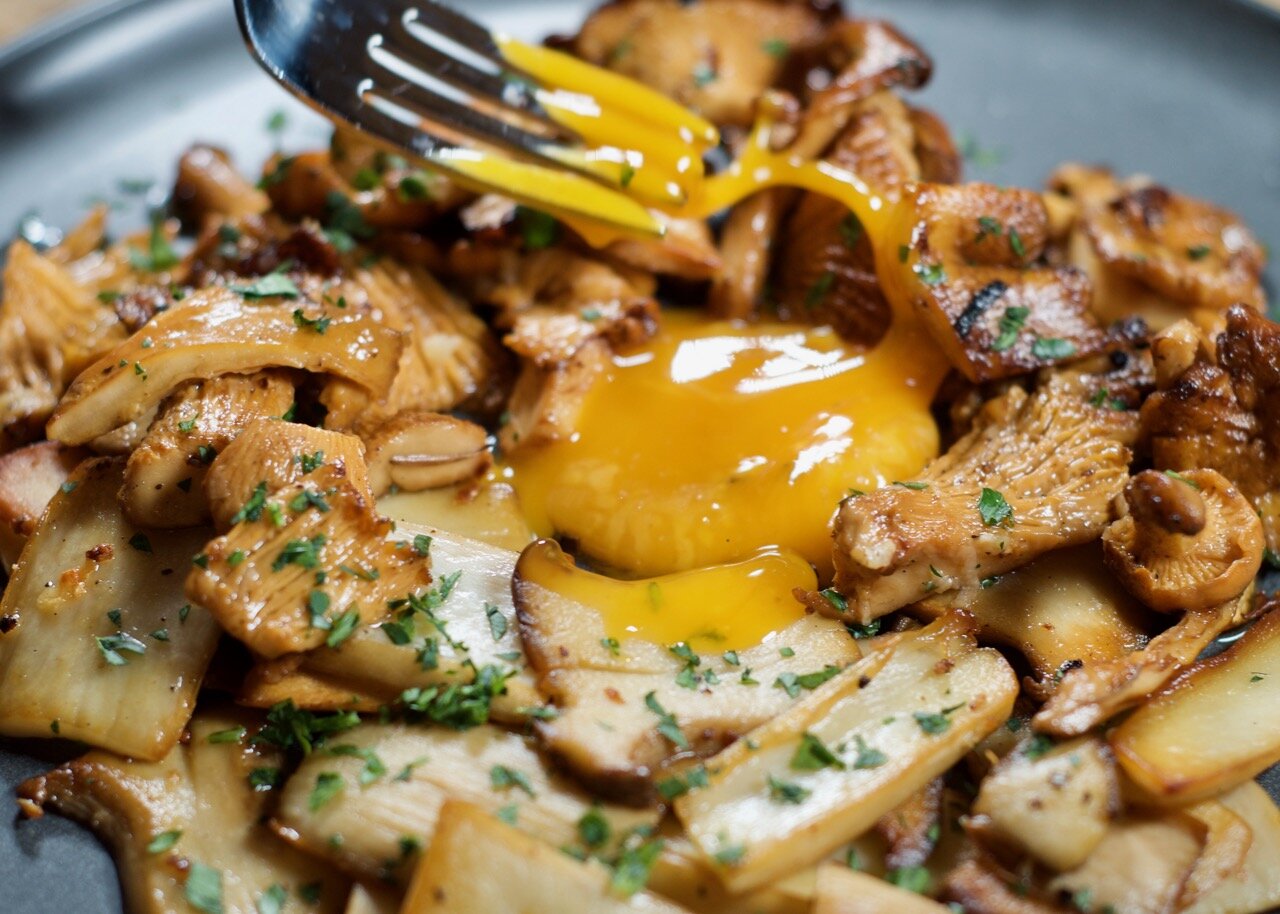
For the crust, you can use either a pie-based pastry or puff pastry. I’m making a “rough puff”, which is essentially a cheater’s puff pastry, by making a few adjustments to the basic pie crust recipe to get a little more flakiness. While some recipes suggest making everything in one oven safe pan, I’ve actually elected to first cook my apples down in a large pan, before sending it into the oven in a round cake pan. The walls help the apples fit more snugly, and the lighter, more compact cake pan makes it easier to flip at the end.

DSC_3686 (1).jpg
DSC_3748.jpg

A few tips for success:

  • Use firm apples that will hold their shape. The first time I tried with granny smith apples, and the apples just dissolved into applesauce. Not pleasant.

  • Keep the dough cold throughout the rolling process. If you feel it warming up or the dough starts to feel greasy, stick it back into the fridge for 20 minutes before continuing.

  • Bake in a different pan than you use to cook the apples. It’s easier to use a larger pan to cook down the apples, and you have the flexibility to thicken the caramel sauce without overcooking the apples if needed.

  • When cutting out the dough shape, keep in mind the dough may shrink a bit in the oven so give yourself a little more to work with.


Apple Tarte Tatin
makes one tart

ingredients

for the pie crust:

1 1/4 cup flour

1/2 teaspoon salt

1 stick unsalted butter, chilled and cut in 1/2 in cubes

4 - 5 tablespoons ice water

for the filling:

6 medium sized firm apples (e.g. pink lady)

lemon juice (from half a lemon)

1 teaspoon cinnamon

2/3 cup sugar, sifted

3 tablespoons cold butter, cubed

steps

Preparing the pie crust

1. Mix dry ingredients: In a medium sized bowl, mix together the flour and salt

2. Incorporate butter with flour: Toss the butter with flour mixture until butter pieces are covered. Flatten the butter cubes either between your fingers or the palm of your hands. Continue until the butter pieces are the size of walnut pieces.

3. Hydrate: Sprinkle the ice water into the mixture one tablespoon at a time, using your fingers to lightly toss the flour in between water additions (use a light touch, similar to how you would toss a salad). At this stage, you want to add just enough water for the dough to come together. Once you’ve added 4 tablespoons of water, you may need to add a little more so continue to sprinkle water on the remaining dry spots. A properly hydrated dough should be able to stay together but not tacky to the touch. If butter has started to melt, stick the dough back into the freezer for a few minutes.

4. Fold: To create even more layers + help the dough come together, roll out the dough and using a bench scraper, fold it back over itself in thirds (like an envelope). Turn 90 degrees and repeat. Cover with plastic wrap and refrigerate for 30 min, before repeating the folding process (rolling out twice in each turn) two more times. It is important to keep the dough cold, to prevent the butter from melting into the dough. Keep refrigerated until ready for use.

Preparing the filling

Preheat oven to 400 F

1. Prepare apples: Peel, core, and cut apples into quarters. Toss with lemon juice and cinnamon.

2. Make caramel: Over medium heat, sprinkle half the sugar into the pan in thin, even layer. Do not disturb, as the sugar starts to melt and caramelize. Sprinkle in the rest of the sugar, and turn heat down to low to prevent caramel from burning. Continue cooking until caramel reaches a rich amber color.

Caramel tips: Use a dry pan with no water. Avoid stirring, though it’s fine to use a spatula to get all the sugar around the edges incorporated.

3. Add butter: Whisk in the butter cubes. The caramel will initially look like its seizing up, but as you continue to whisk, it will smooth out and the color will turn more toffee like.

4. Cook apples: Add the apple quarters to the caramel, with heat on low simmer. Mix so that all the apples are tossed in the caramel. As the caramel touches the cooler apples, they may harden at first but don’t worry, as the apples start to release their juices, the caramel will loosen up into a syrup. Continue cooking the apples for 10 - 15 min, until the apples have softened up and are no longer crispy. Let cool for 10 minutes.

5. Roll out the crust: Roll out the pastry dough to just under 1/4 inch thickness. Cut out a circle, leaving 1 extra inch around the circumference of your pan. Set aside.

6. Arrange apples: Transfer the apples into the cake pan, and arrange the apples with the cut edge facing up. Keep the apples fit snugly, with about 2/3 overlap. Spoon remaining caramel sauce over the apples. Transfer the pastry circle you just rolled out over the apples, tucking in the dough around the edges. If your apples are still a little warm, your dough may get soft quickly and it may be easier to use a spatula to help tuck the dough in around the edges.

7. Bake for 30-35 minutes, until pastry is golden brown. If serving immediately: let cool for 15 min, place a plate over the pan, and quickly flip the pan over. If serving later, reheat the pan to loosen up the caramel (the apples can get stuck if the pan if the caramel has thickened too much) before flipping. Serve with some vanilla ice cream or whipped cream.


lemon pistachio tart

lemon pistachio meringue tart

While we’ve all been staying home this summer, there is nothing like a lemon tart that will transport you straight to the streets of Paris. With a sweet buttery crust, bright zesty lemon cream, and an airy meringue, this is the kind of lemon tart that belongs on an outdoor cafe table along the streets of Saint Germain. The best part? It’s a dangerously simple recipe that you will make over and over again.

This recipe is adapted from Desserts by Pierre Hermé, a source I would trust with my life on all things French patisserie. The recipe for the pate sucrée (the tart crust) makes enough for 3 tarts, but they freeze wonderfully for future baking projects. I’ve adjusted the lemon cream recipe to reduce the amount of butter, because there was an obscene amount of butter, but don’t worry, the result is still a silky, creamy filling with just a little less guilt.

The meringue and pistachios are optional, but both elements really help balance out the strong lemon flavors of the cream. You can use either a fluted tart pan with the removable bottom, or in my case, I’ve elected to use a tart ring for a more streamlined look.


Lemon Pistachio Tart
makes one 9.5 inch tart

ingredients

for the pate sucrée (tart dough):

2.5 sticks (10 ounces) unsalted butter, room temp

1 1/2 cups powdered sugar, sifted

1 1/2 cups almond meal, lightly packed

1/2 teaspoon salt

1/2 teaspoon vanilla bean pulp (optional)

2 large eggs, room temp

3 1/2 cups AP flour

for the lemon cream filling:

1 cup sugar

zest of 3 lemons

4 large eggs

3/4 cup lemon juice (4-5 lemons)

1 stick unsalted butter, cut into chunks

for the meringue (optional):

4 egg whites. room temp

1 teaspoon white vinegar

1 cup sugar

1/4 cup water

1/4 cup chopped roasted pistachios

steps

Preparing the tart dough

1. Cream butter: Using the paddle attachment of a stand mixer, beat the butter until creamy and add in the sugar, almond, salt, and vanilla bean if using until well mixed. Continue to beat in the eggs one at a time, making sure to scrape down the sides.

2. Add in flour: With the mixer on low, mix in the flour in 2 or 3 additions until just incorporated - you don’t want to overmix at this step and create a tough dough. Divide the dough into 3 disks and refrigerate at least 2 hours.

3. Shape the dough: Take out one of the disks from the fridge to slightly soften up for 10 min. On a floured surface, roll out the dough to 1/8 - 1/4 inch thickness. If you’re having trouble with the dough cracking, roll out the dough between two sheets of parchment paper. To transfer the rolled out dough over to the tart ring, lightly roll up the dough over a rolling pan and unroll over the tart ring. Run the rolling pin across the top to cut off the extras. Don’t stretch the dough to fit as it will likely shrink in the oven, and if you have any spots missing, use any of the extra dough to patch those right up like you’re using play doh. Prick the dough all over with a fork to prevent air bubbles, and quickly pop back into the fridge for 30 min.

Preheat oven to 350 F.

4. Parbake: Line the dough with parchment and fill with dried beans/rice. Bake for 20 min. Remove parchment with the dried beans/rice and bake another 5-7 minutes until golden.

Lemon cream

1. Mixing: In a large bowl, rub the sugar and lemon zest together until fragrant. Whisk in the eggs, then followed by the lemon juice.

2. Thickening the cream: Using a double broiler, with the bowl over a pot of boiling water, continue stirring the lemon mixture until it thickens where the whisk is leaving tracks (around 180 F). Be patient - the mixture will remain quite liquid until it nears the right temperature, and can take around 10 minutes. Keep an eye on it to avoid overcooking.

3. Adding in the butter: Once lemon mixture has reached the right consistency, whisk in the butter until it has dissolved. Bonus: do this step in a blender to create an extra airy and smooth cream.

Optional: Push the cream through a sieve to remove any lumps.

4. Cool: Line the surface directly with plastic wrap to avoid a skin forming, and let it come to room temperature.

Meringue

1. Meringue base: Using the whisk attachment, start beating the egg whites and vinegar together until soft peaks form.

2. Sugar syrup: I’m using an Italian meringue method to partially cook the meringue as we won’t be baking it. Simultaneously as you start running the mixer with the egg whites, add the sugar and water to a saucepan and bring to a temperature of 235 F, otherwise known as the soft ball stage. If you meringue is going faster than your sugar syrup, turn down the speed of the mixer but don’t stop it.

3. Adding in the sugar: Once the sugar has come to temp, keep mixer on low as you pour in the sugar syrup into the meringue. Make sure to do this along the edge of the bowl where it meets the meringue. Once the sugar is in, turn the mixer back on high until the meringue reaches stiff peaks. Use this meringue to pipe immediately.

Putting it all together

Now that you have all the components ready, fill the tart shell with the prepared lemon cream and level off using an offset spatula (or any other long flat utensil of your choosing). Using a piping bag fitted with a round piping tip, pipe round dollops of the meringue in circles on top of the lemon cream, reserving the center for the chopped pistachios. Serve immediately! But it will keep will in the fridge overnight as well.

Optional: If you own a blow torch for some reason, this is the time to break that baby out and give it that meringue some nice color. I had only recently acquired one myself, and have had way too much fun with it.

matcha macarons

matcha green tea macarons

While I’m lucky enough to live in the vicinity of both Ladurée and Pierre Hermé (which is my personal favorite) here in New York, I still love taking the time to make my own macarons. There’s a certain joy in clearing an afternoon and embarking on a challenging baking project. It can take some time to figure out the technique but after all that work, you’re left with these incredibly light meringue treats which are the perfect vehicle for any flavor.

The flavor from the matcha white chocolate ganache imparts a lovely bitter undertone to the inherent sweetness of macarons and the adzuki beans add an earthiness to complement the matcha. The flavor combination of green tea + adzuki beans is commonly found in Asian desserts, but if you can’t locate any, feel free to omit and stick with the green tea white chocolate ganache.

The recipe below calls for the french macaron method, which is typically my go-to as I sometimes get annoyed by the extra steps and clean up of making the sugar syrup for the italian method. I’m always looking for ways to minimize the number of dishes I have to wash!

dsc_1386.jpg

Matcha Green Tea Macarons
makes 12 macarons

ingredients

for the macaron shells:

50 g almond meal

50 g powdered sugar

5 g matcha green tea powder, plus extra to sprinkle

40 g egg whites (1 egg), room temp

1/2 teaspoon white vinegar

40 g sugar

for the matcha white chocolate ganache filling:

50 g white chocolate, preferably Valrhona

50 g heavy cream

1 tablespoon matcha powder

for the adzuki bean filling (optional):

1/4 cup adzuki beans

boiling water

1/4 cup sugar

steps

1. Mix dry ingredients: in a medium sized bowl, sift the almond meal, powdered sugar, and green tea powder together.

2. Make the meringue: Using the whisk attachment of a stand, start beating the egg whites and vinegar, which helps stabilize the egg whites. Once large bubbles start to form, slowly pour in the sugar as you continue beating the egg whites until the meringue is glossy with medium peaks.

3. Combine: Using a spatula, fold 1/3 of the meringue into the almond mixture until well mixed. Continue 1/3 at a time until all the meringue is incorporated. In the initial stages of mixing the meringue, you don’t have to be as gentle.

4. Macronage: This is where you have to take your time. Gently fold the mixture, making sure scrape from the edge of the bowls. As you continue folding the mixture and the meringue deflates, you will see the meringue become glossy and form ribbons when you lift the spatula. Stop mixing when the ribbons last for around 20 seconds before sinking back into the batter. I personally like to stop mixing one or two folds short, knowing i’ll deflate the mixture a bit more when I go to fill the piping bag and as I’m piping out the macarons.

5. Piping the macarons: Pipe the macarons on a half sheet lined with silpat/parchment paper using a piping bag with a piping tip similar to the Wilton 2A tip. If using parchment paper, use a little of the meringue in each corner to stick the paper in place. Let the macarons rest until a dull skin forms on top (this can take anywhere between 15 min - 1 hour depending on the humidity). Preheat the oven to 350 F as the macarons rest.

Optional: Sprinkle some more matcha powder over the macarons using a sieve.

6. Baking: Slip an empty baking sheet in the rack below to help moderate the temperature. Bake the macarons for 5 minutes, or until you see the feet start to form around the edges. Bring the temperature down to 300 F, and rotate the pan to avoid lopsided macarons from uneven heat zones in the oven. Bake for another 8-10 minutes, until the macarons no longer move when gently nudged. If you’re unsure, it’s safer to err on the side of slightly overbaking as it’ll self correct once you add the filling and let it sit in the fridge overnight. Let macrons cool completely before filling.

7. Ganache: Melt white chocolate over double broiler. Simultaneously, heat heavy cream until almost boiling. Pour a little bit of the heavy cream into the matcha powder and mix to create a paste. Once you have an even paste with no lumps of matcha powder, stir in the rest of the heavy cream. Combine with the melted white chocolate, and let it cool until it reaches a pipable consistency.

8. Adzuki bean filling: In a sauce pan, add the adzuki beans with just enough boiling water to cover the beans. Bring water to a boil again, and simmer until beans are tender and start to lose their shape. Mix the sugar, adjust to taste. Make sure all the liquid has cooked off (or else it’ll make the shells soggy) and let it cool.

9. Construction: Pipe the white chocolate ganache in a circle on one macaron shell, with some of the adzuki beans in the middle if using. Top with second macaron shell. Best served at room temp after refrigerating overnight in airtight container.