key lime and passion fruit tart

apple tarte tatin

As the summer produce season begins to wrap up, green markets and grocery stores are flooded with the likes of tomatoes, corn, and peaches. However, there are some other delightful finds during this time that tend to fly under the radar that are a real treat, like key limes. While those in Florida may easily find an abundance of key limes, I rarely get my hands on some in New York so it’s always a treat to find some.

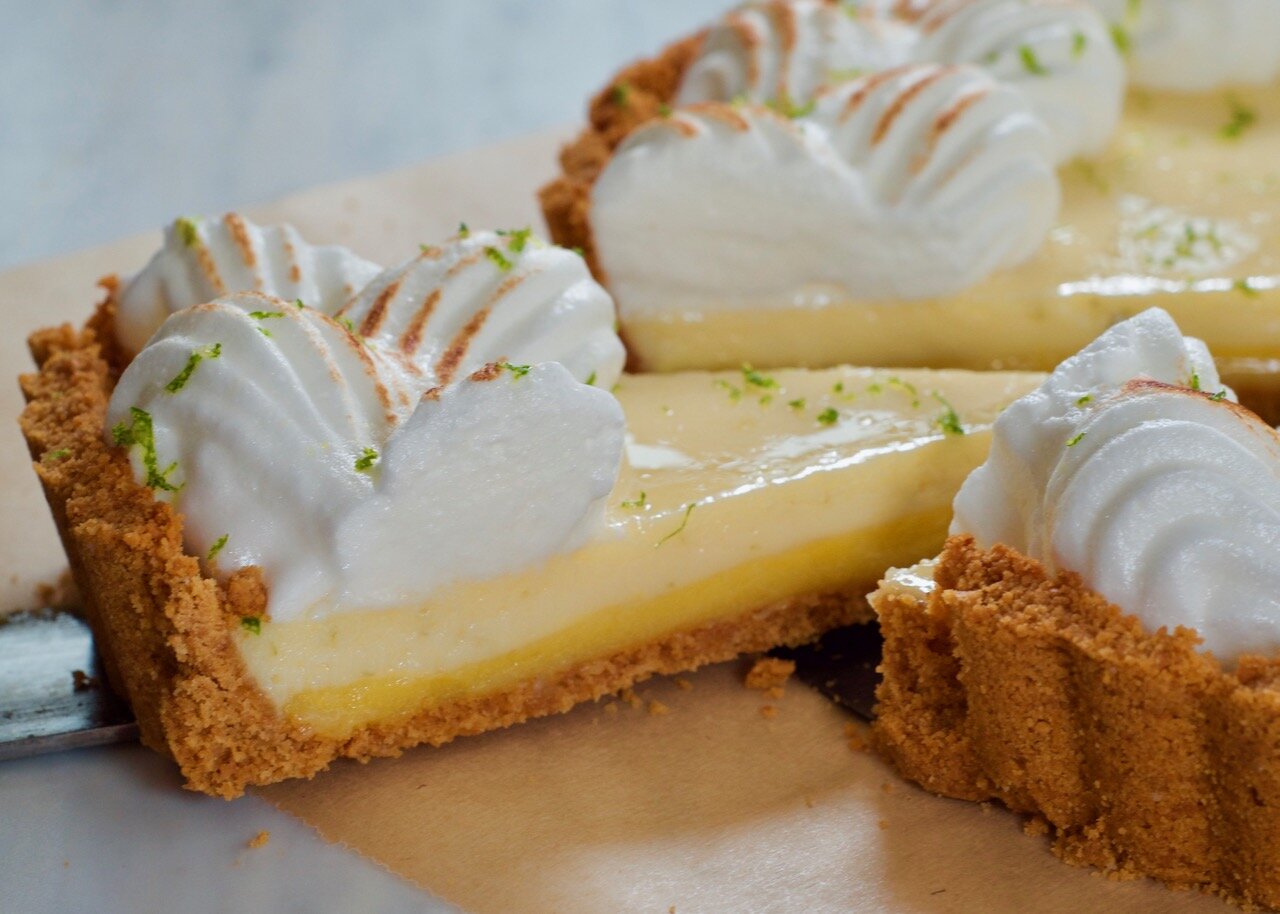
Key lime and passion fruit is a match made in heaven

Passion fruits have an incredibly tart and fragrant flavor and shine in any dessert. The passion fruit curd complements the creamy key lime custard and cuts through the sweetness. The layers create an eye catching gradient from the dark golden crust toward the airy meringue, which also helps counterbalance the creaminess of the key lime filling and passion fruit curd. Always make sure to finish it off with a fresh dusting of lime zest

A few tips:

  • If you can’t find key limes, use regular limes. It can be such a pain to squeeze those tiny little limes, but don’t use the bottled lime juice

  • Instead of graham cracker crumbs, use whichever biscuits or crackers suit your fancy.

  • An easy alternative to buying actual passion fruit is frozen passion fruit puree. It’s cheap and can be found in many grocery stores.


key lime & passion fruit tart

makes one 11 inch tart

ingredients

graham cracker crust:

210 g / 1 3/4 cup graham cracker crumbs

2 g / 1/2 teaspoon salt

85 g / 6 tablespoons unsalted butter, melted

for the passion fruit curd:

3 passion fruits or 80 g / 1/3 cup passion fruit purée

60 g / 1/4 cup lemon juice

100 g / 1/2 cup sugar

4 egg yolks + 1 whole egg

56 g / 4 tablespoons unsalted butter

for the key lime filling:

160 g / 2/3 cup lime juice (approx. one bag of key limes)

43 g / 2 egg yolks

397 g / 1 can sweetened condensed milk

5 g / 2 teaspoons lime zest

for the meringue (optional):

110 g / 3 egg whites, room temp

150 g / 3/4 cup sugar

60 g / 1/4 cup water

15 g / 1 teaspoon lemon juice

steps

graham cracker crust:

Preheat oven to 350 F.

1. Prepare crumb mixture: Mix the crumbs, salt, and butter until evenly incorporated. The mixture should resemble wet sand.

2. Pack it into the pan: With the help of a measuring cup (or any flat bottomed surface), pack the crumbs into the tart pan starting from the middle and moving out towards the edges.

3. Parbake: Bake for 10 - 13 minutes until crust hardens and starts to brown around the edges. Let cool.

passion fruit curd:

1. Prepare passion fruits: If using whole passion fruits, sieve out the pulp and juice and discard seeds. If using the frozen purèe, defrost and proceed.

2. Mix it together: Whisk together the passion fruit, lemon juice, sugar, and eggs. Save the whites for the meringue.

3. Heat up gently: Pour egg and passion fruit mixture into a heavy bottomed saucepan over low-medium heat. Cook the curd continuously whisking until it begins to thicken and the whisk leaves tracks. Be careful of overheating it as the mixture can curdle - if you’re uncertain, you can use the double broiler method with the egg mixture in a bowl over hot water.

4. Whisk in butter: Once the curd thickens, whisk in the butter until mixed in.

5. Chill: Pour the lemon curd into the prepared crust and smooth it out with an offset spatula. Gently lay a sheet of plastic wrap over the surface to prevent a skin from forming and let it set in the fridge for at least 2 hours.

key lime filling:

1. Whisk egg yolks: Either by hand using a whisk or an electric mixer, thoroughly whisk the egg yolks until it thickens and becomes a pale yellow.

2. Mix everything else in: Mix in the lime juice, condensed milk, and lime zest with the egg yolks.

Preheat oven to 350 F

3. Pour into tart: Remove the plastic from the surface of the passion fruit curd in the tart. Pour the key lime filling over top and bake for 10 minutes until just set. Let cool before serving or piping meringue over top.

meringue:

1. Preparing sugar syrup: In a saucepan over medium heat, bring the sugar and water to temperature of 235 F. When the syrup reaches 210 F, start whisking the meringue.

2. Whisking egg whites: In a separate clean bowl, start whisking the egg whites with the lemon juice until soft peaks form. At this stage, the sugar should reach the right temperature. Slowly pour in the syrup with the mixer still running on slow, and bring the mixer back up to a high speed to continue beating until you reach stiff peaks.

3. Pipe the meringue: Use your favorite piping tip (I used a large star tip) to pipe patterns over the tart or just pile it high.

4. Finish off with zest: Finish with some lime zest

spring asparagus and pesto rye tart

apple tarte tatin

As the weather warms and the trees blossom, my favorite sign of spring is when asparagus season hits. The green stalks are bright and tender, and it’s a telltale sign of a cornucopia of seasonal produce to come.

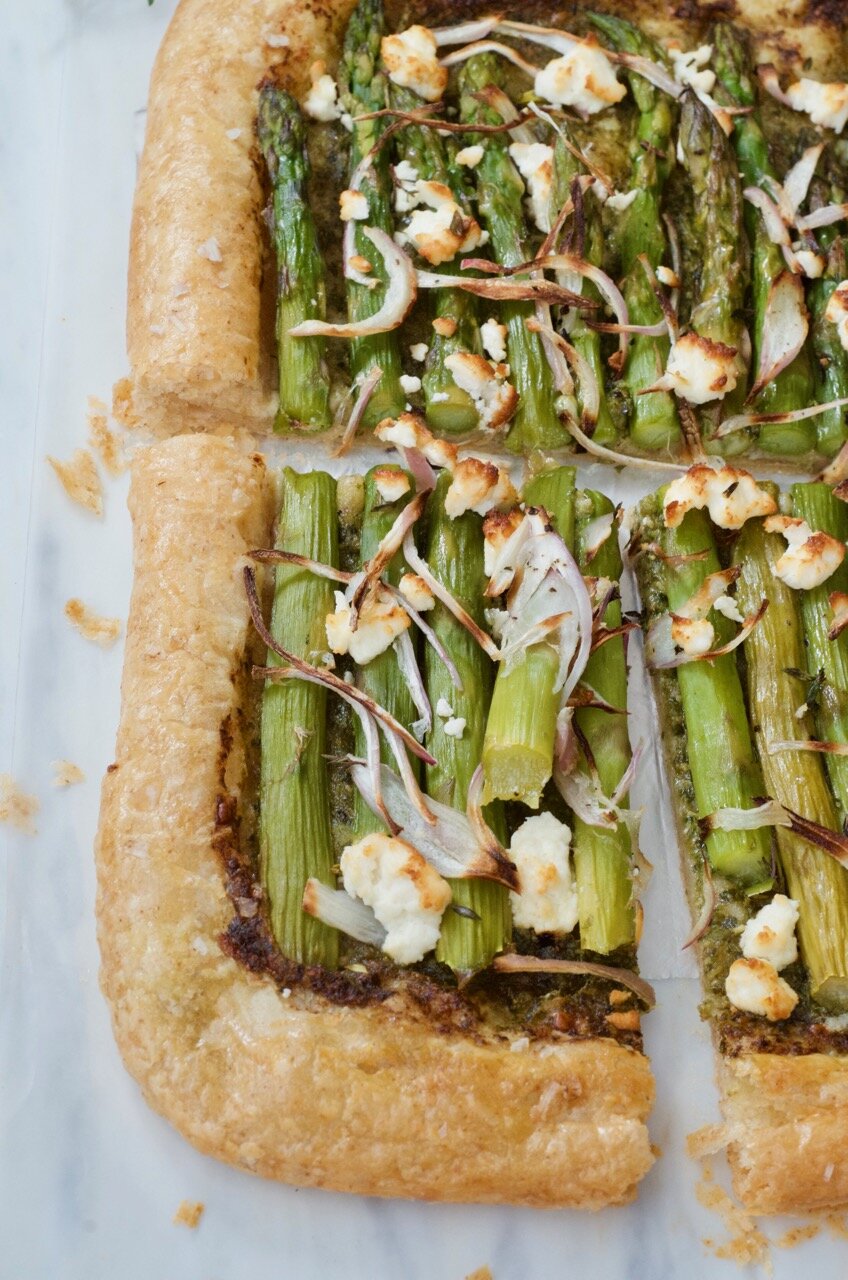
Sitting on top of a flaky rye crust, the pesto brings together the asparagus, shallots, and crumbly feta cheese. The rye offers a deeper and more complex alternative to all purpose flour, which complements all the bright flavors coming from the topping.

The rye tart crust

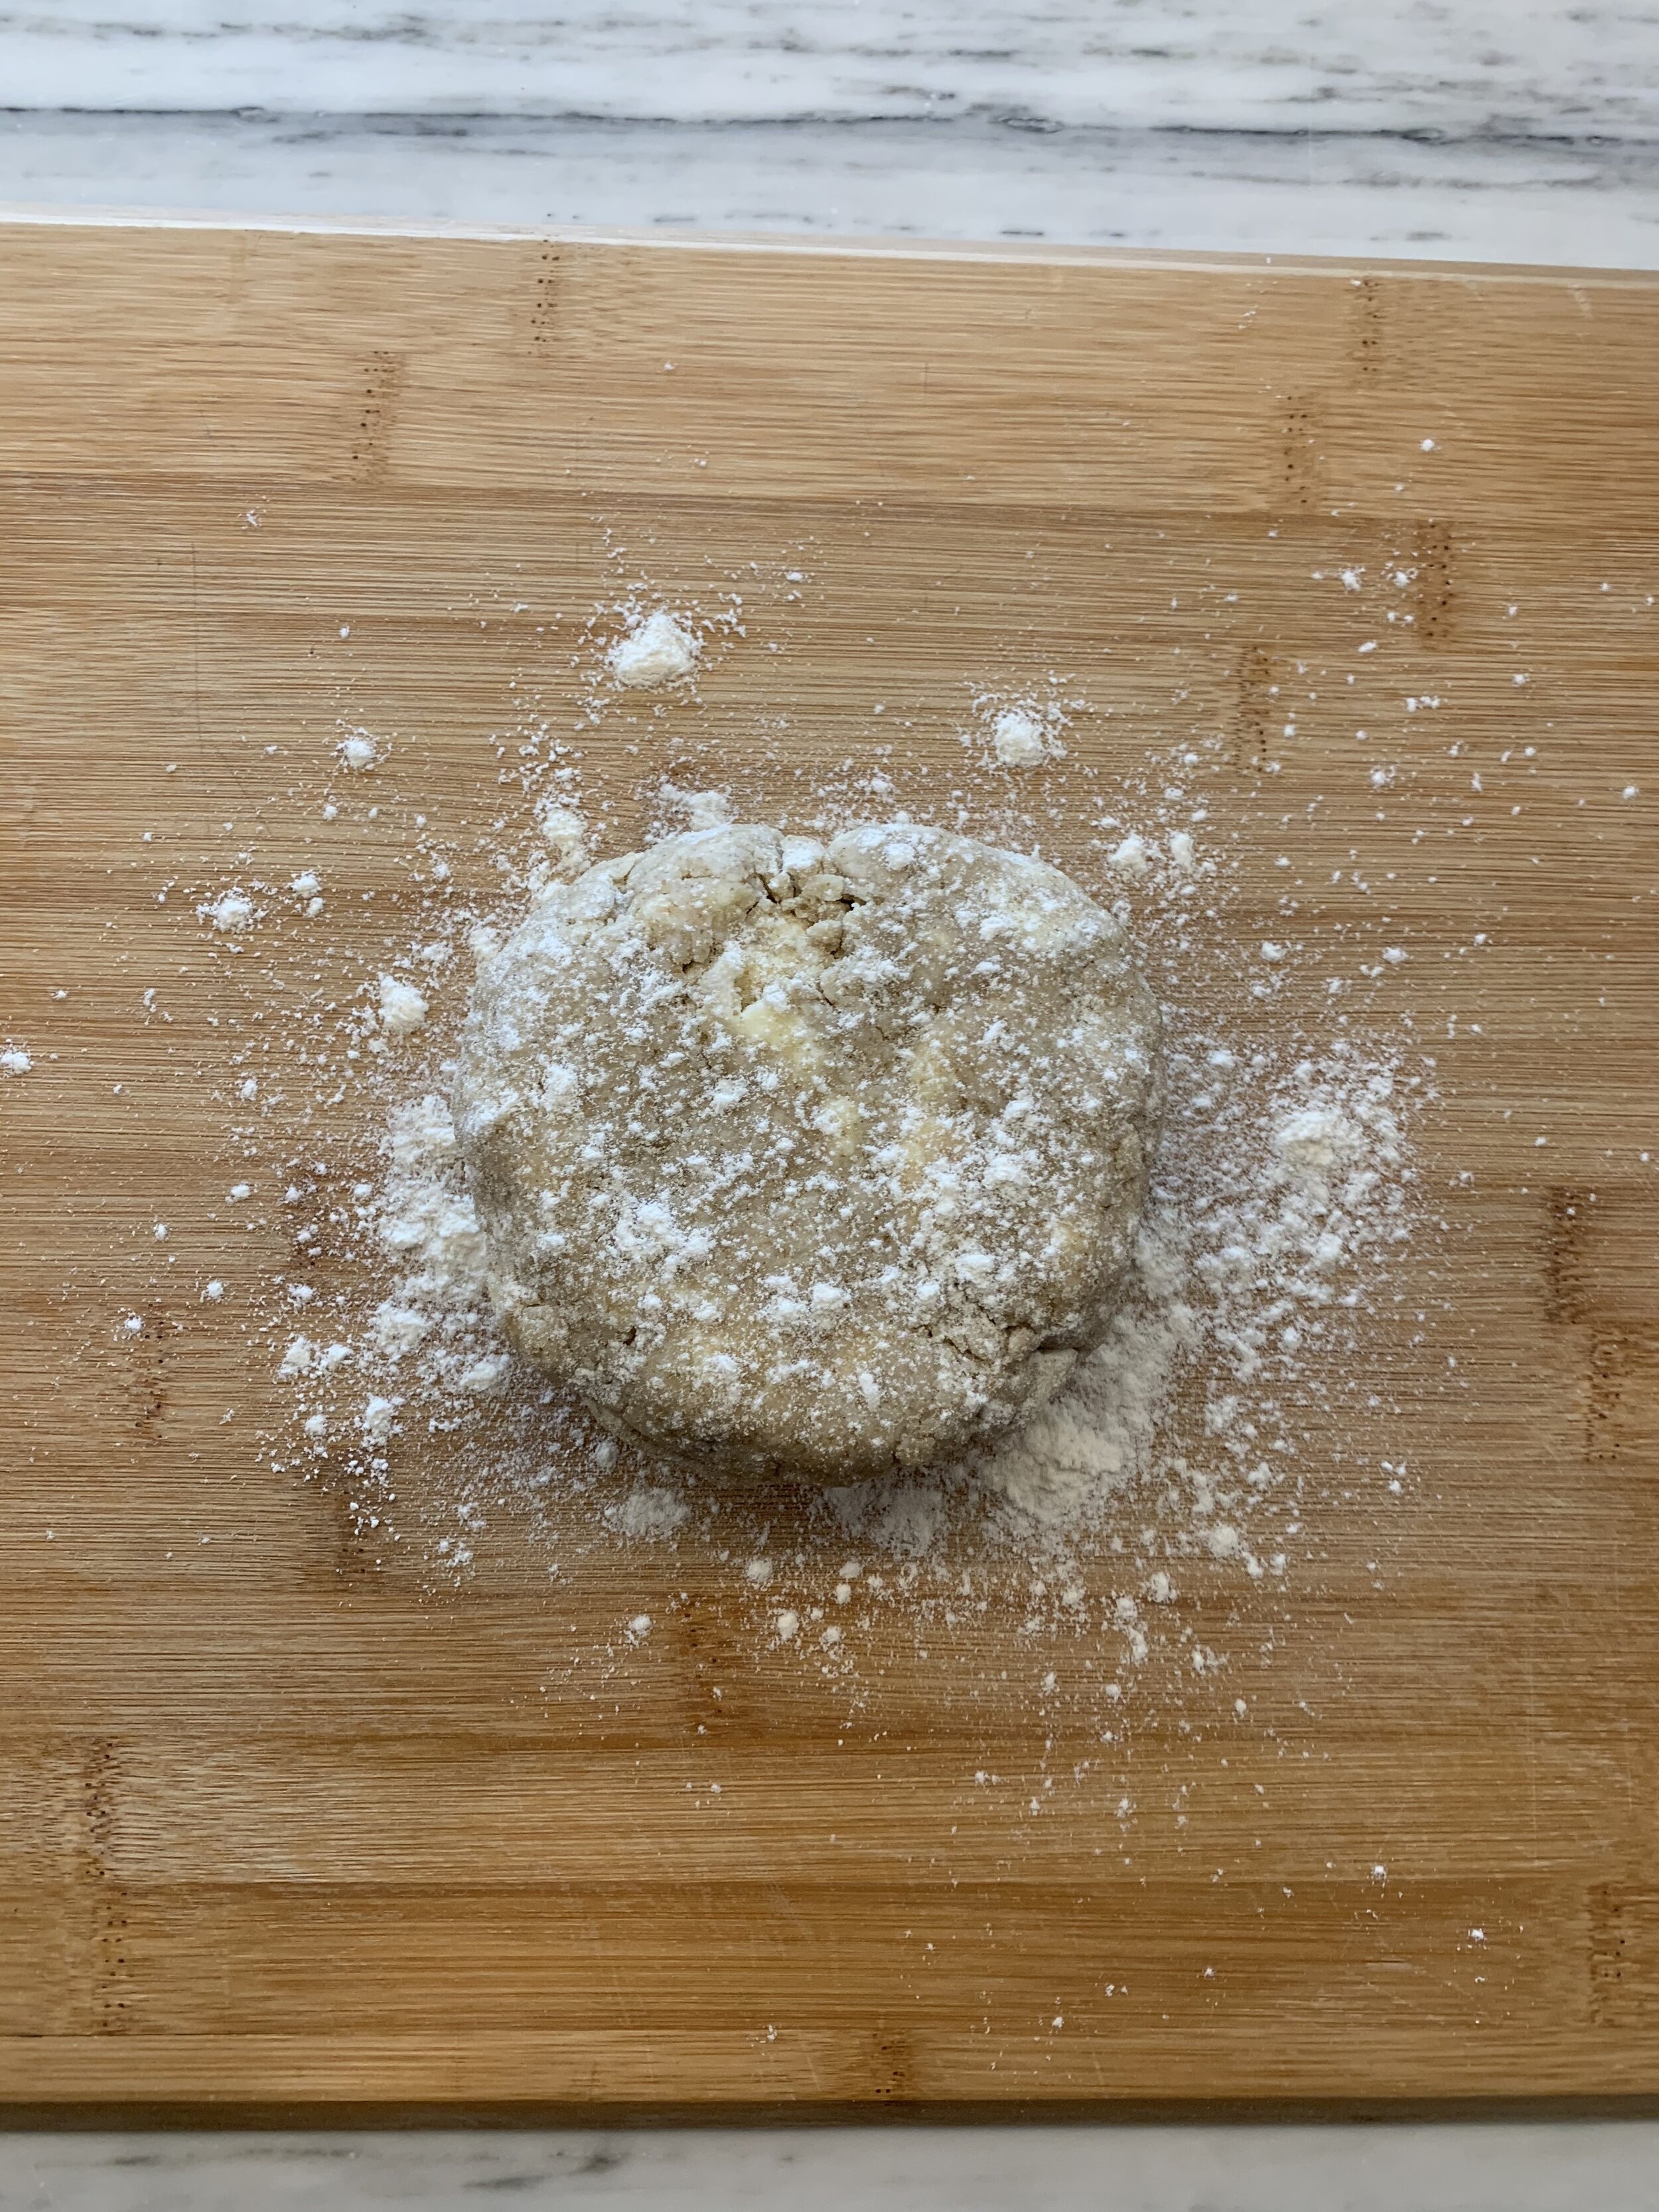
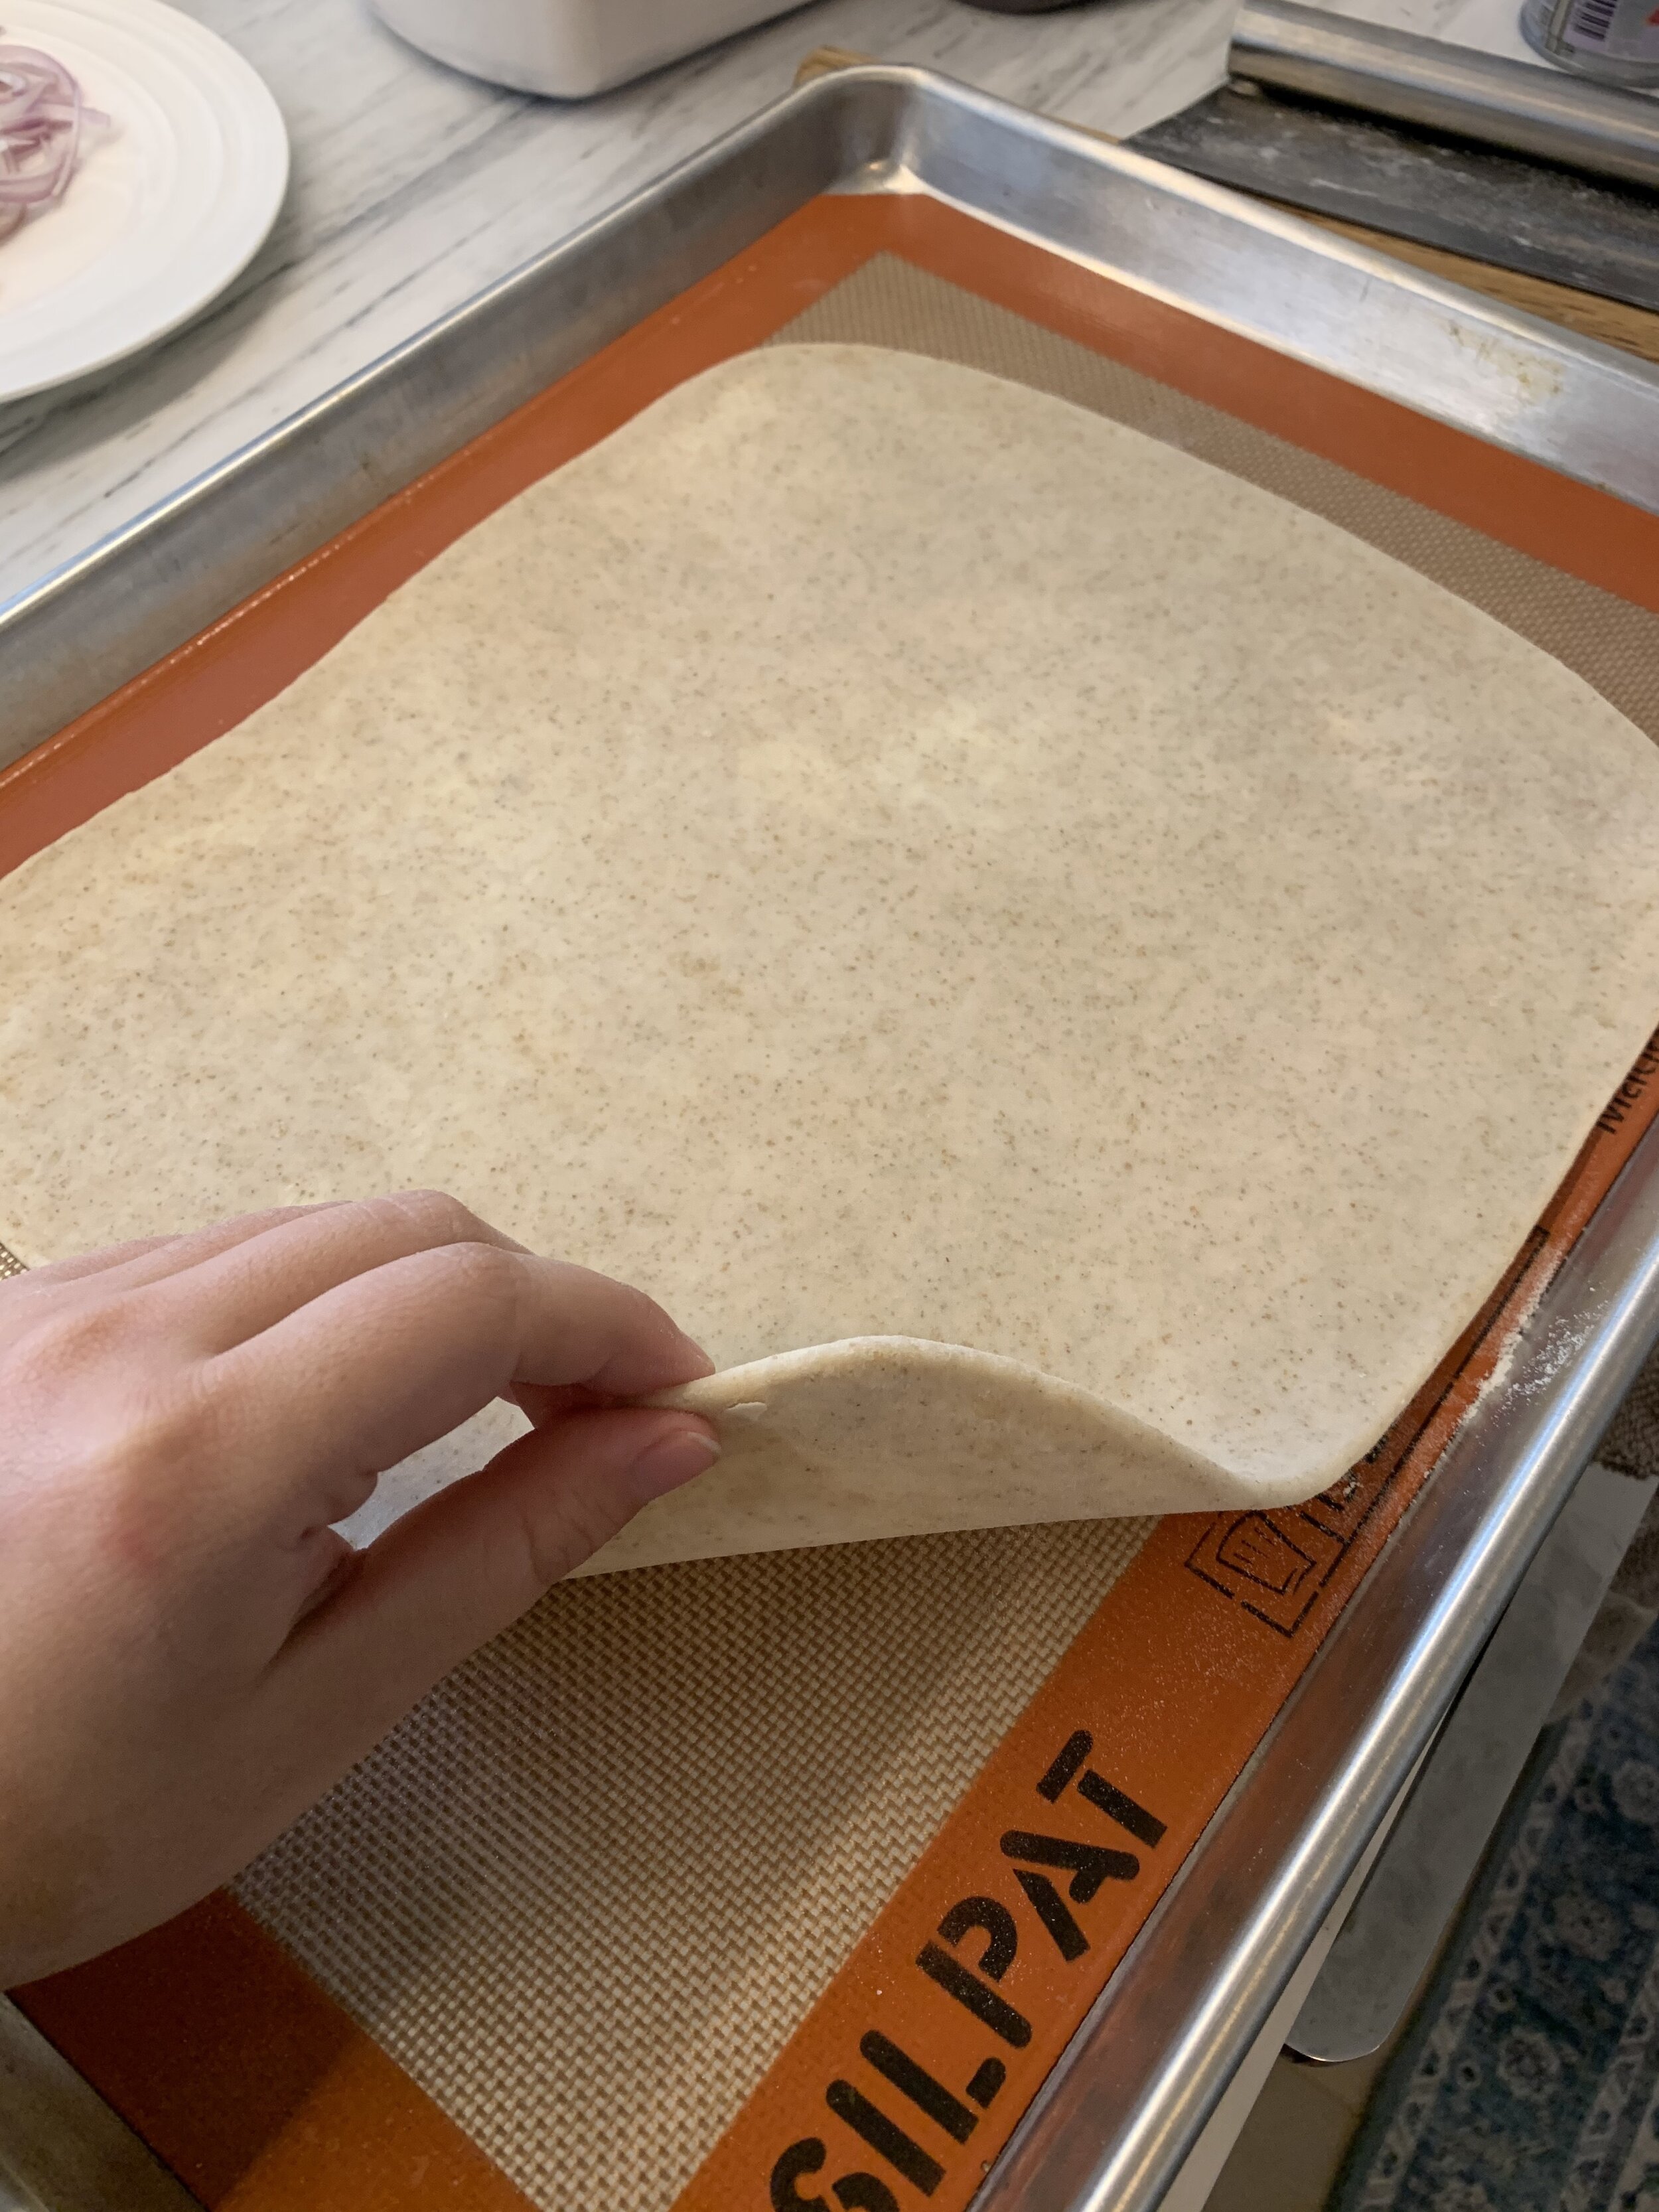
To create a shattering tender crust, make some extra envelope folds in your dough before rolling it out. Keep the initial butter chunks large, as they will get incorporated into the crust more as you fold the layers. The initial dough will be craggly with bumps and ridges, but as you make the folds, the dough will smooth out.

rye tart dough
IMG_2789.JPG
IMG_2792.JPG

A few tips:

  • Trim the tough bottoms off the asparagus - you can even break them off with your hands

  • Keep the dough cool at all times, and leave some space in your fridge to easily pop in the dough if it starts to warm up

  • Feel free to customize to your taste. You can leave out the shallots if you don’t like them or switch out the feta for another cheese like parmesan or goat cheese.


spring asparagus and pesto rye tart

serves 6

ingredients

for the rye crust:

1 cup AP flour

1/4 cup rye flour

1/2 teaspoon salt

1 stick butter, cut into 1 inch pieces

4 - 6 tablespoons ice water

for the topping:

1 bunch asparagus

4 tablespoons pesto

1/2 shallot, thinly sliced

1 teaspoon olive oil

1/2 cup feta cheese, crumbled

1 egg, whisked (optional)

flaky salt (optional)

steps

Rye crust:

1. Mixing dry ingredients with butter: Combine the AP flour, rye flour and salt. Toss in the butter cubes (make sure the butter is as cold as possible) until the individual cubes are covered in flour.

2. Flatten the butter: Working quickly (so the butter doesn’t warm up too much), start flattening the butter pieces between your fingers but leave them in large chunks.

3. Hydrate: Drizzle in the ice water, and toss with the flour/butter mixture (like you would toss a salad - do not knead). The optimal hydration for your dough is to have it hold together in a ball with no floury streaks. If your dough is still too crumbly, add water slowly as a little water can go a long way. Form dough into a disk, wrap tightly and rest in the fridge for at least 30-60 min.

4. Extra folds: This step is optional, but this is the key to getting a really flaky crust. Roll out the dough into a long rectangle and fold into thirds. Rotate 90 degree, and repeat the process of rolling and folding 2 more times. The dough should start to smooth out by the third fold. Let it rest in the fridge for another 30 min.

5. Roll out dough: Trying to keep the dough in a rectangular shape, roll out the dough until 1/4 inch thick. The shape should be long enough to hold the asparagus stalks. You can trim the edges of your dough to get a perfect straight edge if you’d like, but I kept mine as is to avoid wasting any dough. Let the rolled out dough rest in the fridge as you prepare the rest of the toppings.

Preheat oven to 375 F

Topping:

6. Blanch the asparagus: Bring a pot of water to boil over high heat and quickly drop the asparagus in, cooking for ~2 min. Transfer the asparagus over to an ice bath to stop the cooking and pat dry.

7. Build the tart: Thinly spread a layer of the pesto over the tart. Arrange the asparagus in a single layer. Toss the shallot slices in a teaspoon of olive oil, and add on top of the asparagus along with the feta. Optional: brush the edges with egg, and top with flaky salt.

8. Bake: Bake in a preheated oven for 25 - 30 min, or until the edges turn golden brown. If the shallots start browning too quickly, turn the heat down to 350 F midway.

pasteis de nata (portuguese custard tarts)

apple tarte tatin

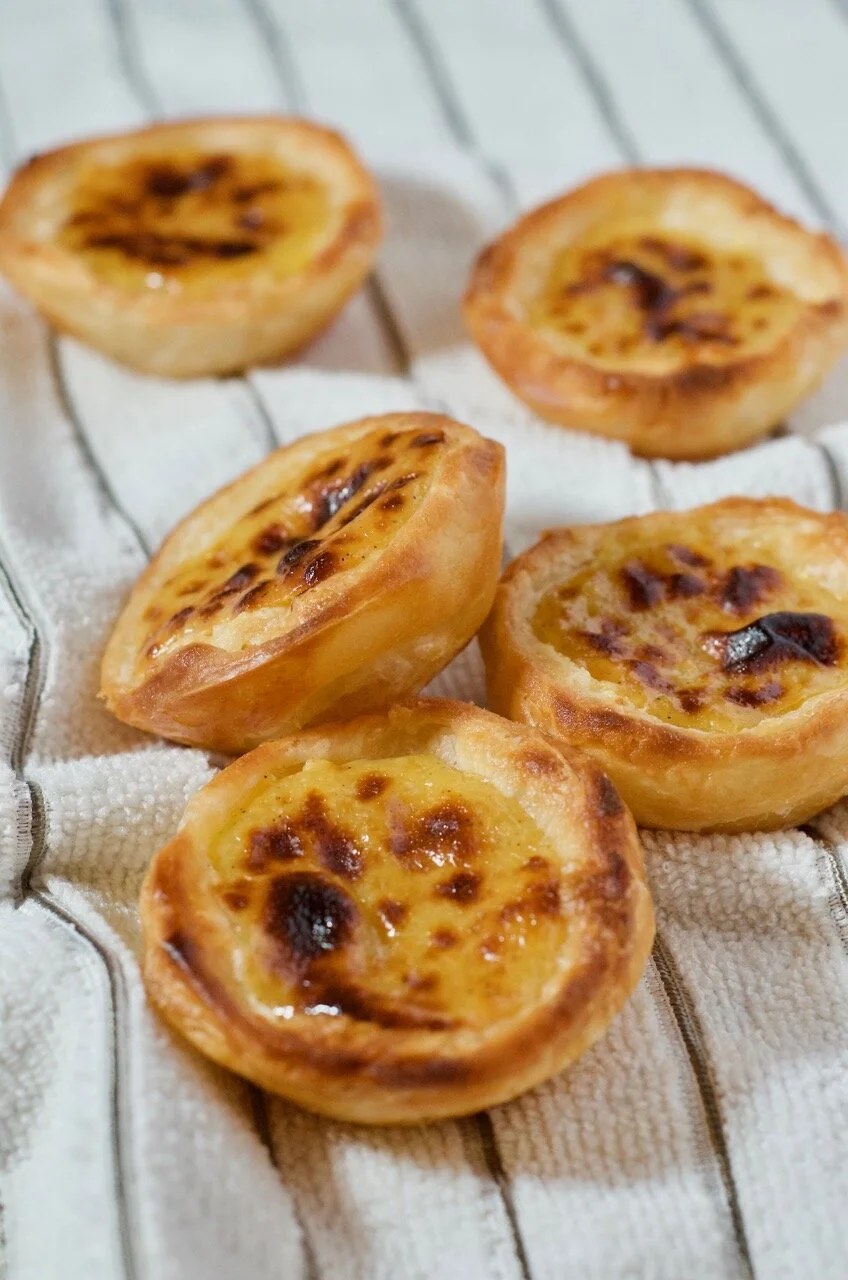
Pasteis de nata are delightful Portuguese custard tarts with an extremely flaky crust, a burnished caramelized top, and filled with a smooth rich custard. You can find them in every cafe across Lisbon, and most famously, at Pasteis de Belem. Overlooking the Atlantic ocean in the neighborhood of Belem, a monastery began selling these tarts nearly 200 years ago. They’ve kept their original recipe a closely guarded secret, but I’ve come up with my version below.

What is the difference between a Portuguese custard tart and a regular custard tart?

A Portuguese custard tart stands out for its exceptionally flaky crust that shatters are you bite into it. The custard is rich and creamy with notes of lemon, cinnamon and vanilla. Unlike other custard desserts that are often cooked gently, Portuguese tarts are quickly cooked in a blazing hot oven reaching impossibly high temperatures that home ovens can not reach. However, by pre-cooking the custard we are able to cook off some of the excess moisture on the stove top before hitting the oven allowing us to get that deliciously burnished crust on top of the custard.

How long do the tarts keep?

The tarts at best served fresh out of the oven. However, as I’ve learned from carrying these tarts home in my carry on from Lisbon, these freeze perfectly and if you just reheat them in the oven, they taste like they were freshly baked.

A few tips for success:

  • If your custard is too liquid, make sure to thicken up the mixture on the stovetop before baking. Don’t skip this step, or else you won’t get the toasty lookin’ tops (like the traditional ones do).

  • You want to bake these tarts at as high of a temp your oven will go (my oven goes to 550 F). Keep a close eye as it cooks quickly at these temperatures, and if you see your pastry cooking more quickly than your custard is caramelizing, finish it off with a few minutes under the broiler.

  • Adjust the cooking time based on what mold you use. I used smaller tart molds, but you can also use a muffin tin. Since the tart molds make smaller tarts, adjust the cooking time if you’re making larger tarts.

  • You can make the pastry dough and custard ahead of time, so that it’s less of a project to make these tarts.


Pasteis de Nata
makes 10 - 12 tarts

ingredients

for the pastry dough:

1 cup AP flour + 2 tablespoons

pinch of salt

1/2 cup water

1 stick softened butter

for the custard filling:

1.5 tablespoons flour

1/2 cup milk + 2 tablespoons

3 egg yolks

2/3 cup sugar

1/3 cup water

1 cinnamon stick

lemon peel

1/4 teaspoon vanilla paste

To finish:

icing sugar and cinnamon (optional)

steps

Preparing the dough

Mix dough: In a medium sized bowl or using a stand mixer, mix together the 1 cup of flour, salt, and water. Mix with dough hook of knead for a few minutes until dough comes together. The dough should be soft and tacky, but shouldn’t stick to your hands - add 2 more tablespoons flour if too sticky. Cover dough, let rest for 15 min.

Lamination: Clear out a large workspace, and dust generously with flour. The dough is relatively wet and will stick easily. The lamination can be broken down into 3 stages, and make sure to keep your work surface well floured throughout each roll. Use a bench scraper to help you maneuver the dough.

a. Roll out dough into approx. 12 in square - it’s ok if it’s not perfect. Gently spread 1/3 of the butter across the left 2/3 of the dough, keeping an inch border around the edge. Using the bench scraper, fold the right unbuttered 1/3 over the middle, followed by the left 1/3 like you would fold an envelope. Dust off any excess flour, push out any air bubbles in between the folds, and seal in the butter around the edges.

b. Rotate the dough 90 degrees clockwise, so that the seam is now facing you. Roll the dough back out to a 12 in square, and repeat the same buttering and folding process.

c. For the final roll, rotate dough 90 degrees clockwise once more. With the edge facing you 12 in wide, roll out dough into a rectangle that’s 14 in long. Spread the rest of the butter across the entire dough. Starting from the edge closest to you, roll the dough up into a tight log, dusting off the excess flour as you go. Trim off the uneven ends of the log, cover in plastic wrap, and let it rest in the fridge for 30 minutes as you start on the custard.

Preparing the custard

Preheat oven to 550 F

Prepare sugar syrup: In a saucepan, add the sugar, water, cinnamon stick, and lemon peel. Without stirring, bring to a simmer until it reaches 225 F. Set aside.

Start custard: In another saucepan, whisk together flour and 2 tablespoons milk until you get a paste with no lumps. Slowly mix in the rest of the milk as you continue to whisk. Cook over low heat, continuing to stir, until the milk thickens and the whisk leaves tracks.

Mix in eggs: In a separate bowl, first whisk the egg yolks. Fold in some of the hot milk, quickly whisking with the egg yolks to avoid cooking the eggs, before mixing the eggs with the rest of the milk mixture in the pot. Mix in the sugar syrup, leaving out the cinnamon stick and lemon peel, along with the vanilla paste. You should now have a very liquid mixture. Bring the pot back over low heat, continuously stirring until the custard thickens up enough to coat the back of a spoon.

Making the tarts

Transferring dough into the molds: Retrieve the log of dough from the fridge, and cut into 2/3 inch sections if you’re using mini tart molds - cut them into 1 inch sections if using a muffin tin. Arrange them cut side up in lightly greased molds, where you can see the swirls of butter. Using your thumb, press the dough down in the middle, and continue pressing the dough along the walls of the mold. If sticking, lightly dampen your fingers with water. The dough should be thin around the bottom, but make sure not to make any holes.

Filling and baking the tarts: Fill the tarts 3/4 full with the cooled custard. Bake them for ~8 minutes in the preheated oven, and finishing the last 2 minutes with the broiler. Keep a close eye on the tarts as they bake, as you want a well cooked pastry without burning it.

Let cool for a few minutes, before removing pastries from the mold. Serve warm, with some optional powdered sugar and cinnamon sprinkled over top as the Portuguese do.


apple tarte tatin

apple tarte tatin

As we head into fall, I’m just sitting here wondering where the summer went? While I didn’t get to take some of the bigger vacations I had planned, this has been an unexpected opportunity for us to explore our own backyard a little more. We’ve spent the summer visiting farms throughout the Hudson Valley and gathering the seasonal produce as we went from strawberries and asparagus to blueberries and now peaches and corn. I’m a little sad to see the long summer days go, but as Taylor Swift said so wisely, “August sipped away like a bottle of wine”.

apple tarte tatin dessert

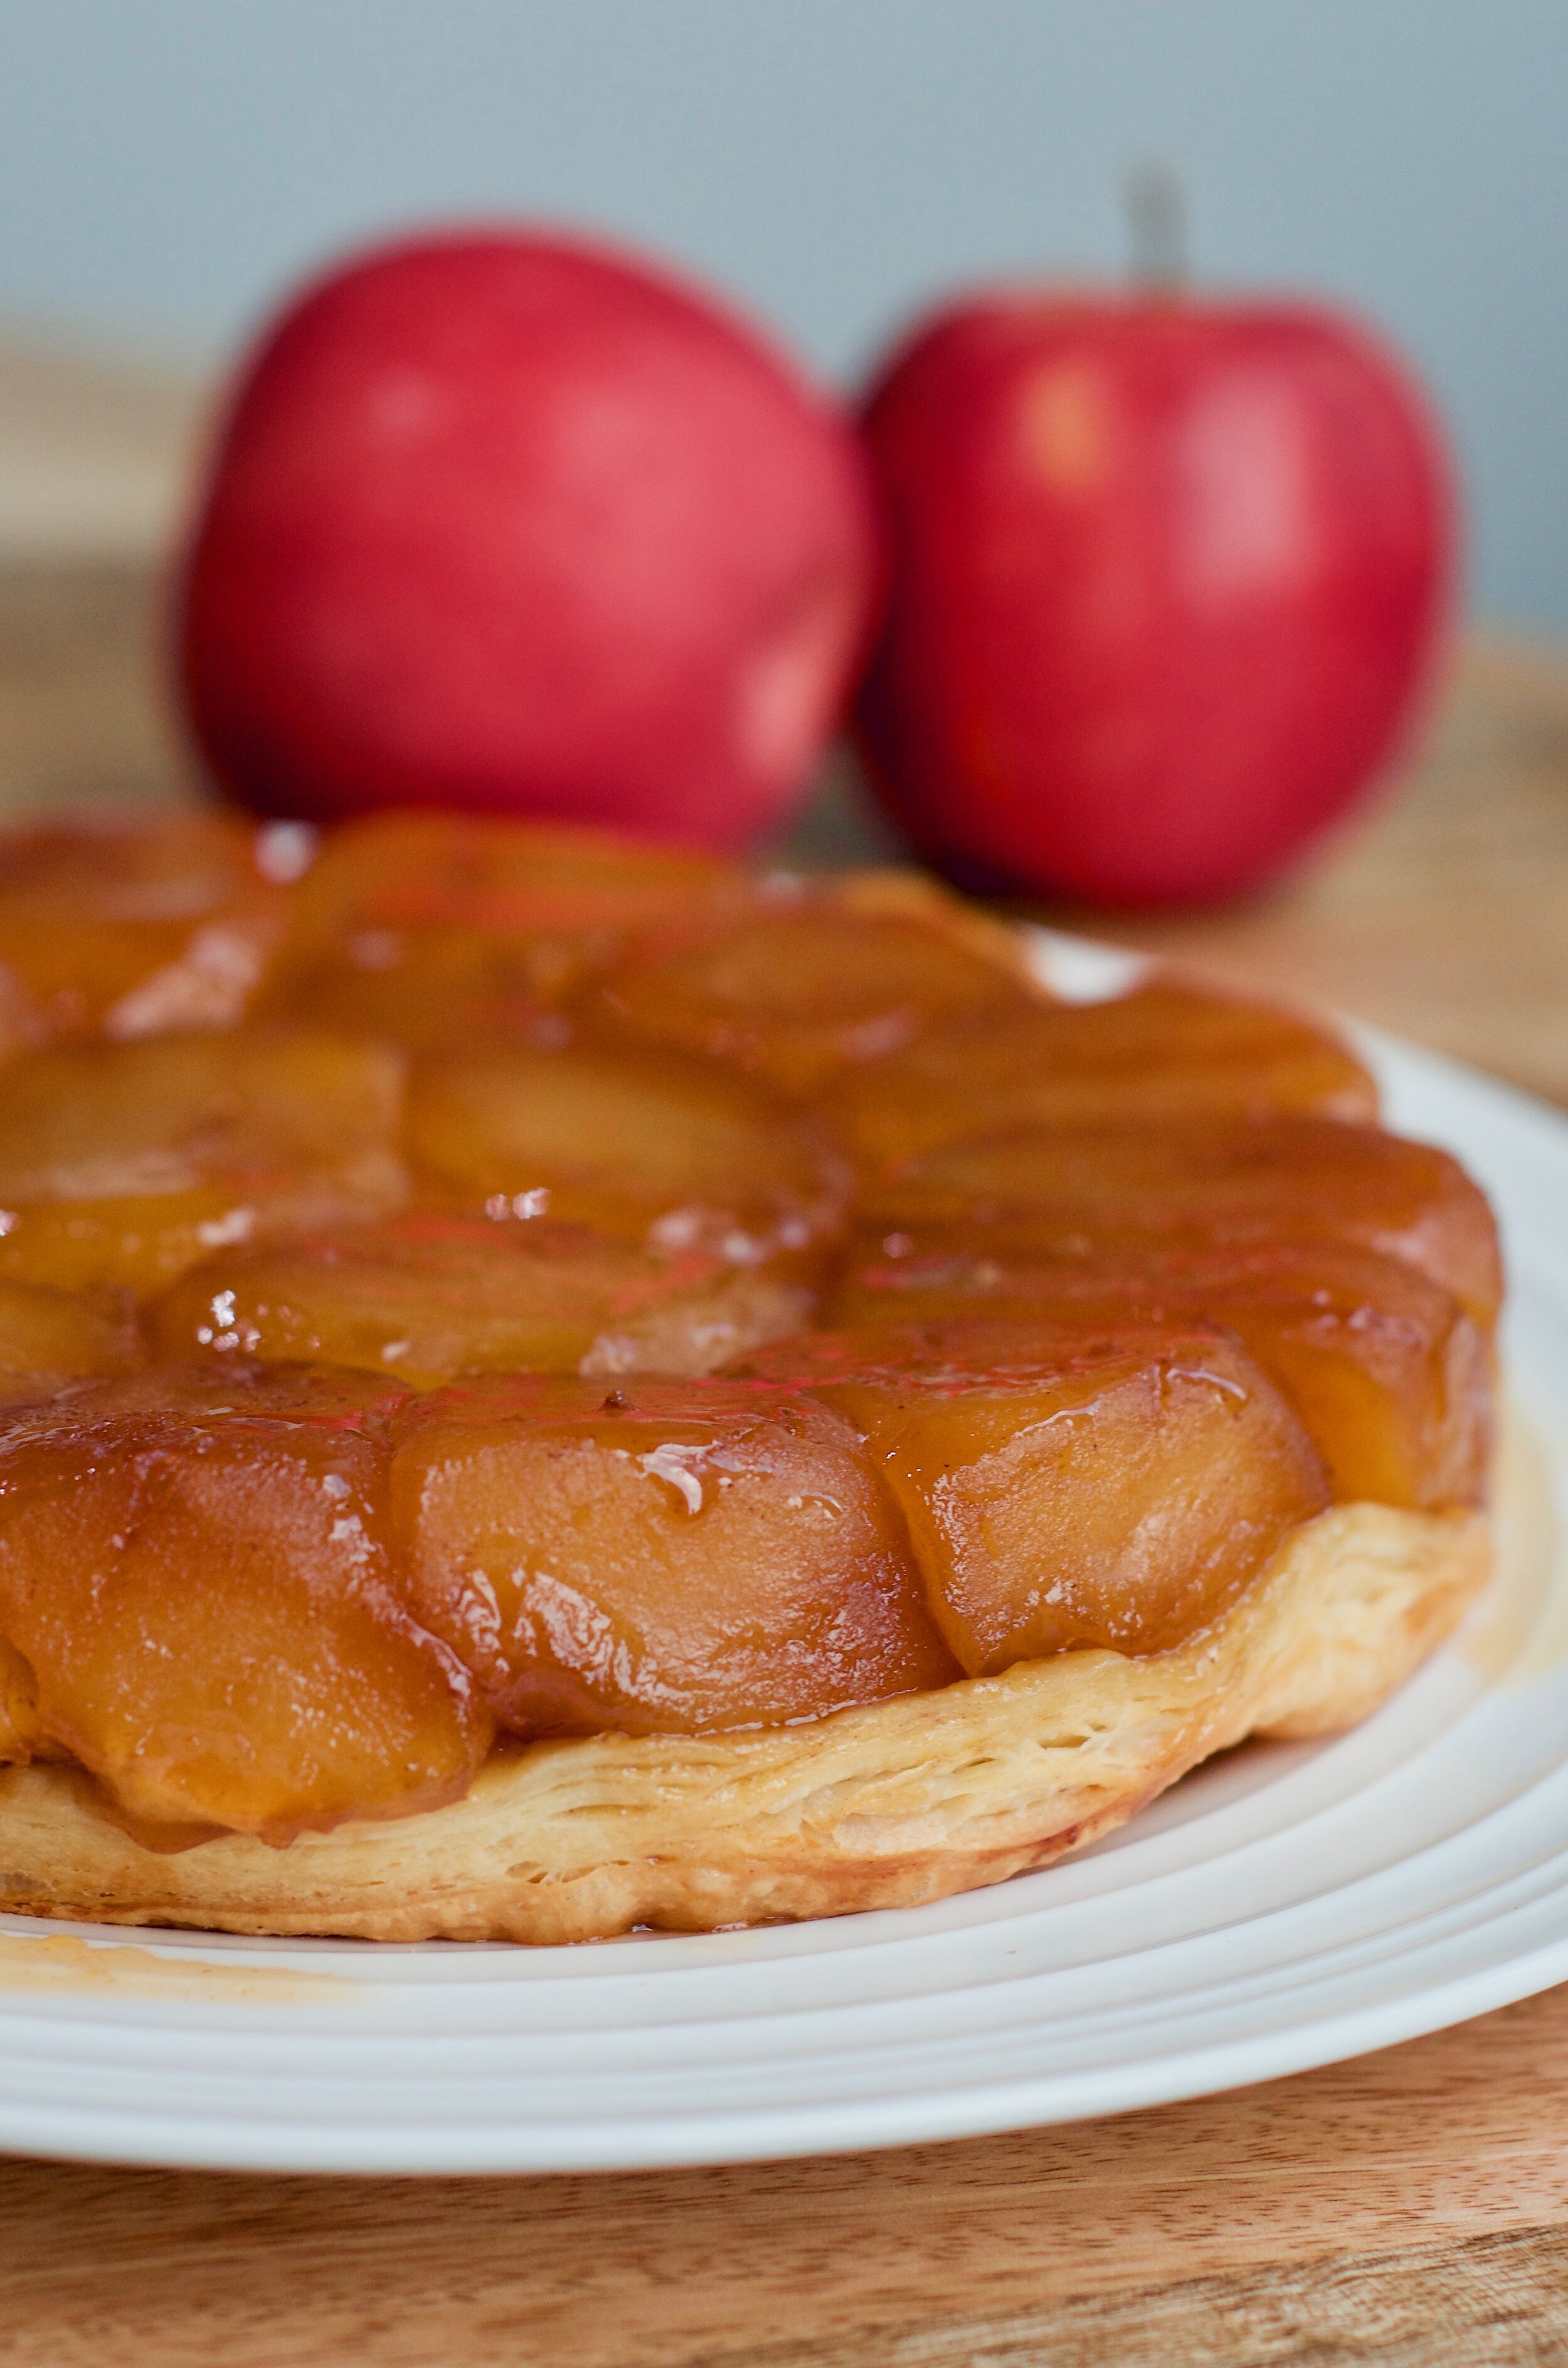
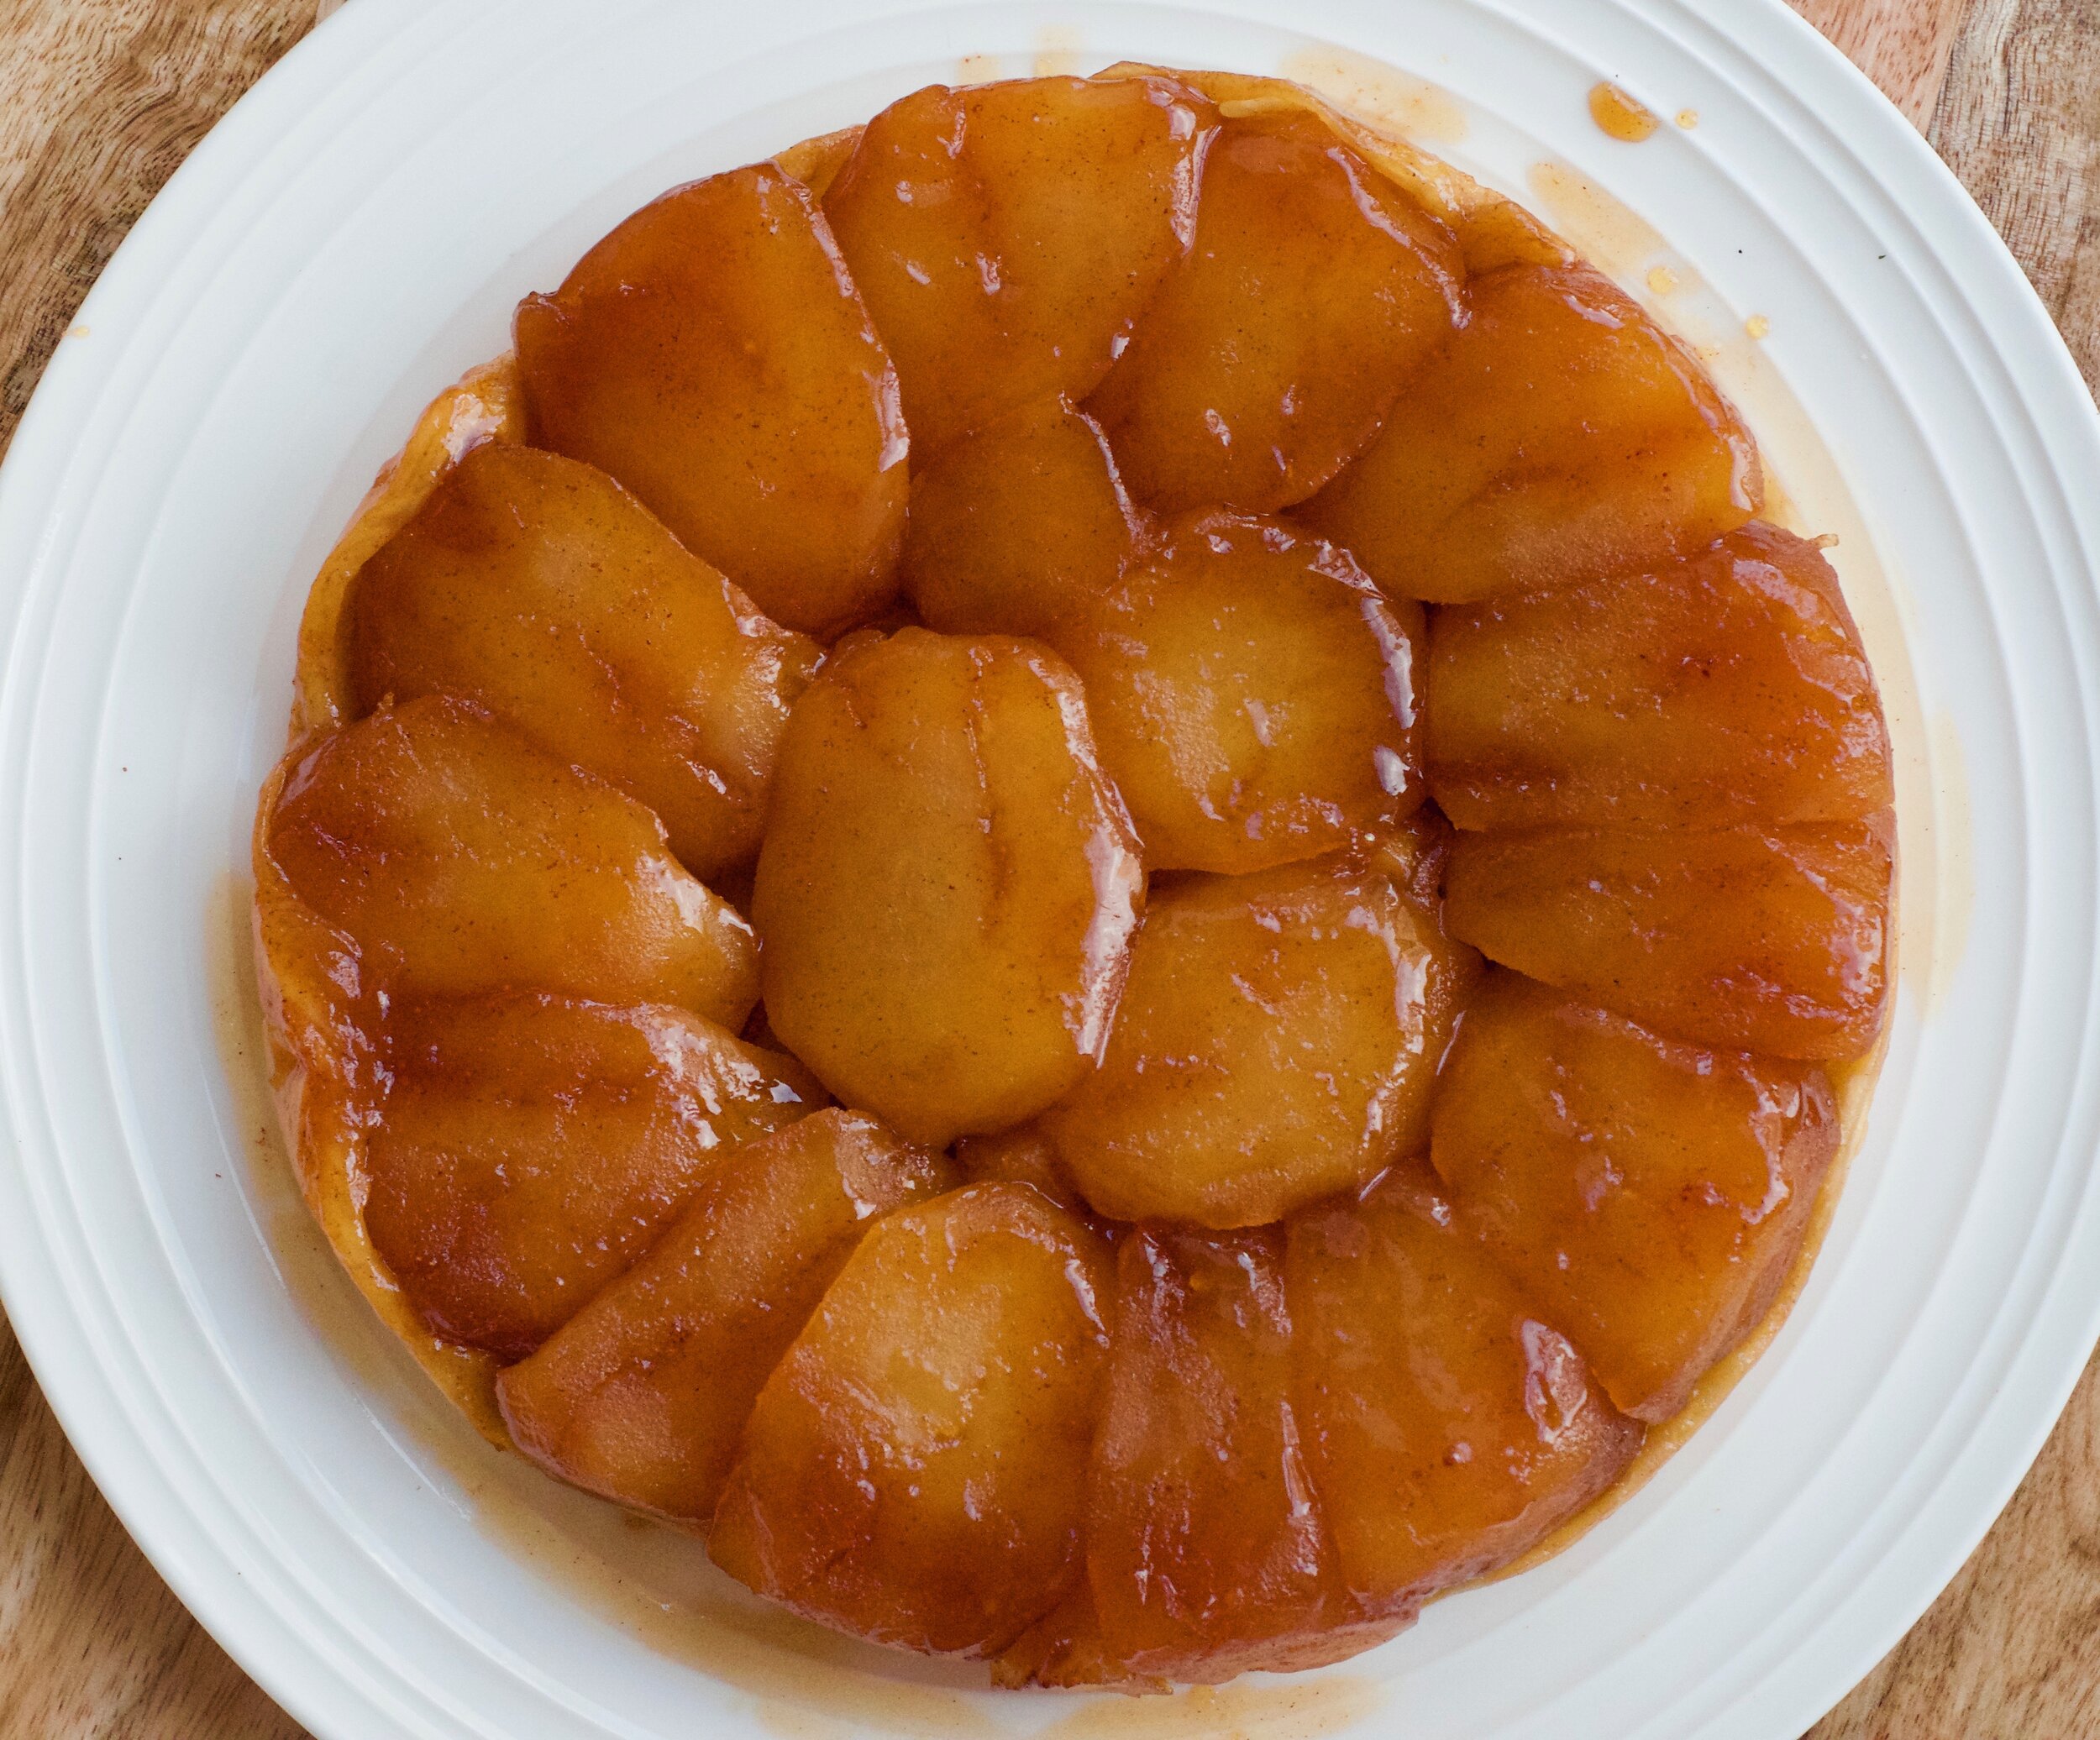
However, with the crisp air comes apple season! As you start to haul home your bags of freshly picked apples, this is the perfect time to get a little creative and instead of making a traditional apple pie, why not try a tarte tatin? It may be a few extra steps, but it is 100% worth it. The apples are cooked in a rich caramel until they melt in your mouth and topped with a buttery, flaky pastry crust before being flipped upside down to serve. Cooking the apples in caramel gives you a deep, rich flavor that you don’t get in regular apple pie.

For the crust, you can use either a pie-based pastry or puff pastry. I’m making a “rough puff”, which is essentially a cheater’s puff pastry, by making a few adjustments to the basic pie crust recipe to get a little more flakiness. While some recipes suggest making everything in one oven safe pan, I’ve actually elected to first cook my apples down in a large pan, before sending it into the oven in a round cake pan. The walls help the apples fit more snugly, and the lighter, more compact cake pan makes it easier to flip at the end.

DSC_3686 (1).jpg
DSC_3748.jpg

A few tips for success:

  • Use firm apples that will hold their shape. The first time I tried with granny smith apples, and the apples just dissolved into applesauce. Not pleasant.

  • Keep the dough cold throughout the rolling process. If you feel it warming up or the dough starts to feel greasy, stick it back into the fridge for 20 minutes before continuing.

  • Bake in a different pan than you use to cook the apples. It’s easier to use a larger pan to cook down the apples, and you have the flexibility to thicken the caramel sauce without overcooking the apples if needed.

  • When cutting out the dough shape, keep in mind the dough may shrink a bit in the oven so give yourself a little more to work with.


Apple Tarte Tatin
makes one tart

ingredients

for the pie crust:

1 1/4 cup flour

1/2 teaspoon salt

1 stick unsalted butter, chilled and cut in 1/2 in cubes

4 - 5 tablespoons ice water

for the filling:

6 medium sized firm apples (e.g. pink lady)

lemon juice (from half a lemon)

1 teaspoon cinnamon

2/3 cup sugar, sifted

3 tablespoons cold butter, cubed

steps

Preparing the pie crust

1. Mix dry ingredients: In a medium sized bowl, mix together the flour and salt

2. Incorporate butter with flour: Toss the butter with flour mixture until butter pieces are covered. Flatten the butter cubes either between your fingers or the palm of your hands. Continue until the butter pieces are the size of walnut pieces.

3. Hydrate: Sprinkle the ice water into the mixture one tablespoon at a time, using your fingers to lightly toss the flour in between water additions (use a light touch, similar to how you would toss a salad). At this stage, you want to add just enough water for the dough to come together. Once you’ve added 4 tablespoons of water, you may need to add a little more so continue to sprinkle water on the remaining dry spots. A properly hydrated dough should be able to stay together but not tacky to the touch. If butter has started to melt, stick the dough back into the freezer for a few minutes.

4. Fold: To create even more layers + help the dough come together, roll out the dough and using a bench scraper, fold it back over itself in thirds (like an envelope). Turn 90 degrees and repeat. Cover with plastic wrap and refrigerate for 30 min, before repeating the folding process (rolling out twice in each turn) two more times. It is important to keep the dough cold, to prevent the butter from melting into the dough. Keep refrigerated until ready for use.

Preparing the filling

Preheat oven to 400 F

1. Prepare apples: Peel, core, and cut apples into quarters. Toss with lemon juice and cinnamon.

2. Make caramel: Over medium heat, sprinkle half the sugar into the pan in thin, even layer. Do not disturb, as the sugar starts to melt and caramelize. Sprinkle in the rest of the sugar, and turn heat down to low to prevent caramel from burning. Continue cooking until caramel reaches a rich amber color.

Caramel tips: Use a dry pan with no water. Avoid stirring, though it’s fine to use a spatula to get all the sugar around the edges incorporated.

3. Add butter: Whisk in the butter cubes. The caramel will initially look like its seizing up, but as you continue to whisk, it will smooth out and the color will turn more toffee like.

4. Cook apples: Add the apple quarters to the caramel, with heat on low simmer. Mix so that all the apples are tossed in the caramel. As the caramel touches the cooler apples, they may harden at first but don’t worry, as the apples start to release their juices, the caramel will loosen up into a syrup. Continue cooking the apples for 10 - 15 min, until the apples have softened up and are no longer crispy. Let cool for 10 minutes.

5. Roll out the crust: Roll out the pastry dough to just under 1/4 inch thickness. Cut out a circle, leaving 1 extra inch around the circumference of your pan. Set aside.

6. Arrange apples: Transfer the apples into the cake pan, and arrange the apples with the cut edge facing up. Keep the apples fit snugly, with about 2/3 overlap. Spoon remaining caramel sauce over the apples. Transfer the pastry circle you just rolled out over the apples, tucking in the dough around the edges. If your apples are still a little warm, your dough may get soft quickly and it may be easier to use a spatula to help tuck the dough in around the edges.

7. Bake for 30-35 minutes, until pastry is golden brown. If serving immediately: let cool for 15 min, place a plate over the pan, and quickly flip the pan over. If serving later, reheat the pan to loosen up the caramel (the apples can get stuck if the pan if the caramel has thickened too much) before flipping. Serve with some vanilla ice cream or whipped cream.


lemon pistachio tart

lemon pistachio meringue tart

While we’ve all been staying home this summer, there is nothing like a lemon tart that will transport you straight to the streets of Paris. With a sweet buttery crust, bright zesty lemon cream, and an airy meringue, this is the kind of lemon tart that belongs on an outdoor cafe table along the streets of Saint Germain. The best part? It’s a dangerously simple recipe that you will make over and over again.

This recipe is adapted from Desserts by Pierre Hermé, a source I would trust with my life on all things French patisserie. The recipe for the pate sucrée (the tart crust) makes enough for 3 tarts, but they freeze wonderfully for future baking projects. I’ve adjusted the lemon cream recipe to reduce the amount of butter, because there was an obscene amount of butter, but don’t worry, the result is still a silky, creamy filling with just a little less guilt.

The meringue and pistachios are optional, but both elements really help balance out the strong lemon flavors of the cream. You can use either a fluted tart pan with the removable bottom, or in my case, I’ve elected to use a tart ring for a more streamlined look.


Lemon Pistachio Tart
makes one 9.5 inch tart

ingredients

for the pate sucrée (tart dough):

2.5 sticks (10 ounces) unsalted butter, room temp

1 1/2 cups powdered sugar, sifted

1 1/2 cups almond meal, lightly packed

1/2 teaspoon salt

1/2 teaspoon vanilla bean pulp (optional)

2 large eggs, room temp

3 1/2 cups AP flour

for the lemon cream filling:

1 cup sugar

zest of 3 lemons

4 large eggs

3/4 cup lemon juice (4-5 lemons)

1 stick unsalted butter, cut into chunks

for the meringue (optional):

4 egg whites. room temp

1 teaspoon white vinegar

1 cup sugar

1/4 cup water

1/4 cup chopped roasted pistachios

steps

Preparing the tart dough

1. Cream butter: Using the paddle attachment of a stand mixer, beat the butter until creamy and add in the sugar, almond, salt, and vanilla bean if using until well mixed. Continue to beat in the eggs one at a time, making sure to scrape down the sides.

2. Add in flour: With the mixer on low, mix in the flour in 2 or 3 additions until just incorporated - you don’t want to overmix at this step and create a tough dough. Divide the dough into 3 disks and refrigerate at least 2 hours.

3. Shape the dough: Take out one of the disks from the fridge to slightly soften up for 10 min. On a floured surface, roll out the dough to 1/8 - 1/4 inch thickness. If you’re having trouble with the dough cracking, roll out the dough between two sheets of parchment paper. To transfer the rolled out dough over to the tart ring, lightly roll up the dough over a rolling pan and unroll over the tart ring. Run the rolling pin across the top to cut off the extras. Don’t stretch the dough to fit as it will likely shrink in the oven, and if you have any spots missing, use any of the extra dough to patch those right up like you’re using play doh. Prick the dough all over with a fork to prevent air bubbles, and quickly pop back into the fridge for 30 min.

Preheat oven to 350 F.

4. Parbake: Line the dough with parchment and fill with dried beans/rice. Bake for 20 min. Remove parchment with the dried beans/rice and bake another 5-7 minutes until golden.

Lemon cream

1. Mixing: In a large bowl, rub the sugar and lemon zest together until fragrant. Whisk in the eggs, then followed by the lemon juice.

2. Thickening the cream: Using a double broiler, with the bowl over a pot of boiling water, continue stirring the lemon mixture until it thickens where the whisk is leaving tracks (around 180 F). Be patient - the mixture will remain quite liquid until it nears the right temperature, and can take around 10 minutes. Keep an eye on it to avoid overcooking.

3. Adding in the butter: Once lemon mixture has reached the right consistency, whisk in the butter until it has dissolved. Bonus: do this step in a blender to create an extra airy and smooth cream.

Optional: Push the cream through a sieve to remove any lumps.

4. Cool: Line the surface directly with plastic wrap to avoid a skin forming, and let it come to room temperature.

Meringue

1. Meringue base: Using the whisk attachment, start beating the egg whites and vinegar together until soft peaks form.

2. Sugar syrup: I’m using an Italian meringue method to partially cook the meringue as we won’t be baking it. Simultaneously as you start running the mixer with the egg whites, add the sugar and water to a saucepan and bring to a temperature of 235 F, otherwise known as the soft ball stage. If you meringue is going faster than your sugar syrup, turn down the speed of the mixer but don’t stop it.

3. Adding in the sugar: Once the sugar has come to temp, keep mixer on low as you pour in the sugar syrup into the meringue. Make sure to do this along the edge of the bowl where it meets the meringue. Once the sugar is in, turn the mixer back on high until the meringue reaches stiff peaks. Use this meringue to pipe immediately.

Putting it all together

Now that you have all the components ready, fill the tart shell with the prepared lemon cream and level off using an offset spatula (or any other long flat utensil of your choosing). Using a piping bag fitted with a round piping tip, pipe round dollops of the meringue in circles on top of the lemon cream, reserving the center for the chopped pistachios. Serve immediately! But it will keep will in the fridge overnight as well.

Optional: If you own a blow torch for some reason, this is the time to break that baby out and give it that meringue some nice color. I had only recently acquired one myself, and have had way too much fun with it.