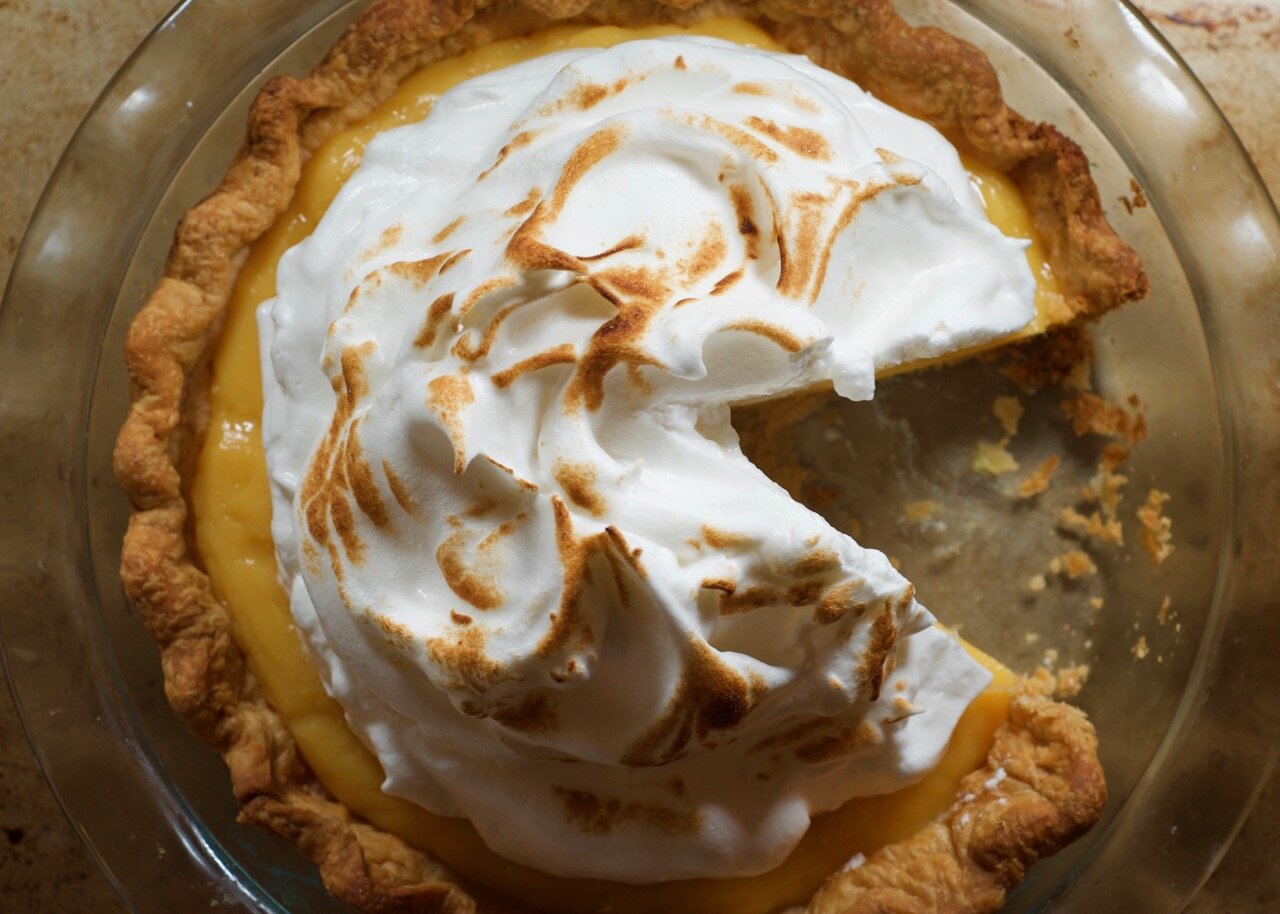
key lime and passion fruit tart

apple tarte tatin

As the summer produce season begins to wrap up, green markets and grocery stores are flooded with the likes of tomatoes, corn, and peaches. However, there are some other delightful finds during this time that tend to fly under the radar that are a real treat, like key limes. While those in Florida may easily find an abundance of key limes, I rarely get my hands on some in New York so it’s always a treat to find some.

Key lime and passion fruit is a match made in heaven

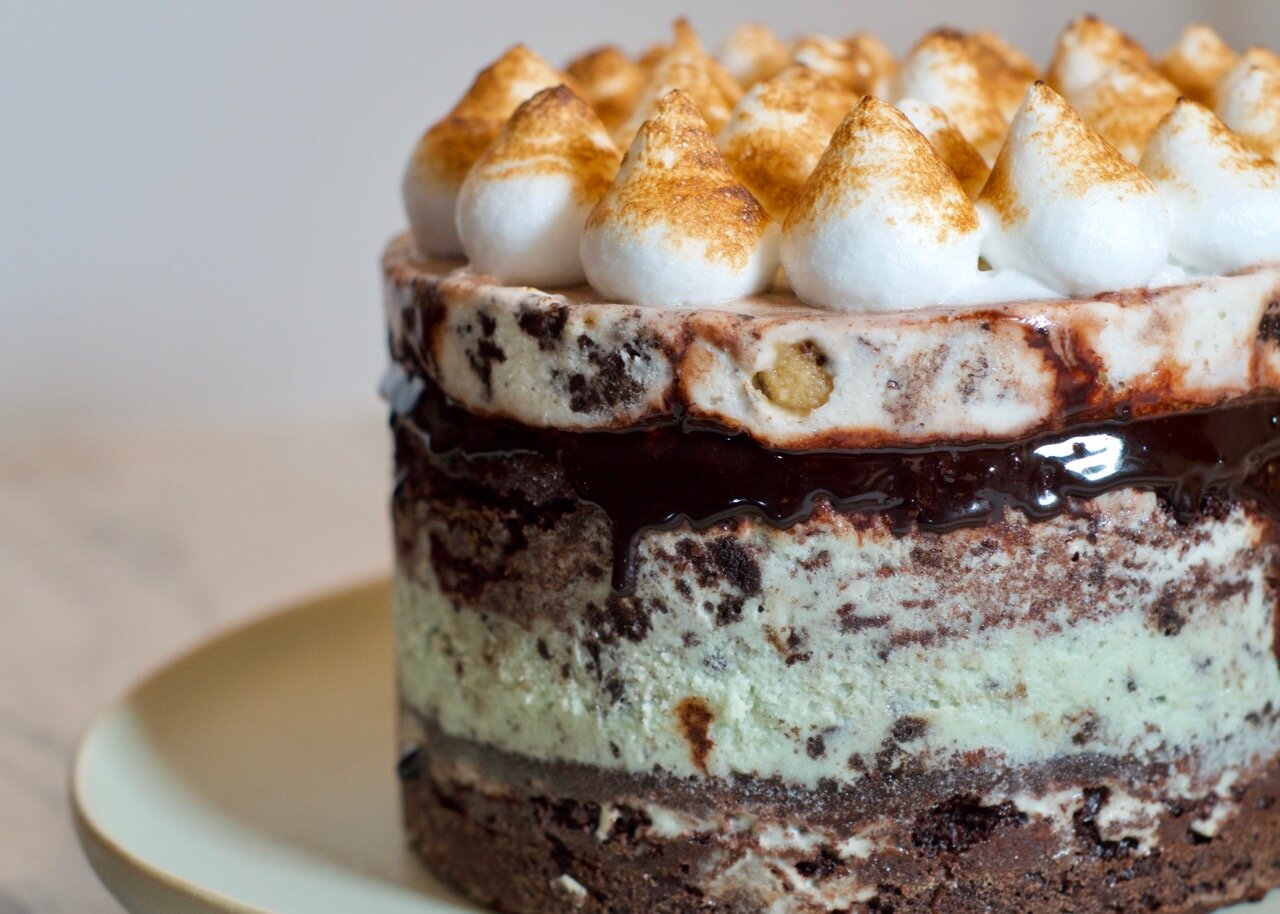
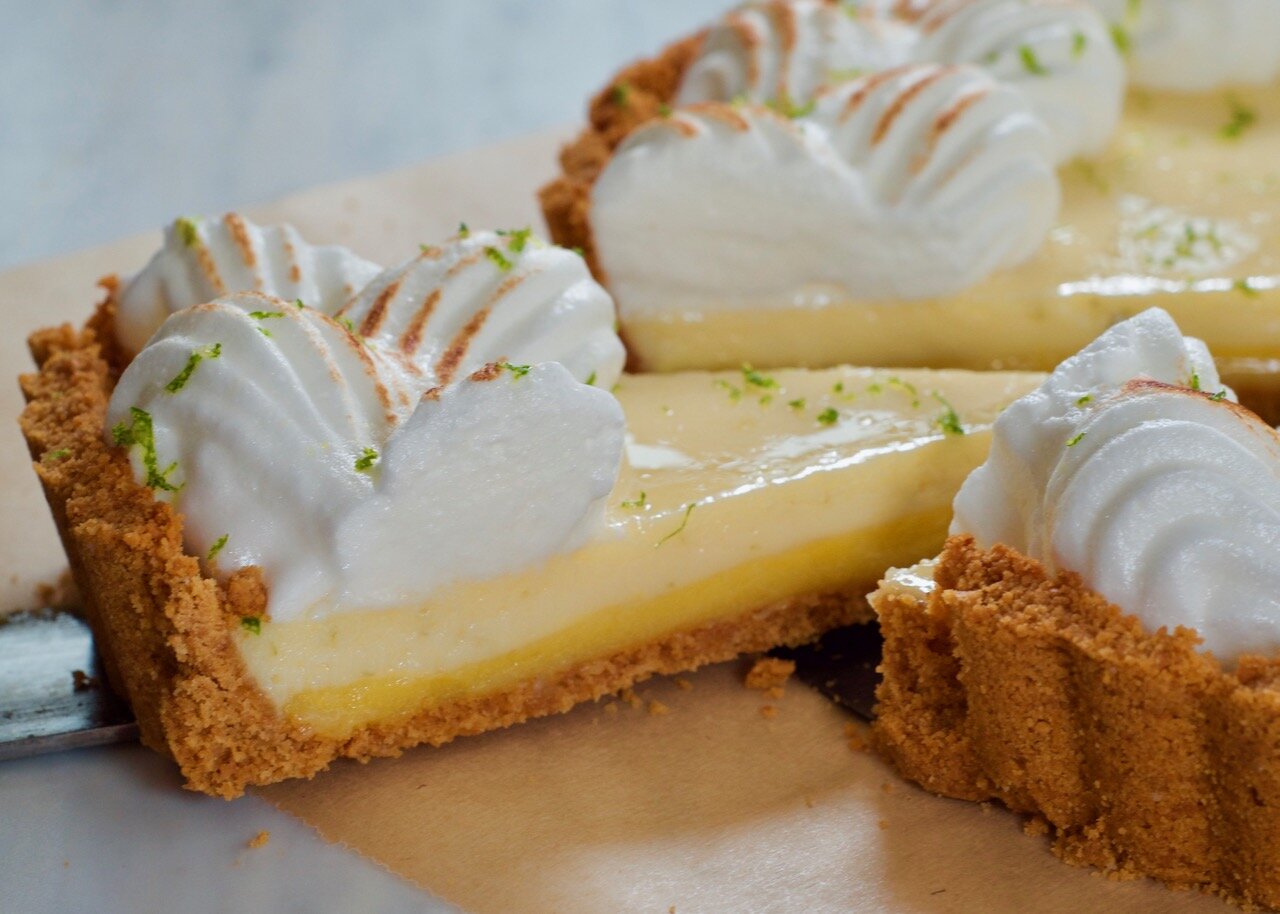
Passion fruits have an incredibly tart and fragrant flavor and shine in any dessert. The passion fruit curd complements the creamy key lime custard and cuts through the sweetness. The layers create an eye catching gradient from the dark golden crust toward the airy meringue, which also helps counterbalance the creaminess of the key lime filling and passion fruit curd. Always make sure to finish it off with a fresh dusting of lime zest

A few tips:

  • If you can’t find key limes, use regular limes. It can be such a pain to squeeze those tiny little limes, but don’t use the bottled lime juice

  • Instead of graham cracker crumbs, use whichever biscuits or crackers suit your fancy.

  • An easy alternative to buying actual passion fruit is frozen passion fruit puree. It’s cheap and can be found in many grocery stores.


key lime & passion fruit tart

makes one 11 inch tart

ingredients

graham cracker crust:

210 g / 1 3/4 cup graham cracker crumbs

2 g / 1/2 teaspoon salt

85 g / 6 tablespoons unsalted butter, melted

for the passion fruit curd:

3 passion fruits or 80 g / 1/3 cup passion fruit purée

60 g / 1/4 cup lemon juice

100 g / 1/2 cup sugar

4 egg yolks + 1 whole egg

56 g / 4 tablespoons unsalted butter

for the key lime filling:

160 g / 2/3 cup lime juice (approx. one bag of key limes)

43 g / 2 egg yolks

397 g / 1 can sweetened condensed milk

5 g / 2 teaspoons lime zest

for the meringue (optional):

110 g / 3 egg whites, room temp

150 g / 3/4 cup sugar

60 g / 1/4 cup water

15 g / 1 teaspoon lemon juice

steps

graham cracker crust:

Preheat oven to 350 F.

1. Prepare crumb mixture: Mix the crumbs, salt, and butter until evenly incorporated. The mixture should resemble wet sand.

2. Pack it into the pan: With the help of a measuring cup (or any flat bottomed surface), pack the crumbs into the tart pan starting from the middle and moving out towards the edges.

3. Parbake: Bake for 10 - 13 minutes until crust hardens and starts to brown around the edges. Let cool.

passion fruit curd:

1. Prepare passion fruits: If using whole passion fruits, sieve out the pulp and juice and discard seeds. If using the frozen purèe, defrost and proceed.

2. Mix it together: Whisk together the passion fruit, lemon juice, sugar, and eggs. Save the whites for the meringue.

3. Heat up gently: Pour egg and passion fruit mixture into a heavy bottomed saucepan over low-medium heat. Cook the curd continuously whisking until it begins to thicken and the whisk leaves tracks. Be careful of overheating it as the mixture can curdle - if you’re uncertain, you can use the double broiler method with the egg mixture in a bowl over hot water.

4. Whisk in butter: Once the curd thickens, whisk in the butter until mixed in.

5. Chill: Pour the lemon curd into the prepared crust and smooth it out with an offset spatula. Gently lay a sheet of plastic wrap over the surface to prevent a skin from forming and let it set in the fridge for at least 2 hours.

key lime filling:

1. Whisk egg yolks: Either by hand using a whisk or an electric mixer, thoroughly whisk the egg yolks until it thickens and becomes a pale yellow.

2. Mix everything else in: Mix in the lime juice, condensed milk, and lime zest with the egg yolks.

Preheat oven to 350 F

3. Pour into tart: Remove the plastic from the surface of the passion fruit curd in the tart. Pour the key lime filling over top and bake for 10 minutes until just set. Let cool before serving or piping meringue over top.

meringue:

1. Preparing sugar syrup: In a saucepan over medium heat, bring the sugar and water to temperature of 235 F. When the syrup reaches 210 F, start whisking the meringue.

2. Whisking egg whites: In a separate clean bowl, start whisking the egg whites with the lemon juice until soft peaks form. At this stage, the sugar should reach the right temperature. Slowly pour in the syrup with the mixer still running on slow, and bring the mixer back up to a high speed to continue beating until you reach stiff peaks.

3. Pipe the meringue: Use your favorite piping tip (I used a large star tip) to pipe patterns over the tart or just pile it high.

4. Finish off with zest: Finish with some lime zest

ultimate ice cream birthday cake

apple tarte tatin

Ice cream cakes deserve far more love beyond your 12th birthday party. As much nostalgia I have for the large rectangular slabs of ice cream cake from Baskin Robbins or Cold Stone, ice cream cakes can be reimagined to become a go-to celebration cake no matter your age.

slice of chocolate ice cream cake with meringue

Ice cream cake should be cake

Ice cream cakes can deliver so much more beyond being ice cream in the shape of a cake. Ice cream acts as a fantastic alternative to frosting that is both the star of the show and a complement to cake - because at the end of the day, what is ice cream cake without cake?

To save time, I bought some ice cream from a neighborhood ice cream shop Emack & Bolio’s, grasshopper pie and cookie monster. You can choose to use whatever combination of ice cream flavors, but I would recommend sourcing high quality ice cream with some mixin’s, whether you head to a local ice cream shop or make it yourself.

The two layers of moist chocolate cake is the foundation for the ice cream cake. It is made with vegetable oil and buttermilk, keeping in mind that we need the cake to stay soft and moist in a dry freezer. The fudge drizzle (recipe from David Lebovitz) doesn’t solidify in the freezer, and helps keep the cake moist while acting as delicious chocolate glue joining the cake and ice cream layers.

The italian meringue adds the perfect light, fluffy topping to the cake and if you have a kitchen torch on hand, gives it a a nicely toasted color and flavor.

How to decorate ice cream cake?

I took inspiration from how Milk Bar compiles their famous birthday cakes (which aren’t made of ice cream) by building the layers of cake and ice cream in acetate sheets. It helps create a beautiful ice cream cake with clean lines and minimal effort.

The layers are as follows: cake + fudge drizzle + ice cream (flavor 1) + cake + fudge drizzle + ice cream (flavor 2) + meringue topping (optional)

chocolate cake layer with fudge drizzle
carton of emack and bolio's for ice cream cake
first layer of ice cream cake

Use either a springform or just one of the cake pans that you baked the cakes in, line the bottom with plastic wrap to help later extract the cake from the pan, and cut a rectangular sheet of acetate a little longer than the circumference of the cake pan so that it sits just inside the walls of the cake pan with some overlap to prevent any fudge ice cream from spilling out.

I used an offset spatula to try to spread the drizzle and ice cream, but since we’re basically working in a tall cylinder, the easiest method would be to use a spoon bent 90 degrees. I did not feel like sacrificing any spoons, and while it may take a little longer, a small offset spatula will get the work done.

Planning ahead

This is a cake that you can easily make ahead of time, and keep it in the freezer until ready to serve. Each of the main components (cake, ice cream, drizzle) can be prepared ahead of time.

A few tips:

  • Move the ice cream from the freezer to the fridge 2-3 hours prior to building the cake so that it becomes soft and spreadable without melting

  • Make sure the cake is cooled completely. If you’re making it all in one day, move the ice cream into the fridge as you begin making the cake.

  • Let the cake sit in room temperature for 10-15 min before serving, as both the ice cream and cake will be too hard right out of the freezer

  • Clear enough space in the freezer prior to putting together the cake because you do not want to be scrambling to find space with your cake melting on the counter

  • You don’t have to use 6 inch cake rounds, but I wanted to make a cake that was feasible to finish for two people. Feel free to size up the cake for larger rounds or more tiers.


chocolate ice cream birthday cake

makes one two-tiered 6 inch cake

ingredients

for the chocolate cake:

2 cups AP flour

1/2 cup high quality cocoa powder (Valrhona)

1 cup sugar

1 teaspoon salt

2 teaspoons baking soda

1 teaspoon baking powder

2 eggs

1/2 cup vegetable oil

3/4 cup buttermilk

3/4 cup hot water

1 shot espresso (optional)

1/2 teaspoon vanilla paste (optional)

for the fudge drizzle:

1/4 cup sugar

2 tablespoons barley malt or corn syrup

1/4 cup water

3 tablespoons cocoa powder (Valrhona)

1/4 teaspoon vanilla paste

building the cake components:

2 pints of ice cream, softened in the fridge

2 layers of chocolate cake, chilled

fudge drizzle

for the italian meringue topping (optional):

2 egg whites, room temperature

1/2 teaspoon vinegar (optional)

1/2 cup sugar

1/4 cup water

steps

Chocolate cake:

Preheat oven to 350 F.

1. Prepare the 6 inch cake pans: Wipe the inside of your cake pans with butter and dust with some flour. Cut a sheet of circular parchment paper to line the bottom of your pan to ensure that your cakes will have no problem coming out.

2. Mix dry ingredients: Sift together the flour, cocoa powder, sugar, salt, baking soda, and baking powder in large bowl. Set aside.

3. Combine wet ingredients: Mix together the eggs, vegetable oil, buttermilk, espresso and vanilla paste (if using). You won’t be able to explicitly taste the espresso and vanilla but it helps deepen the chocolate flavor.

4. Mixing everything together: Using the paddle attachment of a stand mixer, mix together the dry ingredients with the wet. As the mixture begins to come together, pour in the hot water. Mix until just combined - you will have a thin batter, and pour evenly between your two prepared cake pans

5. Bake: Bake in the preheated oven for ~25 minutes, or until the cake is springy to the touch and an inserted toothpick in the center comes out clean.

6. Trim the cake tops: Once cake is completely cool, remove from pan and using a serrated knife, cut off the domed top of the cakes until flat.

Fudge drizzle:

In a saucepan, whisk together the sugar, syrup, water, and cocoa powder and cook over low-medium heat. Continue to whisk until mixture comes to a simmer for 1 minute. Stir in vanilla paste. Set aside and chill.

Building the cake:

Prepare the pan: Line a 6 inch cake pan with plastic wrap, with enough around the edges to help lift your cake out later. Line the walls of the cake pan with a sheet of acetate, cut to fit. The walls should extend past your cake pan depending on how tall you want your cake.

Start layering:

  1. First layer of cake

  2. Spread half the fudge drizzle on the cake. The ice cream will help push the drizzle out to the edges so focus more on the middle

  3. Spoon 1/2 - 3/4 pint of ice cream and evenly spread it over the cake. Make sure to fully meet the edge of the acetate. Firm up in the freezer for 15 minutes

  4. Second layer of cake

  5. Remaining fudge drizzle

  6. Spoon 1/2 - 3/4 pint of second ice cream. Take care to keep this layer as even as possible as this will be visible when serving. Let it sit in freezer, with the acetate and in the cake pan, for at least 4+ hours. Once the ice cream has firmed up again, you should be able to easily pop the cake out in one piece from the cake pan with the help of the plastic wrap, and remove the acetate.

Italian meringue topping (optional):

1. Meringue base: Using the whisk attachment, start beating the egg whites and vinegar together until soft peaks form.

2. Sugar syrup: I’m using an Italian meringue method to partially cook the meringue as we won’t be baking it. Simultaneously as you start running the mixer with the egg whites, add the sugar and water to a saucepan and bring to a temperature of 235 F, otherwise known as the soft ball stage. If you meringue is going faster than your sugar syrup, turn down the speed of the mixer but don’t stop it.

3. Adding in the sugar: Once the sugar has come to temp, keep mixer on low as you pour in the sugar syrup into the meringue. Make sure to do this along the edge of the bowl where it meets the meringue. Once the sugar is in, turn the mixer back on high until the meringue reaches stiff peaks. Use this meringue to pipe immediately.

4. Optional torching: If you have a kitchen torch handy, quickly bronze the dollops of meringue and return cake to freezer for 30 min before serving.

blood orange meringue pie

apple tarte tatin

This pie is an easy alternative to the classic lemon meringue pie, using cold pressed blood orange juice which adds a more complex citrus note with a hint of bitterness. Topped with a mound of sky high airy meringue, this is the perfect antidote to those cold, wet dreary days.

DSC_4079.jpg

I use Erin McDowell’s all butter pie crust recipe for all my pies, which I’ve included below.

A few tips for success:

  • Don’t be afraid to properly hydrate your pie dough, I’ve found that a number of recipes often undershoot the amount of water needed for the dough to come together cohesively

  • The pie crust and filling can each be made ahead of time as we are making a fully cooked blind baked crust with a cooked curd.

  • I used a small kitchen blowtorch to toast the meringue, but if you don’t have one yet (I don’t love accumulating excess kitchen gadgets, but there is something incredibly satisfying with torching something!!), you can throw it under the oven broiler for a few minutes


Blood Orange Meringue Pie
makes 9.5 inch pie

ingredients

pie crust

1 1/4 AP flour

pinch of salt

1 stick cold unsalted butter, cut into 1 in cubes

6 tablespoons ice water + sprinkle more if needed

blood orange curd

1 1/2 cups blood orange juice

1/4 cup lemon juice (~ 1 lemon)

1/4 cup water

1 cup sugar

1/3 cup cornstarch

4 egg yolks (save the whites for the meringue)

italian meringue

2/3 cup sugar

1/4 cup water

4 egg whites (room temp)

1/2 teaspoon vinegar/lemon juice

steps

pie crust:

Mixing dry ingredients with butter: Combine the AP flour and salt. Toss in the butter cubes (make sure the butter is as cold as possible) until the individual cubes are covered in flour.

Flatten the butter: Working quickly (so the butter doesn’t warm up too much), start flattening the butter pieces between your fingers until they’re the size of the walnut halves.

Hydrate: Drizzle in the ice water, and toss with the flour/butter mixture (like you would toss a salad - do not knead). The optimal hydration for your dough is to have it hold together in a ball with no floury streaks. If your dough is still too crumbly, add water slowly as a little water can go a long way. Form dough into a disk, wrap tightly and rest in the fridge for at least 30-60 min.

Roll out the dough: On a well floured surface, roll out the dough until it is 1 inch larger than your pie pan. Transfer dough into the pan, trim the excess dough past 1 inch. Fold the edge of the dough under itself and press down until you have a smooth ridge. Crimp the edges using whatever style you prefer - I pinched the dough between my thumb and index finger on one hand, and my index finger on the other, forming a wavy edge. Dock the dough with a fork, and let the dough chill in the freezer for 30 min. At this point, preheat the oven to 425F.

Blind bake: Line the pie with parchment/aluminum, and fill with weights (pie weights, beans, rice etc.). Bake for 15 minutes, before removing the weights and continuing to bake for another 10-15 minutes until crust is golden brown. Set aside to cool.

blood orange curd:

Making the curd: In a saucepan, mix together the blood orange juice, lemon juice, water, sugar and cornstarch. Bring to a boil while whisking constantly until mixture begins to thicken.

Temper the egg yolks: Pour in a little of the orange curd and quickly whisk in with the egg yolks. Once thoroughly mixed, slowly pour the tempered egg yolks back in with the curd. Continue cooking on low heat while stirring until mixture is bubbling and thickened. Let cool, covered with plastic wrap directly on the surface to prevent a skin from forming.

italian meringue:

Preparing sugar syrup: In a saucepan over medium heat, bring the sugar and water to temperature of 235 F. When the syrup reaches 210 F, start whisking the meringue.

Whisking egg whites: In a separate clean bowl, start whisking the egg whites with the vinegar until soft peaks form. At this stage, the sugar should reach the right temperature. Slowly pour in the syrup with the mixer still running on slow, and bring the mixer back up to a high speed to continue beating until you reach stiff peaks.

putting it all together:

Fill the pie crust with the blood orange curd, leveling off the surface. Dollop the meringue over the curd, using the back of spoon to make decorative swirls. Give it a light toast with a blowtorch if you’d like, and serve immediately.

lemon pistachio tart

lemon pistachio meringue tart

While we’ve all been staying home this summer, there is nothing like a lemon tart that will transport you straight to the streets of Paris. With a sweet buttery crust, bright zesty lemon cream, and an airy meringue, this is the kind of lemon tart that belongs on an outdoor cafe table along the streets of Saint Germain. The best part? It’s a dangerously simple recipe that you will make over and over again.

This recipe is adapted from Desserts by Pierre Hermé, a source I would trust with my life on all things French patisserie. The recipe for the pate sucrée (the tart crust) makes enough for 3 tarts, but they freeze wonderfully for future baking projects. I’ve adjusted the lemon cream recipe to reduce the amount of butter, because there was an obscene amount of butter, but don’t worry, the result is still a silky, creamy filling with just a little less guilt.

The meringue and pistachios are optional, but both elements really help balance out the strong lemon flavors of the cream. You can use either a fluted tart pan with the removable bottom, or in my case, I’ve elected to use a tart ring for a more streamlined look.


Lemon Pistachio Tart
makes one 9.5 inch tart

ingredients

for the pate sucrée (tart dough):

2.5 sticks (10 ounces) unsalted butter, room temp

1 1/2 cups powdered sugar, sifted

1 1/2 cups almond meal, lightly packed

1/2 teaspoon salt

1/2 teaspoon vanilla bean pulp (optional)

2 large eggs, room temp

3 1/2 cups AP flour

for the lemon cream filling:

1 cup sugar

zest of 3 lemons

4 large eggs

3/4 cup lemon juice (4-5 lemons)

1 stick unsalted butter, cut into chunks

for the meringue (optional):

4 egg whites. room temp

1 teaspoon white vinegar

1 cup sugar

1/4 cup water

1/4 cup chopped roasted pistachios

steps

Preparing the tart dough

1. Cream butter: Using the paddle attachment of a stand mixer, beat the butter until creamy and add in the sugar, almond, salt, and vanilla bean if using until well mixed. Continue to beat in the eggs one at a time, making sure to scrape down the sides.

2. Add in flour: With the mixer on low, mix in the flour in 2 or 3 additions until just incorporated - you don’t want to overmix at this step and create a tough dough. Divide the dough into 3 disks and refrigerate at least 2 hours.

3. Shape the dough: Take out one of the disks from the fridge to slightly soften up for 10 min. On a floured surface, roll out the dough to 1/8 - 1/4 inch thickness. If you’re having trouble with the dough cracking, roll out the dough between two sheets of parchment paper. To transfer the rolled out dough over to the tart ring, lightly roll up the dough over a rolling pan and unroll over the tart ring. Run the rolling pin across the top to cut off the extras. Don’t stretch the dough to fit as it will likely shrink in the oven, and if you have any spots missing, use any of the extra dough to patch those right up like you’re using play doh. Prick the dough all over with a fork to prevent air bubbles, and quickly pop back into the fridge for 30 min.

Preheat oven to 350 F.

4. Parbake: Line the dough with parchment and fill with dried beans/rice. Bake for 20 min. Remove parchment with the dried beans/rice and bake another 5-7 minutes until golden.

Lemon cream

1. Mixing: In a large bowl, rub the sugar and lemon zest together until fragrant. Whisk in the eggs, then followed by the lemon juice.

2. Thickening the cream: Using a double broiler, with the bowl over a pot of boiling water, continue stirring the lemon mixture until it thickens where the whisk is leaving tracks (around 180 F). Be patient - the mixture will remain quite liquid until it nears the right temperature, and can take around 10 minutes. Keep an eye on it to avoid overcooking.

3. Adding in the butter: Once lemon mixture has reached the right consistency, whisk in the butter until it has dissolved. Bonus: do this step in a blender to create an extra airy and smooth cream.

Optional: Push the cream through a sieve to remove any lumps.

4. Cool: Line the surface directly with plastic wrap to avoid a skin forming, and let it come to room temperature.

Meringue

1. Meringue base: Using the whisk attachment, start beating the egg whites and vinegar together until soft peaks form.

2. Sugar syrup: I’m using an Italian meringue method to partially cook the meringue as we won’t be baking it. Simultaneously as you start running the mixer with the egg whites, add the sugar and water to a saucepan and bring to a temperature of 235 F, otherwise known as the soft ball stage. If you meringue is going faster than your sugar syrup, turn down the speed of the mixer but don’t stop it.

3. Adding in the sugar: Once the sugar has come to temp, keep mixer on low as you pour in the sugar syrup into the meringue. Make sure to do this along the edge of the bowl where it meets the meringue. Once the sugar is in, turn the mixer back on high until the meringue reaches stiff peaks. Use this meringue to pipe immediately.

Putting it all together

Now that you have all the components ready, fill the tart shell with the prepared lemon cream and level off using an offset spatula (or any other long flat utensil of your choosing). Using a piping bag fitted with a round piping tip, pipe round dollops of the meringue in circles on top of the lemon cream, reserving the center for the chopped pistachios. Serve immediately! But it will keep will in the fridge overnight as well.

Optional: If you own a blow torch for some reason, this is the time to break that baby out and give it that meringue some nice color. I had only recently acquired one myself, and have had way too much fun with it.